The Weekly Deals are here! To help you make some decisions about what to order, I've got some Pinterest links for you to view cards made with some of the products.
Alphabet Rotary Stamp
Did you know that if you don't have a stamp that says what you need you could use this stamp?
Banner Punch
Banners are SOOOO trendy right now! Punch them out of whatever paper you want to use or pair them with the Banner Banter stamp set! 134060
For The Birds Wood Stamp Set
These little birds are so cute and would be perfect for coloring with Blendabilities markers!
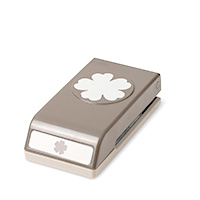
Hearts Border Punch
Use this punch to create a sweet border and/or punch some confetti!
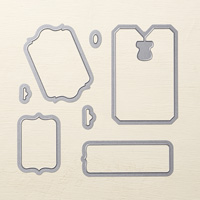
Ticket Duo Builder Punch
Check out this board for some cute ways to use this punch, especially if you pair it with That's The Ticket stamp set! 128075
I hope this gives you some great ideas for how to use these products!
Tuesday, September 30, 2014
Stampin' Up! Weekly Deals–September 30 to October 6
Monday, September 29, 2014
Dream
I had plans to post this last night but apparently a tractor knocked over a hydro pole so we were without power from about 6:15 till 9:45! Needless to say, I didn't get to post before going to bed!
Inspiration for my card came from this card by Angie Leach:
I absolutely love the technique of using an embossing folder to stamp with—I have so many of them, it multiplies my stamping possibilities by quite a bit!
Basically, you use sponge daubers to apply ink to the top (raised portion) of the folder. Then, give it a few sprays of water with the mister and insert your paper (watercolor or Whisper White) into the folder and close it and smooth over the folder with your hand. I have seen a similar technique where you also run the folder through the BigShot to emboss as well as stamp!
This is the card I made:

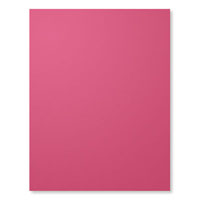
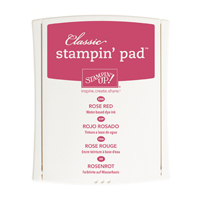
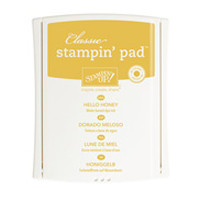
I used the Tim Holtz Honeycomb embossing folder and Rose Red, Hello Honey and Tangelo Twist inks.
I stamped the sentiment on Rose Red card stock with Memento Tuxedo Black using a stamp from the now retired, Loving Thoughts stamp set. I cut a tag using one of the Chalk Talk Framelits and then fancied it up by also punching each end with the Scalloped Tag Topper Punch. This produced a "ribbon slide." I also inked the tag with Rose Red ink.
After my inked paper was dry, the paper was cut to size. The tag was threaded onto a piece of Hello Honey ribbon, wrapped around the inked paper, and then the inked paper was adhered to a Hello Honey matte. This in turn was adhered to a Rose Red card base, using dimensionals.
The finishing touches were the rhinestones on the tag and a sprinkling of non Stampin' Up! silver sequins for added sparkle!
I hope you will try this technique for yourself!


Sunday, September 28, 2014
Emboss Resist Watercolored Card
I've long admired the creativity of fellow Demonstrator, Allison Okamitsu. I have several of her creations pinned on Pinterest. Now that she is on the Artisan Design Team for Stampin' Up! she will have even more exposure for her work.
Back in May, a watercolored card of hers caught my eye and I have been wanting to try the technique she used.

I thought her card was so pretty! I was also intrigued that she used her Silhouette Cameo to cut the word hello from a digital Stampin' Up! kit! Here's the card that her technique inspired:

This was such fun to create!
First, I used Versamark and the Dictionary stamp on watercolor paper. I used white embossing powder to heat emboss it. I used my mister to spray the paper with water and then used Blackberry Bliss, Bermuda Bay, and Rich Razzleberry ink with my Aqua Pen to brush on ink. After it dried, I distressed the edges and then adhered it to a Whisper White card base using Dimensionals.
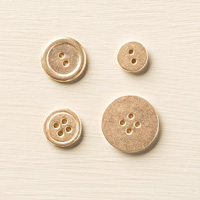
I punched out flowers using the Pansy and Petite Petals punches and used my non Stampin' Up! flower shaping tools to give a little shape to the petals. For the larger flower, I used one of the pretty Faceted Buttons; the smaller flowers got rhinestone centres.
I used the Decorative Label Punch on Whisper White and inked the edges with both Blackberry Bliss and Lost Lagoon. The sentiment is from the World of Dreams stamp set, stamped in Blackberry Bliss.
The two feathers were stamped with Versamark on vellum and heat embossed with white embossing powder. The Feathers Framelits simplified the job of cutting out the feathers. They were tucked under the larger flower to look like leaves.
I loved using this technique and will definitely be using it a lot in the future!


Thursday, September 25, 2014
Featuring Four Feathers
The first card that I created at the Creative Gathering had been rolling around in my mind for a few days. It took a lot of experimentation to get it right.
I knew that I wanted to use vellum for the feathers but what to use to stamp them was the puzzling part. While they looked good embossed with white, they tended to look "heavy."
I tried stamping with Versamark and embossing with iridescent embossing powder but that wasn't right either. I then tried mixing some microfine glitter with warm highlights with some clear embossing powder. That seemed to do the trick! Now to assemble the card!

I chose Early Espresso for my matte and I distressed it before adhering it to my Very Vanilla card front using Dimensionals. I used a piece of brown ribbon we were given as our welcome gift at the Creative Gathering and topped it with a piece of our gold taffeta ribbon.
I used glue dots to fasten three feathers onto the ribbon. I stacked two sizes of the metallic gold buttons and fastened them together with the gold taffeta ribbon and then adhered this on top of the feathers.
I stamped the sentiment (from the now retired Loving Thoughts stamp set) with Early Espresso on Very Vanilla. Using my BigShot and the Magnetic Platform, I cut out the sentiment using the Project Life Cards & Labels dies. I inked up the edges and adhered it with Dimensionals.
The last touch for the card was a sprinkling of sequins in chocolate and iridescent gold. I am in love with sequins lately and unfortunately, Stampin' Up! has not produced them in many colors as of yet. I just like the little bit of sparkle they give!
Here's an angled view. Look at those sequins sparkle!