Showing posts with label zig clean color real brush markers. Show all posts

Friday, March 18, 2016

Watercolor Markers, Distress Inks, and Easter

For my card today, I incorporated Stampin Up as well as some of my many other crafting supplies! My card actually started as an entry for a "yellow" color challenge but became something else entirely!

I started by creating an ombré effect using my yellow toned distress inks on Watercolor paper. I used squeezed lemonade, mustard seed, scattered straw, fossilized amber, and wild honey but in the end, I had to rework my ombré so the final lineup was mustard seed, fossilized amber, wild honey, rusty hinge, spiced marmalade and ripe persimmon. To give some definition to the edges, I added walnut stain.

Next, I decided to use my Zig Clean Color Real Brush Markers to color a focal image. I chose to use the Hyacinth from the Helping Me Grow stamp set and stamped it in Basic Black Archival ink on watercolor paper using my MISTI. It is often difficult to get an image stamped perfectly on watercolor paper in one go; the rougher texture of the paper seems to either absorb or deter ink. MISTI to the rescue!

I zapped the image with my heat tool to be sure it was dry before beginning my coloring. I used the following: Lilac, Light Violet, Purple, Mid Green and Olive Green. I just LOVE coloring with these markers because it seems so effortless!

The Big Shot along with a die from the Circles Collection Framelits was used to die cut the colored image as well as a die cut a matte from Old Olive card stock. I used a sponge dauber with Walnut Stain distress ink to give some definition to the edges of both. The colored image was then adhered to the matte with Dimensionals.

I used the Fluttering Embossing Folder to emboss the ombré matte (the only one that would fit since I was making a non-standard card size). I adhered the embossed background to a very thin Elegant Eggplant matte and then attached both to an Old Olive card base. The focal image was adhered to the matte with Dimensionals.

I chose a piece of Whisper White Seam Binding to color with distress inks to match my project. On my craft mat I dabbed wilted violet, dusty concord and seedless preserves. I spritzed them and my ribbon with water and then proceeded to dab my ribbon into the colors until I was satisfied with the results. I kept crinkling the ribbon into a ball in my hands (I wore disposable gloves so my hands would still look like hands when I finished!) and then dried it with my heat tool.

Cutting a small piece off one end of the ribbon, I wrapped the rest around three fingers. I tied it in the middle with the piece I had cut off to form my crinkly bow. I adhered the bow to my card front using Glue Dots.

I stamped my sentiment from the Crazy About You stamp set onto a strip of Basic Black card stock using Versamark and then heat embossed it using White Stampin' Emboss Powder. I used the Banner Triple Punch to flag one end. The sentiment was adhered to the card front with Fast Fuse Adhesive.

To complete my card, I used (for the first time!) some Rainstones that I had purchased from Papertrey Ink some time ago after watching a video tutorial that showed them being used on a card. I thought they looked gorgeous! I adhered some to my card front using a combination of Multi Medium Matte (for the small ones) and Zots Clear Adhesive Dots-Bling Tiny for the larger ones. I got my Zots at Michaels for $7.99 for 325. They work really great! I think I may try them for sequins or other tiny embellishments in the future.


I did not embellish the inside of my card but may do so before giving it out for Easter. Thanks for checking out my post today!


Tuesday, December 22, 2015

Sympathy Card Using Zig Markers

More and more, it seems, I am in need of sympathy cards. I don't keep a surplus of them because I prefer to personalize the card for the recipient.

This time, the passing was of a former stamper in our stamp group and the mother of one of our stampers. She had been ill for some time and she hadn't attended a stamping class in at least a year. She was a special, one-of-a-kind lady and will definitely be missed.

The card I designed uses images from the Open Heart Stamp Set.

The stamping of this card gave me some difficulty! Because I wanted the leaves to appear to be behind the bird, it was necessary to mask the bird after stamping it with Basic Black Archival ink on Watercolor paper.

I didn't want to have to fussy cut so instead I chose to use my Molotow 2mm Masking Pen. Unfortunately, it was dry and I had to use my 4mm one. I colored in the area of the bird that needed to be masked and then waited for it to dry. I then stamped the leaves.


It was when I tried to remove the masking that it was apparent that I hadn't fully dried the masking fluid and it ripped off part of my bird!

So I re-stamped the bird on another piece of Watercolor paper. This time I decided to use Miskit Masking Fluid. I had it in a bottle with a fine precision tip but I still had trouble applying it to the area I needed to mask. After applying I again waited for it to dry and then stamped my leaves again.

Disappointment again as my bird ripped when I tried to remove the masking. :(

Now my only option left was to fussy cut a mask. I re-stamped the bird on Watercolor paper and then on ordinary copy paper. I fussy cut the bird on the copy paper, just cutting enough for where the masking needed to be. I then used my Scotch Restickable Glue Stick to apply to the back of the bird. After allowing it to dry for about 30 seconds, I stuck it over my bird on the Watercolor paper and stamped the leaves.

Then came the critical moment–removing the mask. It was no problem this time! This is the first time that masking has worked well for me in getting my image stamped the way I need it to be!

I used my heat tool to zap the stamps to make sure they were completely dry and then proceeded to color the images with my Zig Clean Color Real Brush Markers. When I was finished coloring, I stamped the sentiment.

Next, I knotted a piece of Ruffled Pool Party ribbon around the right side of the colored panel and then adhered the panel to the Pool Party card base using Dimensionals.


I'm hoping I won't need any more sympathy cards for awhile.

Built for Free Using: My Stampin Blog

Friday, November 27, 2015

It's Beginning To Look a Lot Like Christmas!

Today, after preparing my projects for next week's stamp class, I was able to finish coloring the stamp I had started last Friday.

I absolutely love my Zig Clean Color Real Brush Markers! They are like no other markers I have ever used! It's almost effortless to blend colors with them, either on their own or by adding water with an aqua pen.

In preparation for coloring, I actually stamped a number of images on watercolor paper. I chose the little boy in the snowsuit from Christmas Cuties because there were a lot of large areas that I thought would work well for blending with water.

I couldn't have been happier with the way he turned out!

After fussy cutting him, I stroked around all the edges with a Basic Black Stampin' Write Marker to hide any white edges.

I cut a Thick Whisper White matte and embossed it with the Softly Falling embossing folder. To create a couple of snowbanks, I used the Sleigh Ride Edgelits Dies to cut some Dazzling Diamonds Glimmer paper. I snipped off the houses and trees with scissors.

Besides snowbanks, I wanted a tree for my little scene. I chose a stamp from the Peaceful Pines stamp set. Using Mossy Meadow, I stamped it on Garden Green card stock and then die cut it with the Perfect Pines Framelits.

I played with the placement of the snowbanks, tree, and the little boy until I was satisfied with my plan. Next, I glued one snowbank onto the embossed matte and then applied Dimensionals to the top of the other snowbank and Fast Fuse Adhesive to the bottom.

The tree die cut also received Dimensionals and was put in place behind the second snowbank. The little boy was popped up with Dimensionals and added to the scene giving depth to the scene.

The sentiment, also from Christmas Cuties, was stamped with Basic Black Archival ink and then punched with the Washi Label Punch. I used a sponge dauber to ink the edges with Real Red. It was adhered to the matte with Dimensionals.

I cut a matte from a striped Tempting Turquoise paper from the Brights DSP stack and inked the edges with Basic Black Archival ink. It was adhered to a Real Red card base using Fast Fuse Adhesive.

Finally, the embossed matte was adhered on top using Fast Fuse Adhesive.


What do you think? Drop me a comment below!


Built for Free Using: My Stampin Blog


Tuesday, November 3, 2015

Halloween Round Up

Halloween was a real whirlwind this year! It seemed that no sooner were the candy, costumes, and decorations on the shelves at Walmart when Halloween night had come and gone!

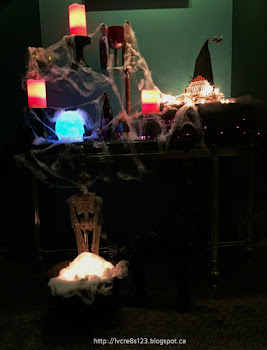
I had been looking forward to creating the Halloween Decor Project from Stampin Up and I was able to incorporate it into a spooky little scene in our hallway entrance that totally captivated my granddaughter, Raine!

For the first couple of times she was over, she would not walk past it at all, even if I held her! Gradually, she was able to go by if I was holding her and by Halloween night, she walked past it herself a couple of times!

Here's the hat by itself after I completed it:


And here it is in the Halloween display I created:


Luckily, I had a day off prior to Halloween in order to create some cards and gift bags.

For Steffan, I used my Zig Clean Color Real Brush Markers to color in a stamp from the Happy Witches stamp set by Hampton Art. I die cut the stamp as well as a Black Glimmer paper using the Lots Of Labels Framelits.

The sentiment from Halloween Expressions Mini from Inkadinkado was stamped with Archival ink on Cucumber Crush card stock. The edges were inked with the archival ink and then the matte was mounted on a Rich Razzleberry card base.

The die cuts were adhered to each other and then popped up on the matte using Dimensionals.


For Courtney, I cased this card. I used the wonderfully spooky stamp set, Witches' Night, to stamp the main image on Whisper White card stock using Basic Black Archival ink. I used Pumpkin Pie and Rich Razzleberry inks to sponge the image and then die cut it using the Lots of Labels Framelits, cutting a larger one from Black Glimmer paper. The colored image was also stamped with Versamark and then heat embossed with Clear Embossing Powder to make it shiny. The die cuts were adhered to each other.

On a strip of Rich Razzleberry I stamped the zig zag pattern stamp from the same stamp set and then adhered a strip of Black Glimmer paper over top. On a Pumpkin Pie matte, I stamped bats in each corner and then it was adhered to a Rich Razzleberry card base using Dimensionals.

The strips of Rich Razzleberry and Black Glimmer were adhered in the centre of the matte and then a black Spiderweb Doily was cut in half and adhered to the back of the die cut. The die cut was then adhered to the card front using Dimensionals.


 For Raine's gift bag, I used a piece of paper from the Happy Haunting DSP pack and the Gift Bag Punch Board to create her treat bag. To decorate it, I used a stamp from the Witches' Night stamp set to stamp on Pumpkin Pie card stock and then die cut it using the Lots of Labels Framelits. It was attached to the bag with a black spiderweb doily cut in half behind it.

I used both the Boo To You and the Seasonal Frame Thinlits Dies to die cut Boo! and Spooky from Pumpkin Pie card stock, three copies of each. The words were glued together using the Fine Tip Glue Pen. I used Versamark and Clear Embossing Powder to heat emboss the words to make them shiny.


Steffan's bag was made the same way but I used a different stamp on Real Red card stock and it was heat embossed to make it shiny. The stamp was die cut and adhered to Black Glimmer paper die cut and then adhered over a spiderweb showing the white side.

I used the Howl-o-ween Treat stamp set with StazOn ink to stamp the skull and bone on Dazzling Diamonds Glimmer paper. They were die cut using the Boo To You Framelits.


Finally, for Courtney's gift bag, I stamped the image from the Happy Witches stamp set on Rich Razzleberry card stock and die cut it. It was edged with Basic Black Archival ink. A larger die cut label in Pumpkin Pie was used behind it, with a black Spiderweb Doily sandwiched between.


Here's a picture of Raine in her costume taken by her daycare provider. They had a party that day and took their costumes to put on there. Prior to this, Raine had not been persuaded to try on her costume but when she saw all the other kids getting into their costumes, she figured it was ok to do the same!


Here's Raine after returning from walking door-to-door for over 1 1/2 hours! She had a ball and got a Walmart bag full of goodies!


Here she is, enjoying some of her candy stash!
 Hope you all had a good Halloween!

Built for Free Using: My Stampin Blog

Monday, August 17, 2015

Best Thoughts Joy Fold Card

Linda Vich Creates: Best Thoughts Joy Fold Card. Shimmering sequins surround blossoms colored with Zig Clean Color Real Brush Markers on a woodgrain embossed panel of this Joy fold card.Finally had the chance to get back to the images I colored using my new Zig Clean Color Real Brush Markers!

It seems that I can't get enough of the Best Thoughts stamp set as I am drawn to use it again and again.

Using my MISTI I stamped the rhododendrons using Ranger Archival ink on watercolor paper. My MISTI allowed me to re-stamp the image a couple of times to get a good print. Watercolor paper tends to be hard to stamp on, even using the smooth side so using the MISTI is a good practice.

I used Cornflower Blue (037) for the flowers and Olive Green (043) and Mid Green (046) for the leaves, using my Aqua Pen to blend the watercolor inks. When it was completely dry, I fussy cut it. To ensure a continuous black edge, I used a Basic Black Stampin' Write Marker to edge the image.

I wanted to use patterned paper as well as an embossing folder with the flower image so I decided to make a Joy Fold card. This is a lovely fold technique that uses a regular card with a narrower front than usual and a smaller card that overlaps and opens within the base card. You can find a great tutorial for a Joy Fold card on Debbie Henderson's blog.

I changed the measurements for my card as follows:

6.5 x 7.5" for the Pear Pizzazz card base, scored on the 7.5" side at 2.5"
2.5 x 6.25" DSP for the small flap
4.75 x 6.25" DSP for the inside of the card base
4.75 x 8" for the smaller Pear Pizzazz card base, scored at 4" on the 8" side
3.5 x 4.25" for the Night of Navy piece
3.5 x 4.25" for inner matte of Naturals White card stock

The patterned paper comes from the Regals DSP Paper Stack. All pieces of DSP had the edges inked with Night of Navy using a sponge dauber. All pieces of DSP were adhered to the larger card base using Fuse Fast adhesive.

The Night of Navy card stock panel was embossed using the Woodgrain Embossing Folder. It was adhered to the front of the smaller Pear Pizzazz card base using Fuse Fast adhesive, making sure the card opened in the opposite direction to usual.

The sentiment was stamped on a matte of the now retired Naturals White card stock using Night of Navy ink and the edges were also inked. It was adhered to the inside of the smaller card base using Fuse Fast adhesive. The smaller card base was centred and adhered to the larger DSP panel on the larger card base.

The colored flower was adhered to the embossed panel using Dimensionals. Sequins were scattered around the card and adhered using Crystal Effects. Wink of Stella provided a nice glimmer for the flower petals. (I really wish that I could get a good picture of the Wink of Stella effect to show those of you who are not familiar with it, but no picture seems to capture the subtle yet shimmery goodness Wink of Stella creates!)

A small bow of Old Olive 1/8" ribbon was added to the flower stem using Crystal Effects.

Linda Vich Creates: Best Thoughts Joy Fold Card. Shimmering sequins surround blossoms colored with Zig Clean Color Real Brush Markers on a woodgrain embossed panel of this Joy fold card.

Linda Vich Creates: Best Thoughts Joy Fold Card. Shimmering sequins surround blossoms colored with Zig Clean Color Real Brush Markers on a woodgrain embossed panel of this Joy fold card.

Linda Vich Creates: Best Thoughts Joy Fold Card. Shimmering sequins surround blossoms colored with Zig Clean Color Real Brush Markers on a woodgrain embossed panel of this Joy fold card.

I hope you'll try creating a card using the Joy Fold technique. It's a great way to use some of your patterned paper and creates a lovely card!

Built for Free Using: My Stampin Blog


Tuesday, August 11, 2015

Blossom Shaker

Linda Vich Creates: Beautiful blossom-filled shaker card in shades of Watermelon Wonder and Cucumber Crush, colored with Zig Clean Color Brush Markers and filled with sparkly sequins.At long last, my Zig Clean Color Real Brush Markers arrived in the mail from Japan! I have been drooling over these markers for a long time and finally bit the bullet and ordered the 48 pack.

These markers are SWEET! They are unlike any other marker I've used. They feel like a paintbrush (thus the real brush) but in a marker form. The colors blend wonderfully well, wet or dry as long as you use watercolor paper.

My first task was to create my swatch list to show each marker in both dry and wet states on watercolor paper. Once this was done, I stamped a slew of images on watercolor paper using Ranger Archival Ink.

I spent the day coloring; such fun to try blending colors together to create new ones and to add depth and dimension to colored images! Coloring with these markers really is a breeze!

For the image on my shaker card, I used a stamp from Indescribable Gift. I used Light Carmine, Carmine, Pale Green, May Green, Brown and Dark Brown.

I would scribble a little with a marker and then blend the rest using my Aqua Pen. If needed, I would go back over a section to give darker shading.

I die cut my image using the Squares Collection Framelits and also cut a polaroid-type frame from Early Espresso card stock as well as a square of Window Sheet.

I adhered the colored image to a Watermelon Wonder card base using Fuse Fast Adhesive and put strips of foam tape around the image.

On the under side of the Early Espresso frame, I put a strip of Sticky Strip and pleated a length of Cucumber Crush Dotted Lace Trim. I also used Fuse Fast Adhesive to secure the window sheet.

I placed a selection of sequins on top of the colored image, inside the foam tape. I then removed the protective strip from the tape and adhered the frame over the sequins to form the shaker.

I stamped the sentiment from the Watercolor Wings stamp set on Cucumber Crush card stock using Archival Ink and then punched it using the Washi Label Punch.

The sentiment was adhered with Dimensionals at the bottom of the frame.

Linda Vich Creates: Beautiful blossom-filled shaker card in shades of Watermelon Wonder and Cucumber Crush, colored with Zig Clean Color Brush Markers and filled with sparkly sequins.

Linda Vich Creates: Beautiful blossom-filled shaker card in shades of Watermelon Wonder and Cucumber Crush, colored with Zig Clean Color Brush Markers and filled with sparkly sequins.

What have you colored with the Zig Clean Real Brush Markers? Leave me a comment below!

Built for Free Using: My Stampin Blog