Showing posts with label watercolor. Show all posts

Saturday, August 5, 2017

Dahlia Up Close

Linda Vich Creates: Dahlia Up Close. Rose Gold embossed dahlia is painted with shades of blue Color Burst watercolors on this lovely anniversary card.
How about something totally different?

Come on now, admit it. Even if you are a Stampin' Up! demonstrator, you have one or two other craft products lying around that you use from time to time! Let's face it–we are crafty individuals or we would never have got involved with Stampin' Up! in the first place!

I have soooooooooooooo many crafting tools and media that sometimes I have to take a break from crafting with Stampin' Up! to play with my other stuff! Or, I combine it with Stampin' Up! to get the best of BOTH worlds like I have done with this card!

Today's card is one I created for my brother and his wife for their anniversary. It is CASEd from a card by Jenny Lee Yamasaki.

I started by stamping the Dahlia Up Close stamp from The Ton on watercolor paper using Versamark using my MISTI after first using my Embossing Buddy. I then heat embossed it with Rose Gold Embossing Powder.

Next, I gathered together a few of my Color Burst colors in blue: Cerulean Blue, Ultramarine Blue, Indigo and Turquoise. I tapped a little of each powder in a watercolor palette I had and then wet a #4 watercolor brush and dipped into the Cerulean Powder and changed it to liquid watercolor.

I painted this over most of the flower and then, painting spots of each of the other colors, I added strategically to the image until I was pleased with the result. Sometimes, I used a paper towel to blot up some of the watercolor to make it paler. When I was finished, I heat set the image.

The next step is where I made a mistake but due to using my MISTI I was able to rectify it. After watercoloring and then drying my image, the watercolor paper was severely warped. I wanted to get it as flat as possible before adding it to my card front. To do this, I placed it face down on a piece of copy paper with another piece of copy paper on top and then an old pillowcase. I then proceeded to iron until the watercolor paper was flat.

I did end up with a flat paper, however, the ironing reheated my embossing and transferred it to the copy paper leaving behind a white outline where the embossing had been! Now this is actually a technique in itself and can be used to good effect but for this image I WANTED the Rose Gold embossing in place!

So, I went back to my MISTI and after using my Embossing Buddy, I re-inked the image with Versamark and heat embossed it AGAIN! Luckily, my stamp had remained in place in my MISTI and I was able to re-stamp the image. I was very careful to warm up the heat tool for awhile before doing the embossing to minimize warping.

Next, I cut a Pacific Point card front 4.75 x 6. I trimmed my painted matte to fit the card front but leave about a 3/4" strip of card front on the left side. I placed a strip of Burnished Rose Gold Foil Tape down the card front and then trimmed off the excess.

On a strip of vellum I stamped the sentiment from the Falling For You stamp set using Versamark and heat embossed it with the same Rose Gold embossing powder. I folded the strip around the edges of the painted matte and then taped the ends to the back. The matte was then adhered to the card front using Fast Fuse. To add a little more zing, several sequins were adhered to the card front using liquid adhesive.

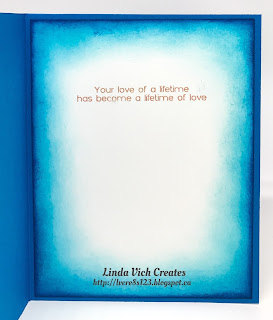
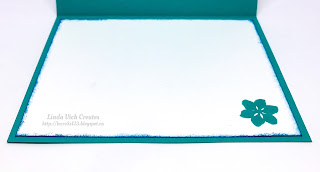
A watercolor matte was cut for inside the card and the matching sentiment was stamped and heat embossed on it. I then used sponges to ink the edges in both Tempting Turquoise and Pacific Point. The matte was then adhered with Fast Fuse to complete the card.

Linda Vich Creates: Dahlia Up Close. Rose Gold embossed dahlia is painted with shades of blue Color Burst watercolors on this lovely anniversary card.

Linda Vich Creates: Dahlia Up Close. Rose Gold embossed dahlia is painted with shades of blue Color Burst watercolors on this lovely anniversary card.

Linda Vich Creates: Dahlia Up Close. Rose Gold embossed dahlia is painted with shades of blue Color Burst watercolors on this lovely anniversary card.

Linda Vich Creates: Dahlia Up Close. Rose Gold embossed dahlia is painted with shades of blue Color Burst watercolors on this lovely anniversary card.


Delighted is how I feel about how this card turned out! I have never "painted" with the Color Bursts before so it was a learning experience but one that ended well for me! I can't wait to give this to my brother and his wife to see their reaction!

I hope you have enjoyed my deviation from projects made strictly with Stampin' Up! materials! I think that we can only become more creative by exploring all brands of media and by appreciating the resulting art forms.

Thank you for visiting today!


Saturday, June 24, 2017

June Wind Up and Projects

Linda Vich: June Wind Up and Projects. Balloons and a paper pieced stamp from Beautiful You produce a stunning layered card.
Friday night was our last stamping class until September. It was bittersweet because so many ladies, from our group, for various reasons, will not be returning to the group in the fall. However, we did have a lovely time by starting the night with goodies and socialization.

I was the lucky recipient of a beautiful card and a gift card to a local spa! It will be such a treat to look forward to using!

After gorging ourselves on various appetizers and desserts, it was a bit difficult to get going on crafting but we managed!

Our first card was a CASE from demonstrator Michelle Carter.

This card was not hard to make though it looks complicated!

A standard card base from Berry Burst was used as well as a small matte of 2.75 x 4". In addition to these, two Whisper White mattes were used, 2.5 x 3.75" and two 4 x 5.25". A piece of the Fresh Florals Designer Paper in Berry Burst was also cut 4 x 5.25" with it cut further at 2.25" to produce two strips.

The larger Whisper White matte was adhered to the card front using Fast Fuse. The larger strip of DSP was adhered onto the white matte.

The Beautiful You stamp set was used and the lady was stamped twice, using Basic Black–once onto the smallest Whisper White matte and once onto the smaller strip of DSP. The stamp on the DSP was fussy cut so that the dress and the hat were able to be glued onto the stamped image on the white card stock. This was then matted with the Berry Burst and adhered to the card front using Dimensionals.

From the remaining strip of DSP, two balloons were punched using the Balloon Bouquet Punch and three balloons were punched from scraps of Berry Burst card stock. Two card stock balloons were glued to the card front with one DSP balloon adhered over top using a Dimensional. The strings were drawn in using a fine point Sharpie.

Inside the card, the sentiment was stamped in Basic Black on a Whisper White matte and then two balloons, one from card stock and one from DSP were adhered, overlapping, on the side of the matte; strings were drawn in like before.

Linda Vich: June Wind Up and Projects. Balloons and a paper pieced stamp from Beautiful You produce a stunning layered card.

Linda Vich: June Wind Up and Projects. Balloons and a paper pieced stamp from Beautiful You produce a stunning layered card.

Linda Vich: June Wind Up and Projects. Balloons and a paper pieced stamp from Beautiful You produce a stunning layered card.


For the second card, the stampers had a choice of either a Sunset Silhouette or a Tropical card.

For the Sunset card, a standard card base of Pumpkin Pie was cut as well as a thin Basic Black matte and a Shimmery White matte.

The Embossing Buddy was used to remove any marks from touching the matte. Using Watercolor Pencils, bands of color were scribbled onto the Shimmery White matte using a vertical orientation. An Aqua Pen was then used to soften the pencil strokes into a watercolor wash. The heat tool was used to dry the matte and then, using the MISTI, the sentiment from the Colorful Seasons stamp set and the birds from the High Tide stamp set were stamped three times with Basic Black to produce a very black print.

After getting matte as flat as possible, the Adirondack chair was die cut from Basic Black using the Seasonal Layers Thinlits and then adhered to the matte using a sponge and liquid adhesive. The matte was then adhered to the Basic Black matte with Fast Fuse and then adhered to the card front using Dimensionals.

A leaf was stamped on the remaining Whisper White matte using Pumpkin Pie and then edges inked with Real Red before the matte was adhered inside the card.

Linda Vich: June Wind Up and Projects. Watercolor pencils are used to create a wash as the backdrop for this Sunset Silhouette, complete with an Adirondack chair die cut with the Seasonal Layers Thinlits.

Linda Vich: June Wind Up and Projects. Watercolor pencils are used to create a wash as the backdrop for this Sunset Silhouette, complete with an Adirondack chair die cut with the Seasonal Layers Thinlits.

Linda Vich: June Wind Up and Projects. Watercolor pencils are used to create a wash as the backdrop for this Sunset Silhouette, complete with an Adirondack chair die cut with the Seasonal Layers Thinlits.

Linda Vich: June Wind Up and Projects. Watercolor pencils are used to create a wash as the backdrop for this Sunset Silhouette, complete with an Adirondack chair die cut with the Seasonal Layers Thinlits.


For the Tropical card, a standard card base of Bermuda Bay was used with a thin Pacific Point matte as well as one from Shimmery White.

Like the previous version of the card, the Embossing Buddy was used to remove any marks from the Shimmery White matte and then Watercolor Pencils were used to lightly scribble alternating bands of Pacific Point and Bermuda Bay using a horizontal orientation this time. The Aqua Pen was used and then the heat tool was used to dry the matte. Using the MISTI, the sentiment was stamped in Versamark and heat embossed using White Stampin' Emboss Powder.

After getting matte as flat as possible, the Adirondack chair, branch and three flowers was die cut from Thick Whisper White using the Seasonal Layers Thinlits. The branch was trimmed in places and then the chair, branch and flowers were adhered to the matte using liquid adhesive. The watercolored piece was then matted with Pacific Point and then adhered to the Bermuda Bay card front using Dimensionals.

A flower was stamped on the remaining Whisper White matte using Bermuda Bay and the edges inked with Pacific Point before the matte was adhered inside the card.

Linda Vich: June Wind Up and Projects. Watercolor pencils are used to create a wash as the backdrop for this Tropical card, complete with an Adirondack chair and branch with blossoms die cut with the Seasonal Layers Thinlits.

Linda Vich: June Wind Up and Projects. Watercolor pencils are used to create a wash as the backdrop for this Tropical card, complete with an Adirondack chair and branch with blossoms die cut with the Seasonal Layers Thinlits.

Linda Vich: June Wind Up and Projects. Watercolor pencils are used to create a wash as the backdrop for this Tropical card, complete with an Adirondack chair and branch with blossoms die cut with the Seasonal Layers Thinlits.

Linda Vich: June Wind Up and Projects. Watercolor pencils are used to create a wash as the backdrop for this Tropical card, complete with an Adirondack chair and branch with blossoms die cut with the Seasonal Layers Thinlits.

Hopefully, everyone will enjoy a lovely summer if Mother Nature cooperates and I will prepare for September!


Sunday, May 7, 2017

Watercoloring With The Eastern Palace Suite

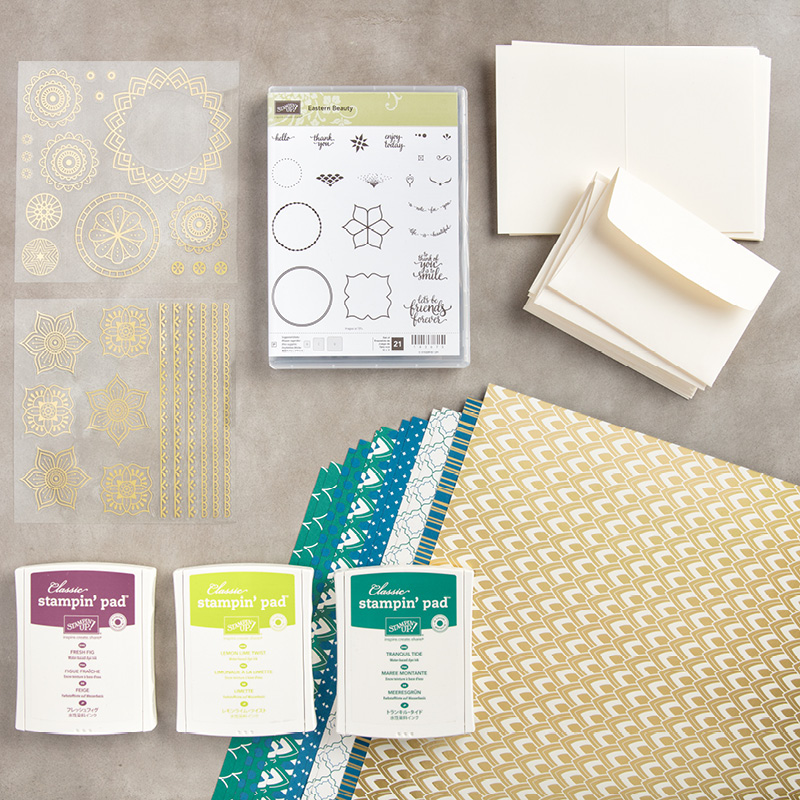
Have you purchased your Eastern Palace Bundle yet? No? Then what are you waiting for?

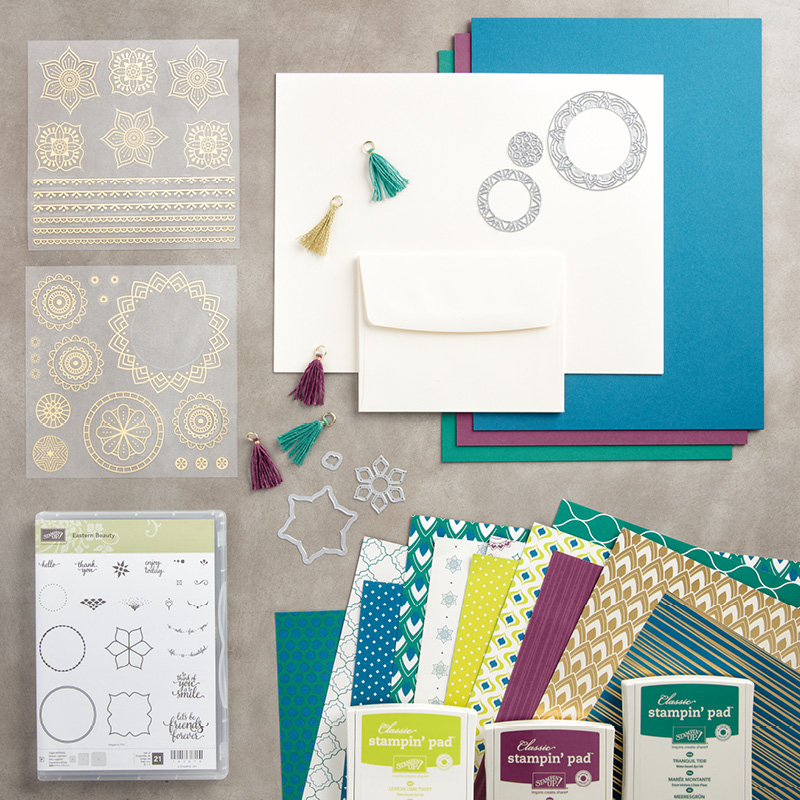
I have been having all kinds of fun with this bundle that is now available for you to purchase but only until May 31! There are two bundles to choose from and here is what you get:

Eastern Palace Starter Bundle $77.75
The Eastern Palace Starter Bundle is for those of you who just can't wait to get your hands on some of the new catalog offerings and must get a taste!

Eastern Palace Premier Bundle $134.75
The Eastern Palace Premier Bundle is for those of you who want it ALL! In my experience, this is the bundle that you want because the Starter Bundle does not include the Thinlits which MAKE this bundle the fun that it is!

Both bundles contain FREE product! The Starter Bundle offers the Very Vanilla Notecards and Envelopes for FREE while the Premier Bundle gives you the new Very Vanilla Thick Card Stock and the Very Vanilla Envelopes for FREE.

These bundles are only available until May 31 so purchase yours from my online store now!

Now let's take a look at the card I have for you today!

Linda Vich Creates: Watercoloring With The Eastern Palace Suite. A watercolored panel is die cut using the Eastern Medallions Thinlits and then embellished with more die cuts for a stunning result.

In creating this card, I started by cutting a matte from Watercolor Paper and then used combinations of the Eastern Medallions Thinlits to cut openings in the matte.

Next, I cut open a Ziplock bag and cut it in half. The resulting piece was larger than my matte. I pressed three ink pads down onto the plastic: Pool Party, Lemon Lime Twist, and Bermuda Bay. I then sprayed the plastic which caused the ink to bead.

I pressed my matte face down onto the plastic and then flipped the plastic over. By flipping it over, I was able to see where the ink was and I could "smoosh" it around while looking at the matte. I like this method better than just smooshing the matte down onto color and hoping for the best!

I used my heat tool to dry the matte and then kept repeating this process until I had the coloring the way that I wanted it. I then adhered the matte to a Basic Black matte of the same size by using liquid adhesive. This was then matted with Lemon Lime Twist.

My next step was to stamp the flower image from the stamp set onto a piece of Bermuda Bay using Basic Black. This was then die cut using die pieces #10 and #11 and the petals bent upwards. I also die cut a Basic Black piece using die #3. After die cutting, I used scissors to snip the medallion from the card stock since this die does not completely cut out the shape.

A piece of the new Finely Woven Ribbon in Lemon Lime Twist was knotted vertically on the right of the matte and then the matte was adhered to a 4.75 x 6" Bermuda Bay card base using Dimensionals.

The flower was adhered to the black medallion and then onto the card front using Dimensionals. One of the new Clear Faceted Gems was added to the centre of the flower.

The sentiment, from the Thoughtful Banners stamp set, was stamped in Versamark and heat embossed with White Stampin' Emboss Powder and then adhered to the card front.

For the inside of the card, a small stamp was used with Bermuda Bay to stamp in all four corners. Lemon Lime Twist was then sponged around the matte. It was adhered with Fast Fuse to complete the card.

Linda Vich Creates: Watercoloring With The Eastern Palace Suite. A watercolored panel is die cut using the Eastern Medallions Thinlits and then embellished with more die cuts for a stunning result.

Linda Vich Creates: Watercoloring With The Eastern Palace Suite. A watercolored panel is die cut using the Eastern Medallions Thinlits and then embellished with more die cuts for a stunning result.

Linda Vich Creates: Watercoloring With The Eastern Palace Suite. A watercolored panel is die cut using the Eastern Medallions Thinlits and then embellished with more die cuts for a stunning result.


I just love how the colors turned out on this card!

Special Note: I will be numbering the dies in the more complex sets to make it easier for you to follow which die I used in my blog posts. For future reference, you can check the die sets and their numbering by visiting my Numbered Die Sets page on my blog. I will update it as I use and add more sets.


Monday, August 8, 2016

Z Fold Tuscan Vineyard Card

Linda Vich Creates: Z Fold Tuscan Vineyard Card. Blackberry Bliss and Rich Razzleberry team up with the Tuscan Vineyard stamp set to create this z fold card.
I have been missing my Blackberry Bliss dreadfully so for my brother's anniversary card, I dug out some retired card stock and DSP to make him and his wife a card. Since they will be spending their anniversary in the vineyard area in British Columbia, I thought that the colors of Blackberry Bliss and Rich Razzleberry would be appropriate.

I started with the focal image of the vineyards from the Tuscan Vineyards stamp set. I stamped it with Basic Black Archival onto Watercolor paper. I then used a variety of reinkers and an Aqua Painter to watercolor the image. It was then die cut using the Layering Ovals Framelits and matted with Blackberry Bliss.

I stamped the corks and corkscrew onto Crumb Cake using the retired Baked Brown Sugar. I ripped the edge around the images and set them aside. On a Crumb Cake matte for the inner part of the card, I stamped the image of the bottle and wine cask. To achieve the two color image, I colored on the stamp with both a Garden Green and a Baked Brown Sugar Stampin' Write Marker.

For the card base, I cut a 11 x 4.25" piece and a 11 x 1" strip of Rich Razzleberry and scored them both at 2.75 and 5.5". Both pieces were folded in a Z fashion. I also cut pieces of the now retired Farmers Market DSP for mattes for the front and back section of the card.

After adhering my mattes to the card base, I stamped the sentiment from the Best Birds stamp set on the long strip and then adhered the strip to the card by first folding up the strip and gluing to the back first and then to the front of the card. The cork and corkscrew images were also adhered and then the focal image to complete the card.

This type of card is not the easiest to photograph to fully show you all the parts of the card but I've done my best!

Linda Vich Creates: Z Fold Tuscan Vineyard Card. Blackberry Bliss and Rich Razzleberry team up with the Tuscan Vineyard stamp set to create this z fold card.

Linda Vich Creates: Z Fold Tuscan Vineyard Card. Blackberry Bliss and Rich Razzleberry team up with the Tuscan Vineyard stamp set to create this z fold card.

Linda Vich Creates: Z Fold Tuscan Vineyard Card. Blackberry Bliss and Rich Razzleberry team up with the Tuscan Vineyard stamp set to create this z fold card.

Linda Vich Creates: Z Fold Tuscan Vineyard Card. Blackberry Bliss and Rich Razzleberry team up with the Tuscan Vineyard stamp set to create this z fold card.

For my first Z Fold card, I am pleased with how this turned out. For my next one, I would like to experiment more with a 3D scene created by mounting various parts of the scene on the floating strip of the card.


Wednesday, July 6, 2016

Best Birds Thank You

Linda Vich Creates: Best Birds Thank You. Learn how the bird was created to look 3D on this delightful thank you card.
Every once in awhile, the stars align and a crafting session goes as smoothly as spreading peanut butter on a slice of bread. Today was one of those days. :)

As I sat reviewing my new stamp sets, I chose the Best Birds to create a card.

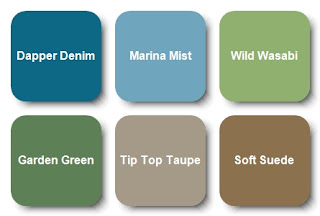
I had a blue bird in mind and chose a scrap of watercolor paper to try out my hunch that Marina Mist and Dapper Denim was the combination I was seeking. I used my Kuretake Fude Water Brush Pen and reinker to paint a few strokes. The blues were perfect together!

Then, since I was also going to be stamping a branch, I tried out Wild Wasabi and Garden Green for the leaves and Tip Top Taupe and Soft Suede for the branch. These combinations also worked well.

I then consulted a downloadable PDF from Patty Bennett that I had saved to Evernote. The PDF is a wonderful resource that provides a sample of all the DSP in the new 2016-2017 catalog. I was looking for a paper that would look good with the bird I was going to paint. One of the new Moroccan papers fit the bill!

I began by stamping, with Basic Black Archival ink, the bird and the branch onto watercolor paper using my MISTI. I zapped the images with my heat tool just to make sure the ink was set and then began watercoloring them using the reinkers I had selected previously. When complete, I heat set the images and then die cut them using the Birds & Blooms Thinlits.

Using the Hello You Thinlits, I die cut three "thanks" from Wild Wasabi and adhered them together using liquid adhesive. I chose green for this sentiment to pick up the green from the leaves and to provide a little relief from all the blue. I inked the stacked die cut with Versamark and then heat embossed with Clear Stampin' Emboss Powder three times to make the sentiment good and shiny.

To create the rest of the sentiment, I stamped with the Labeler Alphabet stamp set onto Thick Whisper White using Dapper Denim ink. To use these letters, you really need to stamp one letter at a time to be able to get them close enough to each other. Once complete, I cut the sentiment up into individual words.

Now that I had the sentiment, the bird and the branch, I took some time to plan out my layout for the card. I tried several different configurations, including both vertical and horizontal. I finally decided on a horizontal orientation.

It was necessary to create a 5 x 7" card to hold my layout. I first chose to matte the DSP with Dapper Denim card stock, after inking the edges of the DSP with Soft Suede. I then cut a Soft Suede card base to pick up the color of the branch. The matted DSP was adhered to the card front using Dimensionals.

In my post, Just Sitting Here, I used a technique learned from Lydia over at Understand Blue. The technique involves using a stylus, or in my case I used my McGill Paper Blossom Tool Kit, to push out the back of a die cut to give it a realistic 3D look. I wanted to apply this technique to my bird so it would not look so flat. I also used this technique on the branch to a lesser degree.

After puffing up my bird and branch, I attached double Dimensionals to the bird to maintain the "puffiness" and adhered both die cuts to the card front. This then allowed me to lay out and then adhere both parts of my sentiment. I attached the "thanks" with liquid glue. Before adhering the individual words, I used a sponge dauber to ink the edges of each word with Soft Suede. The words were then adhered to the card front using rolled up Glue Dots to provide a little height.

For the inside of the card, a matte was cut from watercolor paper. Leaves from the Birthday Blossoms stamp set were stamped in two corners using Basic Black Archival ink. Once dry, I used Wild Wasabi and Garden Green to watercolor the leaves. The matte was adhered with Fast Fuse to complete the card.

Linda Vich Creates: Best Birds Thank You. Learn how the bird was created to look 3D on this delightful thank you card.

Linda Vich Creates: Best Birds Thank You. Learn how the bird was created to look 3D on this delightful thank you card.

Here are a couple of shots showing the dimension on the card. It looks even better in real life!

Linda Vich Creates: Best Birds Thank You. Learn how the bird was created to look 3D on this delightful thank you card.

Linda Vich Creates: Best Birds Thank You. Learn how the bird was created to look 3D on this delightful thank you card.

I had a lot of fun creating this card! I really like the color scheme–feel free to save it!

Linda Vich Creates: Best Birds Thank You. Learn how the bird was created to look 3D on this delightful thank you card.


What was really nice was having the ability to create my own sentiment using alphabet stamps. Sometimes the sentiments in a stamp set just don't say what you need them to say so you have to get creative!

I hope you've enjoyed my card today!


Monday, May 30, 2016

Catalog Launch Party 2016

Linda Vich Creates: Catalog Launch Party 2016.
Though I have been somewhat scarce here lately, due to preparation for my Catalog Launch Party, I plan to have regular posts from now on! I must say, though, that my preparation for the party paid off–our party on Friday night was wonderful!

As usual, I was somewhat nervous about the whole thing so arrived at our usual location (a lovely craft room that belongs to one of our stamping group members, Carolyn, herself a former Stampin' Up Demonstrator) much earlier than was needed!

My daughter Courtney, a nursing student, met me there to help with the initial setup. She designed a stunning food table while I was busy setting up our crafting area.

Linda Vich Creates: Catalog Launch Party 2016.

Linda Vich Creates: Catalog Launch Party 2016.

Once the setup was all done, I was able to breathe a sigh of relief and have a bit of a sit down and chat about the new catalog with Carolyn and my road buddy, Charlene.

Once the other stampers arrived and had entered their tickets for the Door Prize Draw, we chose up two teams and did a Catalog Scavenger Hunt. This was a fun activity to get the ladies exposed to more items in the catalog.

Linda Vich Creates: Catalog Launch Party 2016.

Linda Vich Creates: Catalog Launch Party 2016.

Next up, after again drawing for two different teams, the ladies designed a card by using a set of paper, embellishments, and stamps that I had given them. Each lady completed her own card of the group's design for their take home project. Carolyn's husband, Brian, acted as our judge. The ladies designed some lovely cards!
Linda Vich Creates: Catalog Launch Party 2016.

Linda Vich Creates: Catalog Launch Party 2016.

Linda Vich Creates: Catalog Launch Party 2016.

Linda Vich Creates: Catalog Launch Party 2016.

Linda Vich Creates: Catalog Launch Party 2016.

Linda Vich Creates: Catalog Launch Party 2016.

After an intermission to refuel at the food table, we played a short Bingo game and then worked on our last project of the evening using the Watercolor Smooshing Technique.

Using a craft mat, a ink pad was stamped on it and then spritzed with water. A piece of acetate from packaging was used to pick up the ink and "smoosh" it down onto a piece of watercolor paper. The ink was set using a heat tool and then the next ink was applied. All five of the new In Colors were used for this.
To add even more glitz and drama to the watercolored panel, the edges of the panel were inked with Versamark and heat embossed with Gold Stampin' Emboss Powder. The process was repeated a few times to get a really edgy look while producing a very smooth and shiny outer edge.

Next, the sentiment from the new Painter's Palette stamp set was stamped with Versamark on a square of vellum. It was heat embossed with Gold Stampin' Emboss Powder and then was die cut using one of the new Layering Squares Framelits. Rolled up glue dots were hidden behind the letters to attach it to the watercolor panel. The watercolor panel was attached to a Dapper Denim card front using Dimensionals.

For the inside of the card, the dots stamp was used with Versamark on a Whisper White panel to stamp in two corners. These were heat embossed with the Gold Stampin' Emboss Powder and the matte adhered to the inside of the card using Fast Fuse.

Linda Vich Creates: Catalog Launch Party 2016. Watercolor smooshing is the technique featured on this card showcasing the In Colors of 2016-2018.

Linda Vich Creates: Catalog Launch Party 2016. Watercolor smooshing is the technique featured on this card showcasing the In Colors of 2016-2018.

Linda Vich Creates: Catalog Launch Party 2016. Watercolor smooshing is the technique featured on this card showcasing the In Colors of 2016-2018.

Prize Patrol drawings were sprinkled throughout the evening, with winners based on a colored butterfly that was included in each lady's gift box.

At the end of the evening, after determining the final 1st, 2nd, and 3rd place winners, prizes were awarded. Two other prizes were awarded to the row ladies who possessed two In Color flowers. The ladies seemed delighted with the card sets I had created using each of the five new In Colors.

Linda Vich Creates: Catalog Launch Party 2016.

Linda Vich Creates: Catalog Launch Party 2016.

Linda Vich Creates: Catalog Launch Party 2016.

Linda Vich Creates: Catalog Launch Party 2016.

Linda Vich Creates: Catalog Launch Party 2016.

Unfortunately, one lady had to leave early from the party and it turned out that she was the one who won the Door Prize Draw! She will be opening it at our June 24 Windup so I will share her picture then!

Linda Vich Creates: Catalog Launch Party 2016.

A delightful evening spent with lovely ladies though it was a little hard to crawl out of bed the next day after all the fun of the night before!