Showing posts with label tailored tag punch. Show all posts

Saturday, July 14, 2018

Abstract Impressions Thank You Card

Linda Vich Creates: Abstract Impressions Thank You Card. Embossing with the Springtime Impressions Thinlits adds a lovely texture to a simple card.
Have you tried embossing using the new Big Shot Embossing Mats?

Some of the new dies from Stampin' Up are made only for embossing, like some of the leaves in the Nature's Roots Framelits Dies, but you can emboss with regular cutting dies as well. Talk about increasing the versatility of your dies and getting more bang for your buck!

Stampin' Up has a video that details how to use the Big Shot Embossing Mats. The video explains how to create the proper "sandwich" for embossing with dies.

I found the Stampin' Up recommended sandwich a little cumbersome because it involves placing the die face up with the paper to be embossed on top. To me, this annoys me because I can't see where my die is! Luckily I found a video by Rachel Tessman where she shows how she flips the sandwich so that the die is placed on top of the paper with the cutting side down.

Rachel's method will be used with my card today.

I started by cutting a standard card base from Pacific Point and I also cut a matte of the same color. While I had my trimmer handy, I also cut a piece of the gorgeous Garden Impressions DSP and a thin Calypso Coral matte.

Next, I took my Pacific Point matte and the large flowered die from the Springtime Impressions Thinlits. My Big Shot sandwich was like this:

TOP
Big Shot Clear Cutting Pad
Die, cutting side down
Pacific Point matte (or whatever paper you are embossing)
Thin Blue Silicone Mat
White Pad from the Big Shot Embossing Mats
Big Shot Platform
BOTTOM

Now, because every Big Shot is a little different, I found that part of my embossing was very well defined and part wasn't so I made sure to reposition my die on top of my card stock and then turned the whole sandwich 180 degrees around (not over) before rolling it through my Big Shot.

After running it through this second time, my embossing looked great all over! When I emboss again in the future, I will run through, turn 180 degrees and run it through again just to be sure everything is good!

After embossing, I adhered the matte to the card front using liquid adhesive. The DSP was also matted on the Calypso Coral. A faux bow was added (run a strip of  Tear & Tape and top with a length of ribbon and then attach a bow on top with a Glue Dot) using the now retired Shimmer Ribbon Combo Pack. The matte was then adhered to the card front using Dimensionals.

The sentiment, from the Abstract Impressions Stamp Set, was stamped on Calypso Coral with Pacific Point and then cut with the Tailored Tag Punch. It was attached with Dimensionals.

Three tiny flowers were die cut from Pacific Point and adhered using liquid adhesive. Rhinestones were added to their centres to complete the card.


Linda Vich Creates: Abstract Impressions Thank You Card. Embossing with the Springtime Impressions Thinlits adds a lovely texture to a simple card.

Linda Vich Creates: Abstract Impressions Thank You Card. Embossing with the Springtime Impressions Thinlits adds a lovely texture to a simple card.


I hope you will try embossing with your dies—it opens up even more possibilities for card making!


Product List


Friday, July 6, 2018

Dandelion Wishes Thank You

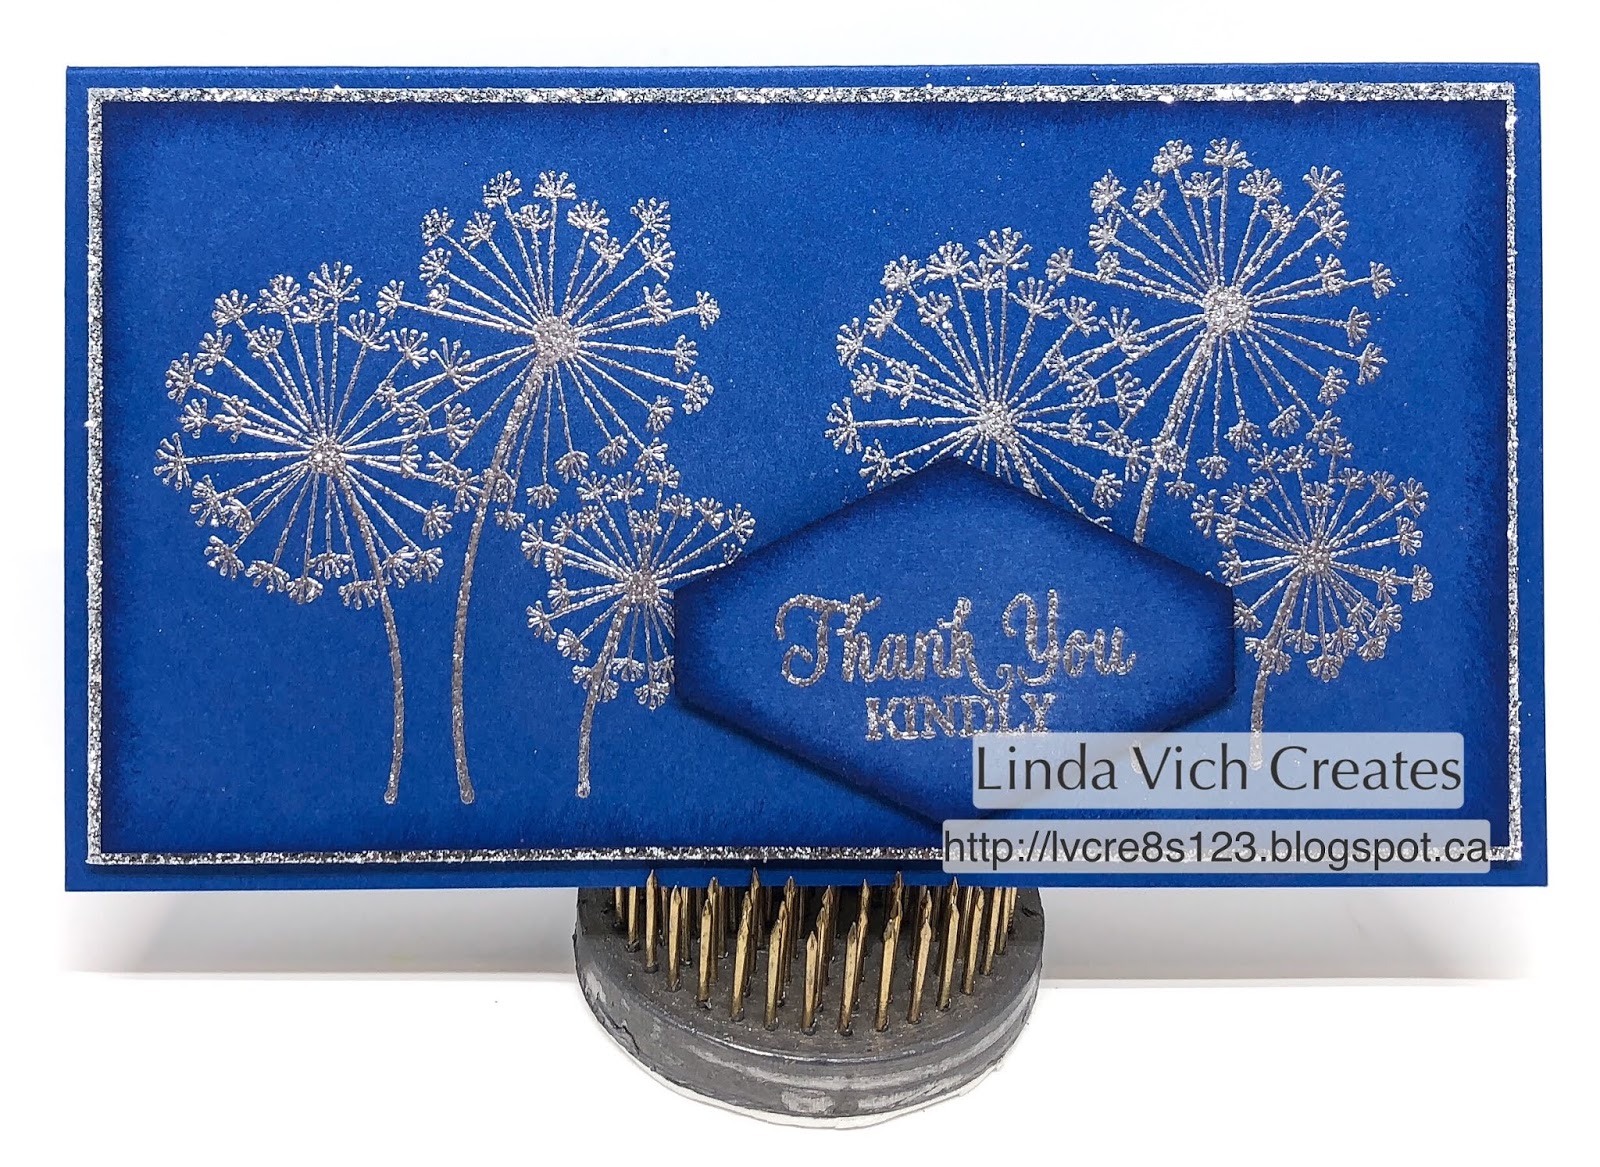
Linda Vich Creates: Dandelion Wishes Thank You. Dandelion Wishes, Blueberry Bushel and silvery glitteriness combine to produce a stunning thank you card!
We have a full house again—four adults, one soon to be five-year-old, four cats, and a dog—but only until the 14th of July. That's the day my daughter and her family move into their new house!

They are so excited! It is right in the community where they wanted to be, two minutes from the school that Raine will attend, and eight minutes to work for Courtney! The house is lovely has a lovely treed yard with room for a garden and bonfires and it also has a pool and a gorgeous deck! It will be so much fun for them to get moved in and arrange things as they like it and more than enough summer left to enjoy their yard and pool!

Courtney asked me to make this card to give to their real estate agent who was instrumental in them purchasing this house.

I knew that I wanted to use the Dandelion Wishes and I knew that I wanted a long, narrow card. However, because I also wanted to use Blueberry Bushel to make an envelope with the Envelope Punch Board, I was limited to using an 8.5 x 11" paper. With the aid of the WRMK's Envelope Generator iPhone app, I was able to choose a card that was 6.25 x 3.5".

I cut the card base and a matte from Blueberry Bushel as well as a piece for my envelope. I cut another matte from Silver Glimmer paper. Using Versamark, I stamped the grouping of dandelions twice on the matte and then heat embossed using a mixture of both Silver Stampin' Emboss Powder and the now retired Silver Glitter.

While I had my stamps out, I stamped a matte for the inside using Blueberry Bushel, stamping off once. I used the same stamp to stamp the outside of my envelope. I used the Detailed Trio Punch to punch the flap of the envelope.

The sentiment from the Enjoy Life stamp set was also stamped and embossed on Blueberry Bushel. It was cut out using the Tailored Tag Punch. The stamped matte and sentiment then had their edges sponged with Blueberry Bushel ink.

The mattes and sentiment were all adhered to the card front using Dimensionals. The two inside mattes were adhered with Fast Fuse.

Linda Vich Creates: Dandelion Wishes Thank You. Dandelion Wishes, Blueberry Bushel and silvery glitteriness combine to produce a stunning thank you card!

Linda Vich Creates: Dandelion Wishes Thank You. Dandelion Wishes, Blueberry Bushel and silvery glitteriness combine to produce a stunning thank you card!

Linda Vich Creates: Dandelion Wishes Thank You. Dandelion Wishes, Blueberry Bushel and silvery glitteriness combine to produce a stunning thank you card!


These stamps are beautiful . . . I think they'll be getting a workout!


Product List


Thursday, May 17, 2018

Wood Textures GoodBye

Linda Vich Creates: Wood Textures Goodbye. The Tailored Tag punch teams up with Wood Textures DSP to create this inlaid wood effect for a masculine card.
About a week ago, we had to say goodbye to the store manager that we had had for three years. Sheldon was a welcome addition to our store. He was very likeable, hardworking, and had a great sense of humor! Of course, since he was so good at his job, he was promoted and left us for another store in Winnipeg. I made him this card to thank him for being such a great boss.

I began by cutting both a standard card base and matte from Early Espresso. I punched a number of pieces from the Wood Textures DSP and after figuring out the placement, I mounted each on another piece punched from Soft Suede card stock for added stability.

I used Versamark and Clear Stampin' Emboss Powder to create a high gloss on each piece. My plan was to make this look like a high gloss, inlaid wood piece. I then used Crystal Effects to adhere each piece to the matte. For the pieces that overhung the matte, I snipped them off with scissors and then glued them into the tiny spots I still needed to fill. After wrapping lengths of Linen Thread around the matte, I used Dimensionals to adhere it to the card front.

The sentiment, from the now retired Greatest Greetings stamp set, was stamped on Thick Very Vanilla using Soft Suede. The edges were also inked with Soft Suede. The greeting was adhered using Adhesive Strips. For a little "manly" bling, I added three of the now retired Urban Underground Embellishments.

Linda Vich Creates: Wood Textures Goodbye. The Tailored Tag punch teams up with Wood Textures DSP to create this inlaid wood effect for a masculine card.


I'm pleased with how this card turned out--I have the Wood Textures to thank for this!