Showing posts with label circle collection framelits. Show all posts

Monday, July 6, 2015

Gardening With Market Fresh: Part Two

Linda Vich Creates: Gardening With Market Fresh: Part Two. Juicy, red strawberries, looking fresh and ready to eat, are stamped with the Market Fresh stamp set and adorn a black striped card front, embellished with both Cherry Cobbler and Crushed Curry ribbons.Today I continue my series on "gardening" by using the Market Fresh stamp set. If you missed it, you can view Gardening With Market Fresh: Part One.

While, Part One of my series used grapes as the focal image, my second card uses strawberries.

I started by using my MISTI to stamp my image with Jet Black Stazon ink on Watercolor paper. I then used my Blender pen and reinkers to color the image. I chose to use the now retired Raspberry Ripple rather than Real Red for the berries and for the shadows, I used Cherry Cobbler. The leaves used Old Olive and Mossy Meadow and the banner used Daffodil Delight with Crushed Curry for the shadows.

I used the Circles Collection Framelits to cut both the stamped image and a Cherry Cobbler matte. The stamped image was adhered to the matte using Fuse Fast adhesive.

I chose a black striped paper from the Farmers Market DSP pack and adhered it to a Cherry Cobbler matte of the same size to give it stability. A length of Cherry Cobbler Sheer Linen Ribbon was adhered across the middle of the matte. The matte was adhered to a Cherry Cobbler card base using Dimensionals.

On the back of the matte for the berries, I placed several glue dots and then adhered and shaped a length of Crushed Curry 1/8" Ribbon. The matte was then adhered to the card front using Dimensionals.

As with the first card, I used my Wink of Stella marker to make the berries look fresh and juicy! Check back tomorrow for the third part of my "gardening" series.

Linda Vich Creates: Gardening With Market Fresh: Part Two. Juicy, red strawberries, looking fresh and ready to eat, are stamped with the Market Fresh stamp set and adorn a black striped card front, embellished with both Cherry Cobbler and Crushed Curry ribbons.


Built for Free Using: My Stampin Blog

Friday, October 31, 2014

Clowning Around On Halloween

Happy Halloween!

I just spent some time putting on my clown makeup for my shift at Walmart today. The picture on the makeup package makes it look so simple to apply :( Wish I could just Photoshop the makeup onto me and go!

Anyway, I decided to dress up this year since I haven't worked the two previous years' Halloween shifts. Quite a few staff do dress up so it's kind of fun to see them. Our old manager used to get right into the festivities as well but this manager is a little more staid so I don't expect to see him in a costume.

Linda Vich Creates: Clowning Around On Halloween


Linda Vich Creates: Clowning Around On Halloween


I also have a very quick and simple card for you today. This was easy to put together . . . a few punches and framelits and some adhesive! Ta-da!

Linda Vich Creates: Clowning Around On Halloween


Hope you have a Spook-tacular Halloween!


Built for Free Using: My Stampin Blog

Wednesday, August 13, 2014

Hello Mojo!

Had the day off today and the house to myself from about 11:30. My mojo must have been happy about that because I finally created a card that I liked!

Brianna, one of the Customer Service Managers (CSM) at Walmart, is a wonderful, young girl. She is always upbeat, friendly and professional. I have worked with her for two years and I will be sorry to see her leave. However, she is off to start a new life in Calgary and I wish her the very best.

Brianna loves color so I knew that I wanted a good combination of fresh, bright colors. I finally decided on making a starburst card.

Starburst Card

I cut strips of Cardstock and Designer Series paper into 4 x 1 1/2" strips and then used my Stampin' Trimmer to cut them into triangles.

I cut a matte from Whisper White, 3 3/4 x 5". I punched a 1" circle from copy paper and adhered it to the upper right of the matte, following the Rule of Thirds, to maintain good design.

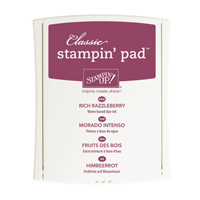
After deciding on the sequence of my triangle pieces, I used Snail Adhesive to quickly cover the matte. I then lined up my pieces one by one, with the points to the circle, till the matte was totally covered. I then flipped the matte over and used scissors to trim off the excess pieces. I used a sponge dauber with Rich Razzleberry to ink the edges of the completed matte.

I adhered the completed piece to a Whisper White matte, then onto a Rich Razzleberry matte, and finally onto a Whisper White card front, using Fast Fuse adhesive.

I used a stamp from the Really Good Greetings stamp set to stamp with Rich Razzleberry onto a scrap of Whisper White. I used one of the Starburst Framelits to cut out the sentiment and then used a Framelit from the Circles Collection Framelits to cut a matte for it from Rich Razzleberry. I used Dimensionals to pop up the greeting on the matte and to adhere it to the card. A bit of bling on the sentiment and the card was complete!

I'm pleased with how the card turned out. Starburst cards can be made several different ways and are perfect for using up scraps. You can use patterned paper interspersed with cardstock, if desired. You could even create a card completely with different colors of cardstock but emboss each piece using a different embossing folder. Here is an example of a Half Starburst card that we made last year in one of our card classes.

Half Starburst Card

Have you made a Starburst card before? Leave me a comment below to tell me about it!