Today I want to share with you the second card that I started while crafting at Charlene's last Friday.
I am madly in love with both Wonderland and the Woodland folder! Ever since I first saw Pinterest posts on the two, I have been dying to experiment with them.
Whereas the Wonderland trees can be stamped in every color of the rainbow and look nice, the cards created with the Woodland embossing folder seem to be, for the most part, done with traditional birch colors of white and a little gray or taupe added for interest, but they are nonetheless fabulous!
When you marry these two products in the same card, how could it not be anything but stunning?
My card is a CASE of the card by Billie Moan:

I started by cutting a piece of the Thick Whisper White card stock (love how elegantly this embosses!) 4.25 x 5.75" in size. I absolutely love how the new embossing folders are 6" in size, giving you lots of possibilities to use them in larger cards!
Next, I took the Woodland embossing folder and laid it open on my craft mat. I took my Tip Top Taupe and swiped the stamp pad across the side marked Sizzix, down near the bottom of the folder. I then used Lost Lagoon to swipe the upper part of the folder.
I inked up Wonderland using Mossy Meadow and stamped it right on the folder, and repeated this process right across the folder, being sure to clean my stamp between inkings.Placing my card stock on the un-inked side of the folder, I carefully closed it and ran it through my Big Shot. Beautiful results!
I used a sponge dauber to ink the edges of the embossed panel with Tip Top Taupe and then used my Early Espresso Stampin' Write Marker to outline the marks on the trees. Wow! That technique alone gives a whole lot of punch to these trees and it really only takes a few minutes to accomplish, using the brush end of the marker.
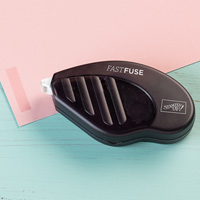
The finished piece was adhered to a Mossy Meadow matte using Fast Fuse Adhesive and then I wrapped a length of Blackberry Bliss ribbon around the bottom of the panel, securing it at the back with tape.
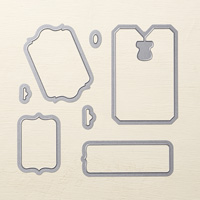
I stamped the sentiment from the soon to be retiring Festive Fireplace Stamp Set on Whisper White card stock using Blackberry Bliss ink. I die cut the sentiment using the Chalk Talk Framelits.
Mossy Meadow ink added definition to the edges of the tag and it was adhered on top of the ribbon using Dimensionals. Two rhinestones gave it a little extra sparkle. The finished matte was then mounted on a 6.5 x 5" Blackberry Bliss card base using Dimensionals.
For the inside, I stamped the tops of the Wonderland trees in Mossy Meadow along the bottom of a piece of the now retired Naturals White card stock. I finished by inking the edges of the matte using Mossy Meadow and adhered it using Fast Fuse Adhesive.


Have you tried either the Wonderland Stamp Set or the Woodland Embossing Folder yet? Don't miss out on purchasing these two great products! Order yours TODAY! For a full list of both retiring and sale products, click here.
To see my other uses of Wonderland and Woodland, click the links below:
Wonderland: My Go-To Stamp
Color Burst Christmas and Wonderful Wonderland
Glints Of Gold With Wonderland
Who's Hiding In The Woods?







 Posted with Blogsy