Friday, October 31, 2014

Clowning Around On Halloween

Happy Halloween!

I just spent some time putting on my clown makeup for my shift at Walmart today. The picture on the makeup package makes it look so simple to apply :( Wish I could just Photoshop the makeup onto me and go!

Anyway, I decided to dress up this year since I haven't worked the two previous years' Halloween shifts. Quite a few staff do dress up so it's kind of fun to see them. Our old manager used to get right into the festivities as well but this manager is a little more staid so I don't expect to see him in a costume.

Linda Vich Creates: Clowning Around On Halloween


Linda Vich Creates: Clowning Around On Halloween


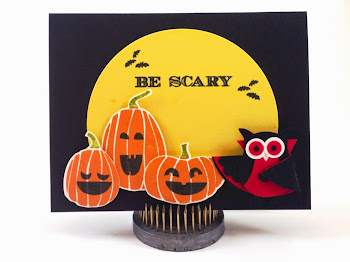
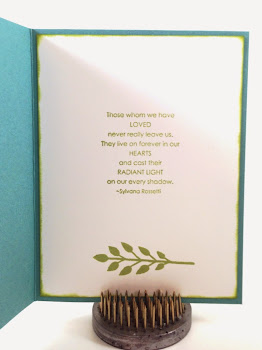
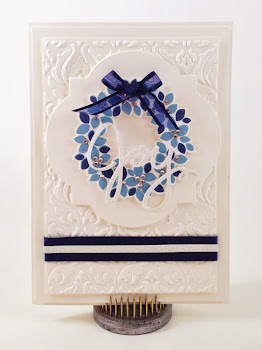
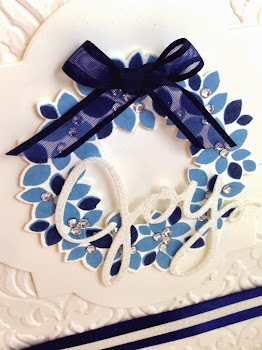
I also have a very quick and simple card for you today. This was easy to put together . . . a few punches and framelits and some adhesive! Ta-da!

Linda Vich Creates: Clowning Around On Halloween


Hope you have a Spook-tacular Halloween!


Built for Free Using: My Stampin Blog

Thursday, October 30, 2014

Homespun Christmas

Hey there! How have you been? It's been a couple of busy days for me at work but I found a little time today to create.

In my last blog post, I had entered a card challenge over at Pals Paper Arts. I found it to be a very motivating and creativity-stirring activity. Though my card was not chosen for one of the three card picks, I'm not lamenting. I was thoroughly delighted with the card I created and I received some lovely comments on it.

Today, I'm trying another challenge from Mojo Monday. This challenge presented a tall and skinny card sketch.

Linda Vich Creates: Homespun Christmas

I have always been drawn to non-standard sized cards but this one had me envisioning it flipped on its side. That's the beauty of a sketch . . . you can play with it, rotate it, flip it, move things around, substitute things . . .

My thoughts for this card turned to that of an old, country Christmas, one that included plenty of simple, home made decorations.

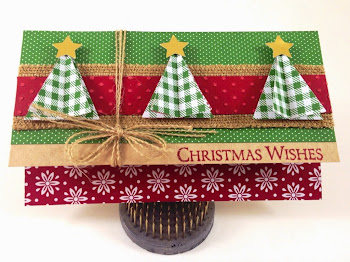
I chose a card size of 6 x 3 1/2" and created my card base using Kraft card stock. I trimmed the bottom of the card front by 3/4" so that I could display a colorful strip of paper adhered to the inside. I used a piece of paper from the Trim The Tree Designer Pack that reminded me of a cozy quilt.

I cut a Kraft matte for the front, equal in size to the trimmed card front. To this I adhered another piece of that designer paper, this one trimmed so that 3/8" of Kraft was still showing.

Keeping with the country theme, I attached a strip of the Burlap Ribbon and on top of that I ran a strip of the now retired Cherry Cobbler Core'dinations card stock. I embossed it with the Perfect Polka Dots Embossing Folder and then sanded the dots.

I created three, 3D trees to place on this strip. To do this I used the tree framelit from the Snowflake Card Thinlits Dies. Keeping to the country theme, for each 3D tree, I cut four trees from a gingham paper. I trimmed the trunk from all the trees and then vertically scored three of the four trees in each tree set.

I put Tombow glue on one half of a tree and adhered another tree half to it. This was repeated until only the non-scored tree remained. It was glued to the two remaining halves to serve as the tree base. A glue dot was used to adhere a gold foil star to the tree top. The stars were cut with a punch from the now retired Merry Minis Punch Pack. The trees were popped up with Dimensionals on the strip.

I used three burlap fibers to tie in a bow around the entire matte. I got the fibers by cutting off the bound edge of a length of the ribbon and then extracted some burlap strands. The matte was then mounted on the card front.

To complete the card, Christmas Wishes from the Ornamental Pine stamp set was stamped in Cherry Cobbler on the Kraft strip not covered by designer paper.

Linda Vich Creates: Homespun Christmas


Linda Vich Creates: Homespun Christmas


What do you think? Does this remind you of a country Christmas? Leave me a comment below!

Built for Free Using: My Stampin Blog

Tuesday, October 28, 2014

My First Card Challenge

Sometimes it really is worth staying up into the wee hours of the night!

After sorting out my Stampin' Up! order tonight and writing Thank You cards, I decided to have a look at a couple of card challenges. Earlier, my daughter had come over after her job training was done for the day. I got her doing some research on card challenges for me.

One of the sites, Pals Paper Arts, had a challenge ending at noon on Tuesday. I thought that would be a pretty tight deadline to meet since I had to work at 12:30 that day so I went looking elsewhere.

But I kept returning to the sketch that they had posted; it was unique and attention grabbing.

PPA225

I thought I'd give it one quick try before heading to bed.

Because I really didn't have an idea in mind other than the sketch, I searched online for a bit for some color inspiration. I didn't really find anything so instead I searched through my stash of designer papers.

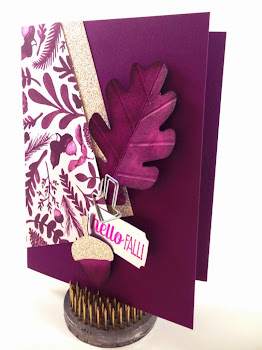
I knew I had found my muse when I got to the pack of Color Me Autumn. A beautiful pattern of fall leaves printed in Blackberry Bliss jumped out at me; I knew I could always count on Blackberry Bliss!


As simple as that, the wheels started turning. I grabbed some Blackberry Bliss card stock, some Silver Glimmer paper and some Bigz dies that I had received in my order just today. I was off to the races!

A little ink here, a die cut there, add a few Dimensionals and WOW! I knew Blackberry Bliss would never steer me wrong!

 Linda Vich Creates: My First Card Challenge


Now, if I can just post this to the challenge correctly, I'll be laughing! Keep your fingers crossed for me–the results will be in on Wednesday, October 29.
Built for Free Using: My Stampin Blog

Monday, October 27, 2014

In The Pink

I guess I was in the mood for pink when I got home from my Walmart shift yesterday! Once again, I was drawn to the Wondrous Wreath stamp set and framelits.

Linda Vich Creates: In The Pink

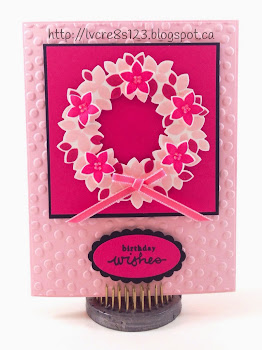
I wanted to use varying shades of pink with just a hint of black to add some pop. I chose Pink Pirouette for the card base and front matte, Rose Red and Melon Mambo for the wreath and Basic Black for the contrast. The Pink Pirouette matte uses the Decorative Dots Embossing Folder, one of my favorites.

Instead of berries on the wreath I used the little flowers, popped up with Dimensionals. The ribbon is the now retired Regal Rose 1/8" Taffeta Ribbon.

Here's the card from an angle.

Linda Vich Creates: In The Pink

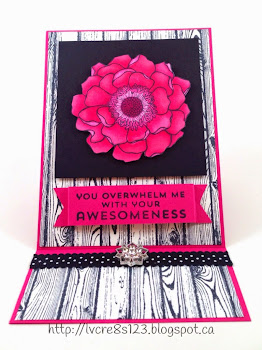
For my second card, I used Melon Mambo Blendabilities to color in the Blended Bloom stamp. I fussy cut the flower and mounted it with Dimensionals on Basic Black.

Linda Vich Creates: In The Pink


Linda Vich Creates: In The Pink

The easel card base and banner are from Melon Mambo. The matte is Whisper White stamped with the Hardwood stamp using Tuxedo Black Memento.

To complete the card, a strip of matching Hardwood was added, topped off with two now retired items: Basic Black 1/2" Scallop Dots Ribbon and Frosted Finishes Embellishments.
Here's a close up showing the Frosted Finishes card stop.

Linda Vich Creates: In The Pink

Which card do you like best? Let me know in the comments below!

Card #1
Built for Free Using: My Stampin Blog


Card #2
Built for Free Using: My Stampin Blog

Sunday, October 26, 2014

Blendabilities–Foray Into Foil

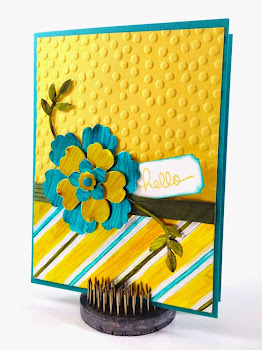
Linda Vich Creates: Blendabilities–Foray Into FoilBlendabilities can be used in many ways; they aren't just used for coloring stamped images. They can be used to color buttons, sequins, acetate, glass, rhinestones, pearls, muslin bags . . . the list goes on.

Today I used them to color foil. The markers give an interesting texture of their own by adding streaks and sometimes pools of color.

For this card I embossed a strip of foil using the Stylish Stripes Embossing Folder. I used Daffodil Delight, Coastal Cabana and Old Olive to color the stripes.

A matte of Daffoldil delight was embossed with the Decorative Dots Embossing Folder and the colored foil strip was adhered to it with Fuse Fast.

I'm used a variety of punches—Blossom, Pansy, Petite Petals and the flower from the now retired Itty Bitty Shapes Pack—to create the flower. The centre uses a Candy Dot from the Brights collection. I also used the Bird Builder a Punch for the leaves.

A Mossy Meadow ribbon was adhered to the matte and then the matte was mounted on the Bermuda Bay card base.

The flower was built with Dimensionals and adhered to the card front.the leaves were added using glue dots.

The sentiment comes from the Endless Birthday Wishes stamp set. It was stamped in Daffodil Delight on Whisper White and then punched with the Ticket Duo Builder Punch. Th edges were inked with Bermuda Bay.

Here's a close-up of the card:

Linda Vich Creates: Blendabilities–Foray Into Foil
Let me know in the comments below what you have colored with Blendabilities.

Built for Free Using: My Stampin Blog


Saturday, October 25, 2014

Seeing Stars

Linda Vich Creates: Seeing StarsAnother late night crafting session for me yesterday with not a lot to show for it. I played with a number of techniques but was not overly satisfied with my results. However, I did get an idea for the card that I'm sharing with you today, just before climbing into bed at 2:30 a.m!

My original conception of this was to be Gold with Mossy Meadow and Sahara Sand but I discovered that I did not have any Gold Glimmer paper. Horrors! (This will soon be rectified!)

I am very pleased with the final design but this is a very fragile card, due to both its dimensionality and the adhesive used.

As I often do when I'm not quite sure if a design will work the way I've envisioned it, I turned to scrap paper for a mock up. After cutting out the three outline stars as well as a card base and matte, I could quickly see that the star feature would work nicely. However, I wanted to cut a hole behind the stars so I could hang something for added pizazz.

To determine the size I would need, I turned to my punches. The 2 1/2" circle punch seemed right but then I realized that the short reach of the punch would not allow me to position into the centre of my matte and card front. Luckily, I had the Circles Collection Framelits and the 2 3/8" framelit worked well for me.

I attached the mock matte to the mock card front with temporary adhesive and ran them through the Big Shot, using the Magnetic Platform. I was able to centre the star feature over the opening and it looked great! For the hanging piece I decided to use one of the All Is Calm Snowflake Embellishments.

Next, I used my Color Coach to check which colors to use for both the card stock in the star feature and the card base and matte. Because I only had Silver Glimmer paper, not the gold that I had planned to use, I decided to use it with Silver Foil and Lost Lagoon. I found that the Basic Gray was dark enough to provide some nice contrast for the star feature and it worked well as a matte on top of Lost Lagoon.

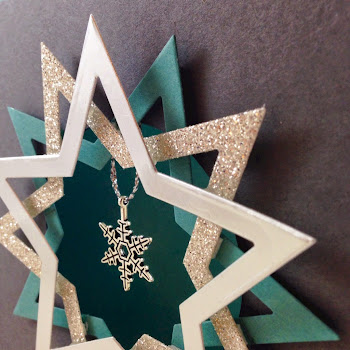
I then created the star feature for real by cutting three stars from the Silver Glimmer Paper, Silver Foil, and Lost Lagoon card stock.

After cutting a square card base and matte, I adhered the matte temporarily to the card front. I carefully positioned the circle framelit in the centre of the matte, eyeballing rather than measuring it. Because I was cutting through two layers of card stock, I ran the cutting sandwich back and forth through the Big Shot a few times to make sure they had cut both pieces. I then separated the pieces.

Next, I hung the snowflake charm from a piece of silver cord and taped it into place on the card front. I used Fast Fuse to adhere the matte, hiding the taped cord ends.

Next came the most difficult part—assembling the star feature with adhesive.

After deciding on the stacking order for the three stars, I took a reference picture with my iPhone after making sure the placement of all three layers was just right before disassembling it. I find this to be a handy method of remembering how something looked so that I can easily recreate it.

Using a pencil I drew temporary lines where the Glimmer Paper layer crossed the Lost Lagoon layer. I removed the Glimmer Paper and proceeded to cut tiny pieces of Dimensionals to fit between the lines and then carefully adhered the Glimmer Paper. I erased any pencil lines that still could be seen with my white eraser.

I really disliked having to cut up the Dimensionals so I decided to use rolled up glue dots to hold the Foil Paper in place. I positioned the layer and then carefully inserted small sticky balls of glue with tweezers and carefully squeezed the layers together. I also used rolled up glue dots to adhere the star feature to the front of the card.

My final step was to stamp the inside of the card, using sentiments from the Ornamental Pine stamp set. Because I wanted to avoid the hole in the middle of the card, I used my Stamp-a-ma-jig for careful stamp placement.

Here is a close-up of the card front so you can see the glimmer of the papers and the dimensionality of the star feature!

Linda Vich Creates: Seeing Stars

I know that the glue dots are not sticky enough to continuously hold the stars together. I think that a glue gun would be a better choice but I could think of no easy way to figure out where to put the glue on the stars when they are apart from each other!

So, I am calling on those of you reading this blog post to make suggestions for

  1. A better adhesive for adhering the layers yet giving dimensionality and
  2. A system for applying that adhesive!
Please leave your comments below as I really need your help with this! Thanks!

Built for Free Using: My Stampin Blog


Friday, October 24, 2014

Wreath Wrangling

I just can't stop making cards—the ideas just keep coming and I want to take advantage of this creative spurt! I was up till almost 2:00 a.m. making cards and didn't feel tired at all!

I have two cards for you today, and you should have figured out from the title of this post that the cards have wreaths!

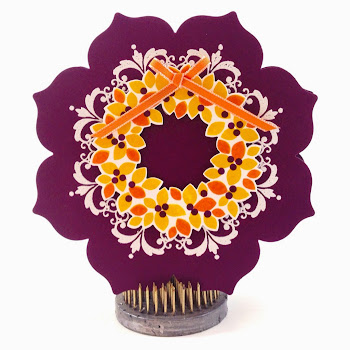
From my last play with the Wondrous Wreath, I have been planning to pair it with the Daydream Medallions and matching Floral Framelits. Tonight that design came together very quickly.

I chose my favorite, Blackberry Bliss for the card base and berries on the wreath. The wreath was stamped with Crushed Curry and Tangerine Tango. If you haven't already read, 5 Things I Learned While Working With The Wondrous Wreath Stamp Set And Framelits, be sure to check it for tips on working with the stamps and framelits.

To make the shaped card base, I first scored and folded my card stock and then, using the Magnetic Platform, I placed the largest Floral Framelit over the card with the top part above the fold about 1/8." This allowed the card to be cut as the flower shape but with the top still attached in two places.

I also cut a single floral shape using the same framelit. This was adhered to the card front so all the petals looked intact. I cut one smaller shape from Whisper White which was adhered to the inside of the card.

I stamped the Daydream Medallion with Versamark and heat embossed it using white embossing powder. The wreath was adhered with Dimensionals and a now retired Pumpkin Pie ribbon added.

Linda Vich Creates: Wreath Wrangling

Linda Vich Creates: Wreath Wrangling


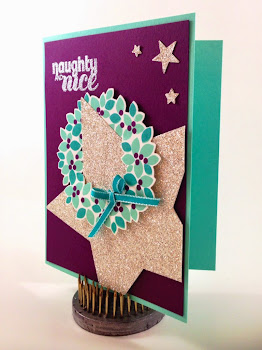
The second card I created was kind of a whimsical treatment of the wreath. After stamping with Coastal Cabana, Bermuda Bay, and Blackberry Bliss, the wreath was cut out and then thrown over a star cut from Silver Glimmer Paper. Of course, it wouldn't be complete without a coordinating bow!

The star was offset and cropped and it and the wreath were adhered with Dimensionals to the Blackberry Bliss matte. The sentiment comes from the Christmas Bliss stamp set and it was heat embossed in silver.

I felt that something was needed in the top right corner so I punched a star with a punch from the now retired Itty Bitty Shapes set of punches and then added two smaller ones punched with the Confetti Stars Punch.

All was adhered to a Coastal Cabana card base.

Linda Vich Creates: Wreath Wrangling

Linda Vich Creates: Wreath Wrangling


Drop me a comment below with a link to your own wreath creations—I'd love to see them!

Card #1

Built for Free Using: My Stampin Blog


Card #2

Built for Free Using: My Stampin Blog


Thursday, October 23, 2014

Card Inspiration—Color

Linda Vich Creates: Card Inspiration–ColorIn my job as cashier at Walmart, I occasionally get a moment between customers. It is then that my thoughts turn to possible card projects.

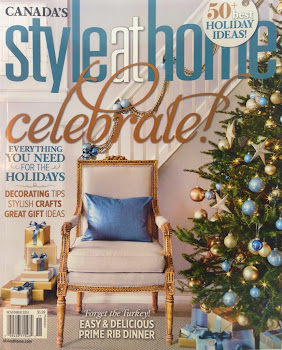
One of my favorite activities is to make a list of new color combos. I love color and can't imagine a world without it. I glean ideas from all sorts of things. A printed fabric, packaging, or like today, from a magazine.

I saw this cover for Style At Home magazine and right away I knew I wanted to use Lost Lagoon, Sahara Sand, Crumb Cake and Gold. I even jotted down a description of the card, complete with a rough sketch.

This card idea gnawed at me all through my shift until I could get home and bring it to fruition!


My apologies for the difference in color between the two card images—the second image is closest to how the card actually looks.

Linda Vich Creates: Card Inspiration–Color

Linda Vich Creates: Card Inspiration–Color

The card deviates only slightly from my design idea. I decided to use a smidge of Island Indigo to make the card pop. Also, I stamped on a die cut rather than straight on the card. I used two now retired stamp sets on this card: Million & One and En Francaise. I also used a punch from the retired set of punches, Itty Bitty Shapes.

Leave me a comment below to let me know where you find your best color ideas!

Built for Free Using: My Stampin Blog

Wednesday, October 22, 2014

Flower Patch Versatility

My goal for this year is to show my customers many ways to use a stamp set so that they get the most value for their money. At our stamping class last Friday, we worked with the Flower Patch stamps and matching framelits.

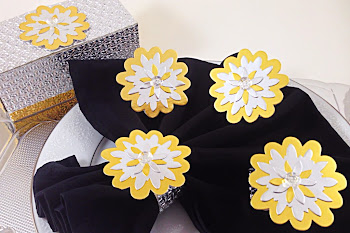
To showcase the stamps, I set up a display showing how the framelits could be utilized in home decor and entertaining. I created napkin rings with a matching box for storage and showed them in action with a place setting!

Linda Vich Creates: Flower Patch Versatility


Linda Vich Creates: Flower Patch Versatility

I reviewed the tips I had for working with photopolymer stamps that I shared in 3 Things To Know Before Using The Flower Patch Stamp Set.

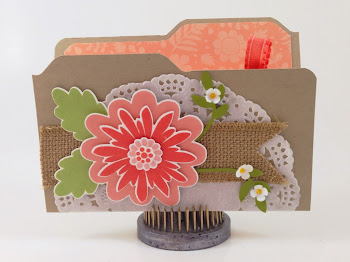
The first card was a File Folder card that I cased from Sharon Burkert. I demonstrated how to make the file folder card by using the Envelope Punch Board and described how the card was assembled.

Linda Vich Creates: Flower Patch Versatility

Linda Vich Creates: Flower Patch Versatility

The second card for the evening used the stamps to create a watercolor effect. This time we used a technique that I discovered on Elizabeth Price's blog.

The card that she created was absolutely lovely and I greatly enjoyed playing with her process of misting, stamping, and blotting to create a one-of-a-kind card!

Linda Vich Creates: Flower Patch Versatility

Linda Vich Creates: Flower Patch Versatility

Linda Vich Creates: Flower Patch Versatility


I have found the Flower Patch set to be truly versatile and an asset to my collection of stamps and framelits. Be sure to check out my other posts on using Flower Patch:
If you don't already have them, be sure to purchase them by clicking on the links below and choosing me as your demonstrator!


Napkin Rings

Built for Free Using: My Stampin Blog

Card #1

Built for Free Using: My Stampin Blog

Card #2

Built for Free Using: My Stampin Blog


Tuesday, October 21, 2014

5 Things I Learned While Working With The Wondrous Wreath Stamp Set And Framelits

Linda Vich Creates: 5 Things I Learned While Working With The Wondrous Wreath Stamp Set And FramelitsHave you ever admired a particular stamp technique and drooled over the many cards on Pinterest made using it? When there are so many wonderfully executed cards being displayed, surely the technique is an easy one, right? Not necessarily.

Ever since purchasing the Wondrous Wreath stamp set and matching framelits, I have been itching to try them out. I thought I'd sit down and knock off a few different card versions in no time.

Uh, no.

Stampin' Up! designed these stamps and framelits a little differently from other sets in an effort to make lining things up a little easier. Each of the wreath pieces and the matching framelits (except for the small one) have a tab that is supposed to be oriented up, or at least in the same direction for each piece used.

Since it can be a bit tricky to cut out the wreath and its centre, Stampin' Up! advises us to

  1. Use a framelit to cut out the centre of the wreath
  2. Stamp the wreath itself (and any of its additions . . . extra leaves, berries)
  3. Cut out the wreath itself.
My first problem occurred when I tried to stamp the wreath after removing its centre. The outer part of the framelit left an indent in the paper. Due to this indent, there was a bare spot where the stamp couldn't stamp. I was NOT a happy camper!

I researched online and found that some other demonstrators were also plagued with this indent. However, one enterprising demo, Diane J. Ouellette, found a work-around for this problem.

First she cut the wreath and its centre out of vellum card stock, being sure to mark the top of each piece. She kept the outer part of the vellum, rather than the wreath itself, and the centre piece.

To use these vellum pieces first she would stamp the wreath and any of its additions. Next she put the stamped wreath on the Magnetic Platform and arranged the vellum frame and inner piece over the wreath, using temporary adhesive to keep the pieces in place. Lastly she added both framelits and cut out the wreath. No more indent!

One problem solved! However, my second issue was the stamping itself.

When I stamped I made sure to apply the lessons I learned about photopolymer stamps from 3 Things To Know Before Using The Flower Patch Stamp Set. However, when I stamped the second set of leaves, they didn't look right! It took me a bit to realize that the extra leaves were meant to totally overlap some of the existing stamped leaves! Once I knew that, I had to practice, practice, practice to get the extra leaves placed correctly on my wreath. This is where scrap paper and a lot of patience can be a good friend!

One other frustrating problem occurred while using the Joy framelit included in the set. The two words, Joy and Noel are very intricate and thin. Removing them intact from the framelit can be a real challenge! In order to save my sanity, I resorted to putting a layer of waxed paper between the die and my glimmer paper. This enabled me to carefully remove my die cut word with the help of my paper piercer. I was able to get under the waxed paper and carefully push the glimmer paper out of the framelit.

So, if you are going to be working with the Wondrous Wreath stamp set and matching framelits, remember these things:
  1. Cut a vellum template to use with the stamps/framelits.
  2. Use the tips for photopolymer stamps I shared in 3 Things To Know Before Using The Flower Patch Stamp Set.
  3. Practice, practice, practice stamping and lining up the additional stamps for the wreath.
  4. Use a piece of waxed paper between your card stock and the intricate word dies.
  5. A ready supply of patience!
Now here are a few shots of my card from different angles and a couple of close ups to show you the sparkle of the Dazzling Diamonds Glimmer Paper and the twinkling Rhinestones.

Linda Vich Creates: 5 Things I Learned While Working With The Wondrous Wreath Stamp Set And Framelits

Linda Vich Creates: 5 Things I Learned While Working With The Wondrous Wreath Stamp Set And Framelits

Linda Vich Creates: 5 Things I Learned While Working With The Wondrous Wreath Stamp Set And Framelits

Linda Vich Creates: 5 Things I Learned While Working With The Wondrous Wreath Stamp Set And Framelits

I hope you will try working with the Wondrous Wreath set—it is truly beautiful! Drop me a comment below with a link to your creations.

Built for Free Using: My Stampin Blog


Monday, October 20, 2014

Sunday Stamping

Four Feathers Card - Sunday Stamping on Linda Vich Creates

Every person can use a spark of creativity from time to time, me included. Being a creative person does not necessarily mean that you have a non-ending supply of wonderful ideas so when I find something to help me trigger an idea, I latch onto it with both of my crafty hands!

Last night I decided to try the Sunday Stamping challenge that was mentioned on Stampin Connection, a forum for Stampin' Up! Demonstrators. It's not so much a challenge as a creative prompt that gets you creating using a particular stamp set.

Yesterday's prompt was to use the Four Feathers stamp set. This was a no-brainer for me—love that set! I've seen so many imaginative cards on Pinterest using that set. Of course, I wanted mine to be unique.

I started my creative process by playing with some scraps of paper—card stock in Basic Black, Basic Gray, and Smoky Slate as well as some Silver Foil and Silver Glimmer Paper. I used the Feathers Framelits to cut the two styles of feathers from each piece of paper.

I tried groupings of the various ones until I settled on Basic Black, Silver Glimmer, and Silver Foil. For the first two I chose the larger, straighter feather; for the foil I used the curved one.

To make the foil feather distinctive, I stamped with Versamark ink on the foil and heat embossed it using black embossing powder.

I decided to group the three feathers on top of Smoky Slate for the best contrast. I would mat it with Basic Gray and then mount it on the card base.

I reviewed the various Framelits I had to see if any lent themselves to providing a stylish backdrop for the feathers. I settled on using both the Circles Collection and the Starburst Framelits.

The Magnetic Platform and Big Shot made short work of cutting my mats. I used Dimensionals to adhere each mat and also at one end of each feather. At the top of each feather I used a Glue Dot. I finished off the feather arrangement by threading a Basic Black 1/8" Taffeta Ribbon through one of our Vintage Faceted Designer Buttons—just the thing I needed for a little more glitz!

Let me know what you think of my final creation in the comments below!

Built for Free Using: My Stampin Blog

Sunday, October 19, 2014

Empty Nesters—The Replay

If you read my post, Empty Nesters—NOT!, you'll know that we have had a full house for awhile now! However, in preparing for my daughter's jaw surgery, I took time off work so I could babysit my granddaughter, Raine, full time while my daughter recovered. Her and her boyfriend, Steffan, moved back to their own place during this time, because Courtney thought it would be better for Raine not to see her mother all drugged up after surgery, etc.

Courtney came through her surgery with flying colors!


Though she is still quite uncomfortable due to swelling and feeling hungry due to a liquid diet, she has been given the okay to eat what she likes.

In the meantime, Raine and I developed our own routine.

Raine has always been a joy to get up in the morning because she always has a big smile for you! When she first wakes up, she spends time by herself both babbling and practicing new words she has learned. Eventually, she lets you know that she is ready to get up for something to eat!

She has long been off her actual bottle and formula so the first thing she gets in the morning is her large sippy cup full of milk. She sits clutching that container like an adult addicted to his first cup of coffee of the day! Once that's done, she may play for awhile or more recently launch right into oatmeal and yogurt! She has started feeding herself so things can get quite messy!


Here she is handing me her cloth after wiping up her highchair!


Around 11:00 she starts rubbing her eyes so it's time for a nap—usually 2 1/2 to 3 hours. This allows me some time to play in my craft room!

When she gets up again, it's time for some lunch and more play time. She loves playing with our two dogs and she is fascinated with Bailey's "necklace."

Another favorite activity is playing on Courtney's old keyboard. She likes to choose some of the autoplay selections with a catchy beat. She definitely has rhythm!

Missing Raine's #keyboard antics. #loveher #missher #sweetgirl #funny
At our supper time, she may have already had hers but will often sit in her highchair or with her grandpa at the table and try some of what we are having. She really enjoyed salmon and asparagus!


More play time after supper and time spent with Grandpa outside. A bubble bath before her final milk of the day and then off to bed!

She is such a sweet little girl and we are already missing her as she has moved over to her other Grandma's house for a few days stay before returning home to Mommy and Daddy.

The house is awfully quiet again.


Tuesday, October 14, 2014

Blog Changes and Stampin' Up! Weekly Deals

Wow! Did the weekend go fast or what? Here it is already Tuesday and time for the Weekly Deals.
As you may have noticed, I've been making some changes to the blog. These changes are to help stampers like you find the information you want quickly!

Several important items can be found by scrolling the sidebar, under my picture. First you will find links that allow you to subscribe to my blog, either through email or via a RSS blog reader. You may also follow me on Facebook and Pinterest.


Next you will find a scrolling view of the Weekly Deals. These will get updated automatically every Tuesday so you can always be sure they are the latest deals. If you'd like a PDF copy of the deals, click the Supply List link on the left below the scrolling images. Clicking on a particular image will take you to the Stampin' Up storefront where you can create an account to be able to shop online. Be sure to choose me as your Demonstrator if you do so!

Below the Weekly Deals are links to the PDF versions of the current catalogs.
Paper Pumpkin is next, allowing you to subscribe or edit your current subscription. This is followed by a link to the Stampin' Up! Clearance Rack—a place you should check regularly for some great deals!

Next up is a Labels Cloud. This is arranged in alphabetic order according to the labels or keywords that I assign to each blog post. Labels that are bonded and/or enlarged are assigned more frequently. Clicking on a label will bring up search results of all blog posts containing those labels.
If you prefer, you may browse the Blog Archive and select articles from there.

With respect to my blog posts themselves, below each blog post title are social media buttons allowing you to pass on my blog posts to others. If you find a photo of a project that you would like to pin to Pinterest, first make sure you are viewing a single blog post rather than simply scrolling down the blog itself, and then mouseover the photo you wish to pin and you will be presented with a Pin It button. The description of the pin will contain my blog title and the title of the particular article you are viewing. Edit the description to describe the pin more fully.

One last change. For each project that I showcase on my blog, I will present the Stampin' Up! products that I used in table form, complete with name, picture, and price. Each is linked to the Stampin' Up! Storefront, allowing you to shop online. Please remember to choose me as your Demonstrator! In addition, you may click the Supply List to download a PDF of the products you need to make the project yourself.

If you have any questions or concerns about the changes I have made, please leave me a comment below. Comments are now functional!

Thursday, October 2, 2014

Holiday Home For All Seasons

THe card I'll be showing you today is the last of the cards that I created while attending the Creative Gathering in Friedensfeld. This card took me practically an entire day to create! Remember, I am a slow card maker because I like to try out several variations before settling on the final look for a card.

This card in particular used a lot of different techniques so I got to play a lot! For me, it's all in the "journey" (though the destination can be pretty good, too!).


As I set out to design this card, I knew the following:


  • I wanted to make a Screen Divider card.
  • I wanted to use the Home For The Holidays stamp set.
  • I wanted to use the 2014-2016 In Colors.

  • I followed the video tutorial by fellow demonstrator, Dawn Olchefske, to make the basic card base. Instead of Whisper White, I decided on Crumb Cake as a good neutral color to go with the In Colors.

    After preparing the base by punching with the Decorative Label punch, I used a non Stampin' Up! border punch, Swiss Cheese, to punch the top. I then used Baked Brown Sugar to ink all the card edges, including the card front.

    I made the decision to take a Four Seasons approach to the card because of the four panels to decorate. I then cut the four colored panels, for the inside of the card, from Blackberry Bliss, Lost Lagoon, Mossy Meadow and Hello Honey. I decided that I would order the panels as Winter, Spring, Summer, and Fall.
    I also cut the smaller pieces from Whisper White to go on each matte and figured out how best to arrange stamps on each panel. Because they were quite narrow, there was not much room to create a yard for each home so the focus would need to involve the background for each.

    I stamped all three houses on scraps of Whisper White, stamping the smallest house twice. It would be used at each end of the card to maintain consistency. I used the Blendabilities markers to color in each house, choosing colors to complement each background I would use.

    After using the Big Shot and the Magnetic Platform with the Holiday Houses Framelits, I used a Black Stampin Marker to touch up the edges of each house outline.

    Next, I created the backgrounds for each panel, varying the horizon line each time for interest.
    For Winter, I I masked the horizon and then sponged on the retired Bashful Blue for the sky. I then tore strips of Whisper White to form snow drifts and topped them with glue and glitter. I stamped an evergreen tree and a snowman in the yard.

    Spring allowed me to use my clouds template (four scalloped circles glued together) with some Bashful Blue to create the sky. Old Olive and Mossy Meadow created the lawn. A bare tree was stamped and leaves added to it using a Pear Pizzazz Stampin Marker.

    Summer was created by sponging a sky with Midnight Muse and a lawn of Old Olive and Mossy Meadow. Stars were added to the sky using Stickles. An evergreen tree was stamped in the yard.

    Fall had a beautiful sunset sky sponged using Perfect Plum, Rose Red, Tangerine Tango and Crushed Curry. The lawn was again created with Old Olive and Mossy Meadow. A bare tree was added to complete the yard.

    All four season scenes were mounted on their colored mattes and adhered to the four panels of the card. Fast Fuse made this a quick and easy job!

    I used a memento ink to stamp the sunburst from Kinda Eclectic on the bottom front of the card. The small house was stamped on Crumb Cake and die cut and then mounted on Dimensionals on top of the sunburst.
    The sentiment was also stamped on Crumb Cake and die cut using the arrow from the On Film Framelits and adhered to the top of the card. A Blackberry Bliss ribbon was used to close the card.

    Though this card may have taken a long time to plan and create, it gave me a lot of joy in making it! Stay tuned to the blog to see the remake of this card that I will be teaching to my Stampin' Up! Card group!


    Built for Free Using: My Stampin Blog


    Wednesday, October 1, 2014

    Stamp, Stock, and Save!

    In honor of World Card Making Day, which is Saturday, October 4, Stampin' Up! is offering you a chance to stock up and save on selected stamps, card stock collections and ink pads!

    You have only until October 6 to take advantage of these prices so don't miss out!

    To see a complete listing of what is available, click on the image below.