Showing posts with label all is calm designer paper. Show all posts

Monday, June 12, 2017

Gold Dipped Daisies

Linda Vich Creates: Gold Dipped Daisies. Dramatic mix of black and gold on this card that features the Daisy Punch.
On the weekend, I had some free moments at my job to brainstorm card ideas. I came up with a couple for using with the Daisy and couldn't wait to try them today! My first idea didn't work quite the way I wanted so I went on to the second idea.

I started by stamping a 4.25 x 5.5" Basic Black matte using the Diagonal Stripe stamp and Versamark and then heat embossed it with Gold Stampin' Emboss Powder. I really liked that effect!

Using the Daisy Punch, I punched six daisies from Basic Black. I also punched out six of the medium size blossom on the now retired Blossom Bunch Punch. I used a sponge dauber to dab Versamark on the ends of each daisy petal and embossed with gold. After using my Heartfelt Creations Deluxe Flower Shaping Kit to shape the small blossom punches, I stamped them with Versamark and embossed the whole blossom, one half at a time, with gold. AMAZING!

I adhered two daisies together and then two of the gold blossoms. A Dimensional adhered the gold blossom to the daisy. This was repeated to create two more flowers. I then colored a Clear Faceted Gem with a black Sharpie and adhered it in the centres of each daisy. Wow!

Next, I cut a strip of Gold Foil and stamped the sentiment with Jet Black Stazon using my MISTI to ensure a clean stamp on a slippery surface. I then used the Scalloped Tag Topper Punch to punch each end. A gold Sharpie was used to ink the edges so that the lighter core of the paper wouldn't show.

I threaded four strands of Basic Black Solid Baker's Twine through the openings in the tag and applied Mini Dimensionals to the back of it. I also taped the twine on the back to prevent the tag from sliding around. The tag was placed at the bottom of the striped embossed matte and the ends of the twine were taped to the back. The matte was then adhered to a 4.75 x 6" Basic Black card front.

The daisies were adhered to the card front using Dimensionals.

For inside the card, a Very Vanilla matte was stamped with the smaller daisy and stem and embossed with gold to complete the card.

Linda Vich Creates: Gold Dipped Daisies. Dramatic mix of black and gold on this card that features the Daisy Punch.

Linda Vich Creates: Gold Dipped Daisies. Dramatic mix of black and gold on this card that features the Daisy Punch.

Linda Vich Creates: Gold Dipped Daisies. Dramatic mix of black and gold on this card that features the Daisy Punch.

I must say that I am LOVING this card! It turned out even better than I imagined that it would! Unfortunately, the photos do not do this card justice. It is so difficult to get good pictures when you use foil on your cards!

Hope you liked my card anyway!


Tuesday, November 11, 2014

It's All About The Sparkle

Mojo Monday definitely is living up to its name for me! Did a quick review of the various Monday challenges and fell in love with this sketch.


I knew just what I wanted to do with it, other than picking the designer paper and deciding which card stock to use for the base and which for the matte. I also tried several different ribbon choices until I felt I had the best one. The card came together quickly after these decisions.


Linda Vich Creates: It's All About The Sparkle

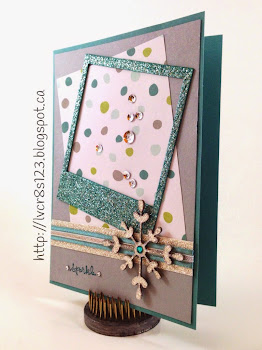
I started with a Lost Lagoon card base of 5 x 7." I cut a matte from Smoky Slate and a piece of All Is Calm Designer paper (love that stuff!).

I used the On Film framelits to cut a polaroid frame from Silver Glimmer paper. I also cut a 3/4" strip and a snowflake from the Glimmer paper. The snowflake is from the Snowflake Card Thinlits Dies, a beautiful set of framelits.

Because I found the frame and snowflake to be so flimsy, I also cut two snowflakes and two frames from Kraft card stock. I glued the two duplicate Kraft die cuts together and then glued the Glimmer paper die cuts on top. In retrospect, I should have cut the duplicates from Smoky Slate card stock instead of Kraft; because you could see some of the edge of the Kraft, I had to color it using a Smoky Slate Blendabilities marker.

I colored the frame using the darkest Coastal Cabana Blendabilities. I love how you can easily change the color of the Glimmer paper by using the Blendabilities and you still get that great glittery effect!

Look at that wonderful sparkle!

Linda Vich Creates: It's All About The Sparkle

I adhered the both Designer paper and the frame to the Smoky Gray matte. I then added the strip of Glimmer paper layered with first Lost Lagoon Ribbon and finally by Silver 1/8" Ribbon. I then adhered the matte to the card front.

I dropped a smattering of All Is Calm silver sequins within the polaroid frame, being sure I had an odd number. I find that dropping sequins from a height above the paper surface gives me a good random pattern, better than what I could come up with myself! I snapped a picture with my camera just to be on the safe side, and then adhered the sequins with a bit of Crystal Effects.

I adhered the snowflake and then added a rhinestone which I had colored with the Coastal Cabana Blendabilities marker.

Linda Vich Creates: It's All About The Sparkle

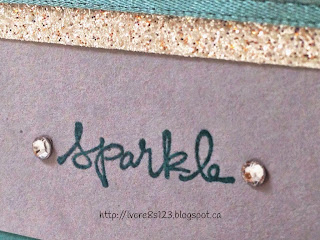
I chose the sentiment from the Good Greetings Hostess stamp set. I inked it first with Versamark and then Bermuda Bay before stamping it on the bottom left of the matte. I heat embossed it with clear embossing powder. I find that the new stamp pads dry too quickly to emboss well so I use a layer of Versamark and then the regular ink so that the stamped image catches more of the embossing powder.

The final touch was to add two small rhinestones on either side of the sentiment.

Linda Vich Creates: It's All About The Sparkle


I just love all the sparkles on this card–the frame, the snowflake, the sequins, the ribbon and the rhinestones bracketing the sentiment! Hope you like it too!

Linda Vich Creates: It's All About The Sparkle


Built for Free Using: My Stampin Blog