Showing posts with label misti. Show all posts

Thursday, October 5, 2017

Thankful Vintage Leaves

Linda Vich Creates: Thankful Vintage Leaves. A non-traditional Night of Navy color scheme used for this fall card that showcases Vintage Leaves and the Layered Leaves embossing folder.
In creating today's card, I had planned to use a new technique but unfortunately, the technique did not produce the results that I wanted so I will save that one for another day! Luckily, I still had the color scheme and rough card design so I set forth to create it.

I started by stamping three oak leaves and one poplar leaf, from the Vintage Leaves stamp set, on Thick Whisper White using Night of Navy. These were die cut using the coordinating framelits.

Next, I stamped the sentiment from the Painted Harvest stamp set on Gold Foil with Jet Black Stazon and then die cut it using the #3 oval from the Stitched Shapes Framelits.

After cutting a Night of Navy matte, I used the Layered Leaves Embossing Folder to dry emboss it. My plan was to adhere this matte to the Thick Whisper White card front but it didn't look right so I decided that a little bit of gold would help. Instead of using a large piece of Gold Foil when only a tiny edge of it would be seen, I decided to use a trick that I learned.

I cut a second matte from Thick Whisper White and then dragged my Versamark along the edges. I heat embossed the edges using Gold Stampin' Emboss Powder. Now, when I placed my embossed matte on top, my design looked better but it still needed something else. While I thought about it, I adhered the embossed matte to the one with the gold edges and then tied a length of the Night of Navy Crinkled Seam Binding Ribbon around both mattes.

The three oak leaves were adhered using Dimensionals and a little bit of liquid adhesive. The gold oval was adhered over the leaves with the poplar leaf adhered on top of that. It was then that I realized that I had forgot to add some flecks of gold with my Gold Wink of Stella! Too late now.

After finishing with my mattes and sentiments, I decided to stamp leaves around the edge of the card front. With the mattes then adhered with Dimensionals, the card design was perfect!

Linda Vich Creates: Thankful Vintage Leaves. A non-traditional Night of Navy color scheme used for this fall card that showcases Vintage Leaves and the Layered Leaves embossing folder.
The Whisper White card front stamped

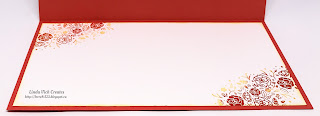
I stamped three offset oak leaves on the inside of the card and called it done!

Linda Vich Creates: Thankful Vintage Leaves. A non-traditional Night of Navy color scheme used for this fall card that showcases Vintage Leaves and the Layered Leaves embossing folder.

Linda Vich Creates: Thankful Vintage Leaves. A non-traditional Night of Navy color scheme used for this fall card that showcases Vintage Leaves and the Layered Leaves embossing folder.

I'm thrilled with how this card turned out! Love the navy and gold together. And what's not to like about leaves?

Hope YOU like my card! Would love to hear from you in the comments below!


Saturday, August 5, 2017

Dahlia Up Close

Linda Vich Creates: Dahlia Up Close. Rose Gold embossed dahlia is painted with shades of blue Color Burst watercolors on this lovely anniversary card.
How about something totally different?

Come on now, admit it. Even if you are a Stampin' Up! demonstrator, you have one or two other craft products lying around that you use from time to time! Let's face it–we are crafty individuals or we would never have got involved with Stampin' Up! in the first place!

I have soooooooooooooo many crafting tools and media that sometimes I have to take a break from crafting with Stampin' Up! to play with my other stuff! Or, I combine it with Stampin' Up! to get the best of BOTH worlds like I have done with this card!

Today's card is one I created for my brother and his wife for their anniversary. It is CASEd from a card by Jenny Lee Yamasaki.

I started by stamping the Dahlia Up Close stamp from The Ton on watercolor paper using Versamark using my MISTI after first using my Embossing Buddy. I then heat embossed it with Rose Gold Embossing Powder.

Next, I gathered together a few of my Color Burst colors in blue: Cerulean Blue, Ultramarine Blue, Indigo and Turquoise. I tapped a little of each powder in a watercolor palette I had and then wet a #4 watercolor brush and dipped into the Cerulean Powder and changed it to liquid watercolor.

I painted this over most of the flower and then, painting spots of each of the other colors, I added strategically to the image until I was pleased with the result. Sometimes, I used a paper towel to blot up some of the watercolor to make it paler. When I was finished, I heat set the image.

The next step is where I made a mistake but due to using my MISTI I was able to rectify it. After watercoloring and then drying my image, the watercolor paper was severely warped. I wanted to get it as flat as possible before adding it to my card front. To do this, I placed it face down on a piece of copy paper with another piece of copy paper on top and then an old pillowcase. I then proceeded to iron until the watercolor paper was flat.

I did end up with a flat paper, however, the ironing reheated my embossing and transferred it to the copy paper leaving behind a white outline where the embossing had been! Now this is actually a technique in itself and can be used to good effect but for this image I WANTED the Rose Gold embossing in place!

So, I went back to my MISTI and after using my Embossing Buddy, I re-inked the image with Versamark and heat embossed it AGAIN! Luckily, my stamp had remained in place in my MISTI and I was able to re-stamp the image. I was very careful to warm up the heat tool for awhile before doing the embossing to minimize warping.

Next, I cut a Pacific Point card front 4.75 x 6. I trimmed my painted matte to fit the card front but leave about a 3/4" strip of card front on the left side. I placed a strip of Burnished Rose Gold Foil Tape down the card front and then trimmed off the excess.

On a strip of vellum I stamped the sentiment from the Falling For You stamp set using Versamark and heat embossed it with the same Rose Gold embossing powder. I folded the strip around the edges of the painted matte and then taped the ends to the back. The matte was then adhered to the card front using Fast Fuse. To add a little more zing, several sequins were adhered to the card front using liquid adhesive.

A watercolor matte was cut for inside the card and the matching sentiment was stamped and heat embossed on it. I then used sponges to ink the edges in both Tempting Turquoise and Pacific Point. The matte was then adhered with Fast Fuse to complete the card.

Linda Vich Creates: Dahlia Up Close. Rose Gold embossed dahlia is painted with shades of blue Color Burst watercolors on this lovely anniversary card.

Linda Vich Creates: Dahlia Up Close. Rose Gold embossed dahlia is painted with shades of blue Color Burst watercolors on this lovely anniversary card.

Linda Vich Creates: Dahlia Up Close. Rose Gold embossed dahlia is painted with shades of blue Color Burst watercolors on this lovely anniversary card.

Linda Vich Creates: Dahlia Up Close. Rose Gold embossed dahlia is painted with shades of blue Color Burst watercolors on this lovely anniversary card.


Delighted is how I feel about how this card turned out! I have never "painted" with the Color Bursts before so it was a learning experience but one that ended well for me! I can't wait to give this to my brother and his wife to see their reaction!

I hope you have enjoyed my deviation from projects made strictly with Stampin' Up! materials! I think that we can only become more creative by exploring all brands of media and by appreciating the resulting art forms.

Thank you for visiting today!


Friday, August 4, 2017

30th Anniversary Card Using Foil Frenzy and Paisley Framelits

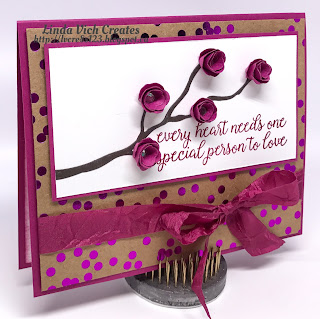
Linda Vich Creates: 30th Anniversary Card Using Foil Frenzy and Paisley Framelits. Rolled roses adorn an Early Espresso Branch on this card, accented with Foil Frenzy DSP and tied up with Berry Burst Crinkled Seam Binding Ribbon.
This July, my husband Bob and I celebrated our 30th anniversary–in this day and age, this is quite a milestone!

In creating his card, I cased a project by demonstrator Barbara Meyer. I cut a 4.75 x 6" card base from Berry Burst. After tying a bow using the luscious new Berry Burst Crinkled Seam Binding Ribbon around a matte from the Foil Frenzy DSP, the matte was adhered using Dimensionals.

On a strip of Whisper White, I stamped the sentiment from the Falling For You stamp set using Berry Burst. This strip was then matted with Berry Burst and adhered at the top of the card front using Dimensionals.

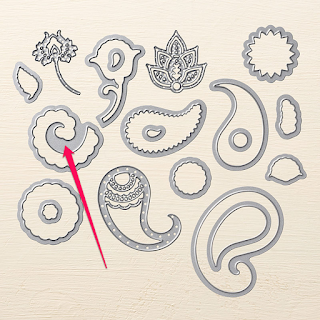
A branch was die cut from Early Espresso using the Seasonal Layers Thinlits and then the Paisley Framelits were used to die cut the rolled roses from Berry Burst. The image below shows the die used.

Photo shows Paisley Thinlits and the die used to create the rolled roses.

I was alerted to the possibility of creating these flowers after watching a video by fellow demonstrator Tan. Scroll down to see the little flowers on the makeup table. The video is here. Feel free to watch the entire video but the part about making the rolled rose flowers starts at about 12:43.

After die cutting five of the flowers, I took one of the die cuts, sprayed it lightly with water, and then used tweezers to roll it up. After releasing it from the tweezers, I rolled the remaining four flowers and then set them aside to dry.

I used drops of liquid adhesive to adhere the branch to the matte with the sentiment. To finish the flowers, I placed a glue dot on the end of each paper curl and adhered it to the bottom of each flower. Glue dots were used to adhere the blossoms to the branch. I added rhinestones to the centre of each blossom but they probably could have been omitted–they were hard to place inside the flowers and I'm not sure that they make that much of a difference.

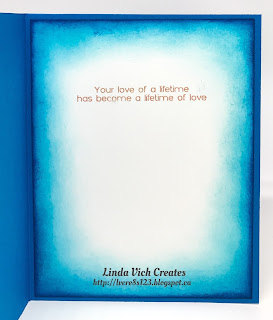
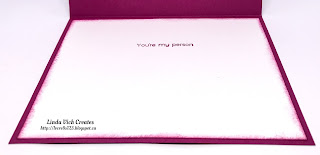
For inside the card, I simply stamped the matching sentiment on a Whisper White matte and inked the edges.

Linda Vich Creates: 30th Anniversary Card Using Foil Frenzy and Paisley Framelits. Rolled roses adorn an Early Espresso Branch on this card, accented with Foil Frenzy DSP and tied up with Berry Burst Crinkled Seam Binding Ribbon.

Linda Vich Creates: 30th Anniversary Card Using Foil Frenzy and Paisley Framelits. Rolled roses adorn an Early Espresso Branch on this card, accented with Foil Frenzy DSP and tied up with Berry Burst Crinkled Seam Binding Ribbon.

Linda Vich Creates: 30th Anniversary Card Using Foil Frenzy and Paisley Framelits. Rolled roses adorn an Early Espresso Branch on this card, accented with Foil Frenzy DSP and tied up with Berry Burst Crinkled Seam Binding Ribbon.

I am pleased with how this card turned out. Using the Foil Frenzy DSP really adds a punch to your card! I also enjoyed making the rolled roses and look forward to using these again soon. They aren't suitable for a mailed card, obviously, but they add such a nice touch to a card!

Thank you for stopping by today!


Saturday, July 8, 2017

Fabulous Flamingo Thank You

Linda Vich Creates: Fabulous Flamingo Thank You. Stylized Fabulous Flamingo card in rich browns with gold
Had another play with Fabulous Flamingo today. This time I wanted to create a more stylized flamingo rather than a realistic one.

After deciding that I wanted to create a matte covered with the palm leaves, I made the decision to use a 5 x7" card because otherwise, not a lot of the matte would be seen. I cut a card base and a 5 x 7" matte from Soft Suede.

Using Versamark, I stamped the palm leaf in a random pattern over the entire matte. I then heat embossed using Gold Stampin' Emboss Powder.

The flamingo was stamped on Very Vanilla using my MISTI since it is so suited to multi-step stamping. I stamped first with Early Espresso, then Sahara Sand 2X, and finally, Versamark for both the legs and the last body layer. I then heat embossed with gold.

The largest of the Lots of Labels Framelits was used to die cut the flamingo. Using Early Espresso, the sentiment was stamped on the bottom of the die cut. Three loose gold sequins were adhered next to the flamingo using liquid adhesive.

Linda Vich Creates: Fabulous Flamingo Thank You. Stylized Fabulous Flamingo card in rich browns with gold


I cut a 1" strip of Early Espresso and adhered it across the embossed matte using Fast Fuse. I topped the strip with a length of the now retired Gold Sequin Trim. The matte was then adhered to the card front using Fast Fuse. The die cut was adhered in the centre of the card front using Dimensionals.

For an inside matte for the card, I stamped the second part of the sentiment on Very Vanilla using Early Espresso and then used Versamark to stamp the palm leaf all around the edges of the matte. After embossing with gold, the matte was adhered inside the card.

Linda Vich Creates: Fabulous Flamingo Thank You. Stylized Fabulous Flamingo card in rich browns with gold

Linda Vich Creates: Fabulous Flamingo Thank You. Stylized Fabulous Flamingo card in rich browns with gold

Linda Vich Creates: Fabulous Flamingo Thank You. Stylized Fabulous Flamingo card in rich browns with gold
Close up of flamingo showing gold embossing  

Linda Vich Creates: Fabulous Flamingo Thank You. Stylized Fabulous Flamingo card in rich browns with gold

I'm not a "browns" person but I quite like how this turned out!


Thursday, July 6, 2017

Crafting Forever on Marbled Background

Linda Vich Creates: Crafting Forever on Marbled Background. The 2017-2019 In Colors are featured in this card set that uses Marbled and Crafting Forever.
How fun is it to play with something new? With so many products in the new catalog, it is hard to choose what to work with first! In the end, I chose Crafting Forever and the Marbled stamps with which to create a set of cards using our new In Colors.

I cut a standard card base and matte in each of the five new colors: Powder Pink, Fresh Fig, Lemon Lime Twist, Berry Burst and Tranquil Tide. I also cut a matte from Whisper White for the inside of the card.

Using my MISTI because it handles large background stamps so well, I stamped the Marbled stamp over each matte using the matching color.

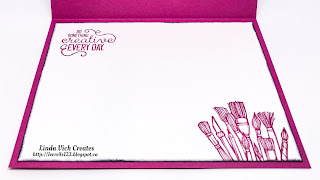
Setting these mattes aside, I stamped the pot of brushes in each color on Thick Whisper White and then die cut it using the #4 oval from the Stitched Shapes Framelits. I used the #7 scalloped oval from the Layering Ovals Framelits to cut mattes from Basic Black and then adhered each stamped image using liquid adhesive. On the Whisper White mattes, I stamped both the sentiment and the tops of the brushes in each of the colors.

I used a sponge dauber to ink the edges of the inside and outside mattes using Basic Black. After tying a length of Black Shimmer Ribbon around each colored matte, it was an easy matter to assemble the cards using Dimensionals and Fast Fuse.

Linda Vich Creates: Crafting Forever on Marbled Background. The 2017-2019 In Colors are featured in this card set that uses Marbled and Crafting Forever.

Linda Vich Creates: Crafting Forever on Marbled Background. The 2017-2019 In Colors are featured in this card set that uses Marbled and Crafting Forever.

Linda Vich Creates: Crafting Forever on Marbled Background. The 2017-2019 In Colors are featured in this card set that uses Marbled and Crafting Forever.

Linda Vich Creates: Crafting Forever on Marbled Background. The 2017-2019 In Colors are featured in this card set that uses Marbled and Crafting Forever.

Linda Vich Creates: Crafting Forever on Marbled Background. The 2017-2019 In Colors are featured in this card set that uses Marbled and Crafting Forever.

Linda Vich Creates: Crafting Forever on Marbled Background. The 2017-2019 In Colors are featured in this card set that uses Marbled and Crafting Forever.

Linda Vich Creates: Crafting Forever on Marbled Background. The 2017-2019 In Colors are featured in this card set that uses Marbled and Crafting Forever.

The Marbled stamp gives a luscious look when stamping with an ink that matches the card stock! I'm anxious to try it with embossing powder. And how fun is that Black Shimmer Ribbon? These photos don't show the shimmer but it is gorgeous!

I hope you've enjoyed my card set today. If you visit, I'd love you to leave me a comment below!


Saturday, July 1, 2017

Fabulous Flamingo Shadow Box Frame

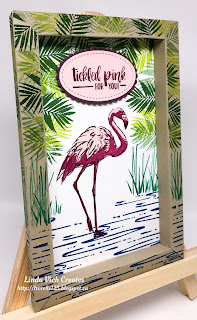
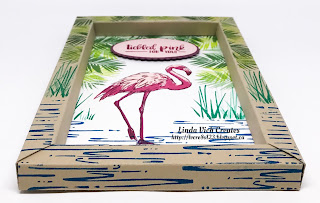
Linda Vich Creates: Fabulous Flamingo Shadow Box Frame. A vibrant shadow box frame showcases the Fabulous Flamingo stamp set.
It's a bit busy at our house right now. My daughter, her boyfriend, and her daughter Raine have moved in with us until after we return from vacation on August 13. This means that our household currently consists of four adults, one soon-to-be-four-year-old, three cats, one kitten and two dogs! Are we crazy? Probably!

Because of this, I'm surprised that I actually finished my project today–the one day off that I have for this Canada Day weekend :(

Today I tried two new things. I broke open my Fabulous Flamingo stamp set and I combined that with a new technique . . . a shadow box. And I did this with my granddaughter by my side, with her little table and chair and the stamping kit I had given her for Christmas. Today she was fascinated by cutting up paper into little tiny pieces! I think I'll get her started with mosaics . . . she's a natural!

Anyway, I had seen a few flamingo posts on Pinterest so I knew basically what I wanted to stamp but first I needed to learn how to create a shadow box. The best tutorial I found was on Joyce Rossiter's blog but the original directions came from Mary Ann Rossiter.

As I do with a lot of tutorials, I tried out the technique by creating it first with a piece of scrap paper. It was actually quite simple to create but I'm glad I tried it out first.

After figuring out the dimensions of the image that would be contained within the frame, I set to stamping. I used my MISTI since it is such a good tool for using with multi-step stamps.

I first tried a color combo of Powder Pink and Flirty Flamingo but in the end, I stamped my flamingo using first Berry Burst, Powder Pink, and finally Fresh Fig. When using the stamp set, I stamped according to the following image:


After stamping the flamingo on Whisper White, I used Pacific Point to stamp the water and then Emerald Envy for the reeds, stamping off to create some contrast.

I stamped the palm leaves around the top and sides of the matte using Lemon Lime Twist and Garden Green, again, stamping some off for added contrast and color.

With the matte completed, I started on the actual shadow box frame. Using a 8.5 x 11" piece of Crumb Cake, I scored each side at .5, 1, 1.5, and then 2". Turning the card stock so that the 11" piece was at the top, I scored at 2.5" but only down to 1". This was also done at 2.5" from the right side of the same piece. I then turned the paper 180° and repeated these two score lines.

I folded and burnished each fold line and then cut out a portion from each corner (see image #5 on Joyce Rossiter's blog).

Because I wanted to stamp on the edge of the frame, I needed to mask the fold I needed and stamp it before assembling the frame. I was able to stamp all but one side correctly and then discovered that for the last side, I stamped on the wrong fold! This meant that I had to remask all the other sides again so that I had stamped on two adjacent folds for each side. (After completing this project, I decided that the next shadow box I created would be stamped on three folds–inside, top, and outside because I really liked the look of the continuous stamping!)

With the stamping complete, I adhered my stamped matte to the inside panel of the frame and then applied Tear & Tape adhesive according to images #8 and 9 and assembled the frame.

The two long sides were adhered first and then the bottom and top. The top was the hardest to adhere correctly but I persevered.

To finish off the shadow box, I stamped the sentiment on Powder Pink card stock with Berry Burst and die cut it with the #2 stitched oval of the Stitched Shapes Framelits. It was matted on Fresh Fig die cut using the #3 oval in the Layering Ovals Framelits. It was adhered with Dimensionals.

Linda Vich Creates: Fabulous Flamingo Shadow Box Frame. A vibrant shadow box frame showcases the Fabulous Flamingo stamp set.

Linda Vich Creates: Fabulous Flamingo Shadow Box Frame. A vibrant shadow box frame showcases the Fabulous Flamingo stamp set.

Linda Vich Creates: Fabulous Flamingo Shadow Box Frame. A vibrant shadow box frame showcases the Fabulous Flamingo stamp set.

Linda Vich Creates: Fabulous Flamingo Shadow Box Frame. A vibrant shadow box frame showcases the Fabulous Flamingo stamp set.

I quite like how this project turned out! I already have ideas for another shadow box as well as ideas for different ways to stamp the flamingo.

Have you used the Fabulous Flamingo stamp set yet? Drop me a line below with a link to your project!


Wednesday, June 14, 2017

Fresh Spring Climbing Orchids

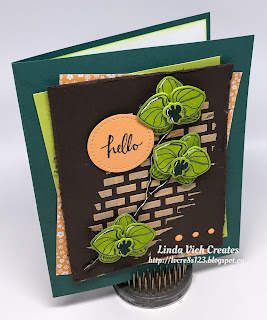
Linda Vich Creates: Fresh Spring Orchids. Lemon Lime Twist Climbing Orchids are featured on this card, displayed on a backdrop of Peekaboo Peach embossing paste bricks.
Edited: It appears that I am somewhat "orchid dyslexic" in that it was brought to my attention that my orchids were upside down! :(  This has been corrected. :)

Woke up with a Spring-like color scheme and card idea in my head this morning. Glad that I didn't have to work today and got to try it out!

I tried several new things on my card today but the first thing I tried was the new Embossing Paste because I knew I would need to let it dry before I could complete my card. I used the new Palette Knives to mix up some of the paste with Peekaboo Peach reinker and then used the brick design from the Pattern Party Decorative Masks to apply the paste to an Early Espresso matte. I set it aside to dry while I worked on the other parts of the card.

On Watercolor paper, I used my MISTI to stamp the two smaller petals and the centre from the Climbing Orchid stamp set using Tranquil Tide. I repeated the stamping three times and then heat set the ink so that I could then stamp it with Versamark. I heat embossed the images using Clear Stampin' Emboss Powder. I stamped enough petals for three complete blooms and then die cut them using the Orchid Builder Framelits.

I also stamped and clear embossed the largest complete orchid onto a Whisper White matte for inside the card. I used a sponge to sponge over and around the orchid using Lemon Lime Twist. I also sponged the edges of the matte before adhering it inside a 4.75 x 6" Tranquil Tide card base.

Using Lemon Lime Twist, I sponged color onto each piece of the orchids. I used Dimensionals to assemble each orchid.

The Seasonal Layers Thinlits were used to Idie cut a branch from Early Espresso and then I played with the arrangement of the orchid pieces on the branch. I trimmed a few of the branches to get the look and placement of the orchids that I wanted.

Once the embossing paste was dry–I left it for a couple of hours though it might have been dry before that– I used rolled up Glue Dots to adhere the branch to the Early Espresso matte. Dimensionals were used to adhere the orchids. Next, I used the now retired Distress Tool to distress the edges of the matte.

I cut two mattes of the same size as the Early Espresso one, a Lemon Lime Twist and a flowered paper from the now retired 2016-2018 In Color DSP Stack. These I stacked under the Early Espresso matte, adjusting them to be angled out from the top matte. Once I got them in the position I liked, I held the centre of the papers and added liquid adhesive in between the layers to adhere them together. They were then adhered to the card front using liquid adhesive. The Early Espresso matte was adhered on top of them using Dimensionals.

The sentiment was stamped with Early Espresso on Peekaboo Peach and then die cut with the #1 Circle from the Stitched Shapes Framelits. It was adhered to the card front using Dimensionals.

At the last minute, I decided to try adding shadows and highlights to the branch and the orchids, similar to what Vicky Papaioannou does (of course she does it much better than me!). I used an Early Espresso Stampin' Write Marker to add a shadow line to the branch and then used a Sharpie Extra Fine Point Poster Paint White Marker to add highlights to the branch and the orchids. Obviously, I need some practice with this but I don't think they look too bad!

Lastly, I added three Peekaboo Peach Enamel Shapes to the card front to complete the card. This creates a visual triangle of Peekaboo Peach that includes the patterned paper, the sentiment and the enamel shapes. This is an excellent design principle to use in cardmaking as well as scrapbooking and other layouts.

Linda Vich Creates: Fresh Spring Orchids. Lemon Lime Twist Climbing Orchids are featured on this card, displayed on a backdrop of Peekaboo Peach embossing paste bricks.

Linda Vich Creates: Fresh Spring Orchids. Lemon Lime Twist Climbing Orchids are featured on this card, displayed on a backdrop of Peekaboo Peach embossing paste bricks.

Linda Vich Creates: Fresh Spring Orchids. Lemon Lime Twist Climbing Orchids are featured on this card, displayed on a backdrop of Peekaboo Peach embossing paste bricks.

Though I do like the color scheme, I go back and forth between liking and not liking the card. What do you think? Does this color scheme and design work? Drop me a comment below to let me know what you think!

If you do like the color scheme, feel free to grab it for use in your own projects!

Linda Vich Creates: Fresh Spring Orchids. Lemon Lime Twist Climbing Orchids are featured on this card, displayed on a backdrop of Peekaboo Peach embossing paste bricks.


Sunday, June 11, 2017

Summer Daisy

Linda Vich Creates: Summer Daisy. Masking technique used to create two-toned letters on this Delightful Daisy summer card!
With the glorious weather lately, it's not hard to tell that summer is the topic on everyone's mind. Popular items through my till at Walmart include fans, air conditioners, pools, barbecues and patio furniture. Because of this, I thought it fitting then to create a summer card!

I started by selecting a piece of the Delightful Daisy DSP and then selected colors from within the pattern–Tranquil Tide and Calypso Coral–to use for a matte and card base. I also chose to use So Saffron and Calypso Coral for my letters. Though Daffodil Delight is supposed to be the yellow in the Delightful Daisy DSP, I found it to be too bright for the yellow of this particular pattern.

Next, I lined up the letter stamps from the Letters For You stamp set on my MISTI to spell SUMMER, leaving out the U and leaving a space for a second M.

I used washi tape to hold a piece of scrap paper across the letters as a mask so that I could ink up half of the letter at a time. I started with So Saffron and I inked up the letters first with Versamark and then the So Saffron so that it would ink up better. After carefully removing the mask, I stamped twice onto Watercolor Paper to get the color strength that I wanted. I then masked up the part of the letters I had stamped and then inked the remaining half of the letters with the Versamark and Calypso Coral and stamped two times.

And then, being the linear thinker that I am, I made my BIG mistake.

The MISTI is an amazing tool and is very useful for repeat stamping. What I should have done after stamping the So Saffron, was remove the piece of watercolor paper and replace it with another to stamp the second M. Then do the second masking, stamp, replace the watercolor paper and stamp again. This would have ensured that I had the division line between the So Saffron and the Calypso Coral in the exact same place on both M's.

But I didn't do that! :(

Instead, I took off the M letter stamp and put it in the spot where the second M would go and attempted to mask and stamp to get the colors in the right places.

NOT!

In the end, I measured carefully and was successful at stamping another M correctly and then I was able to die cut all the letters using the Large Letters Framelits. But it would have been so much easier just to replace the watercolor paper with another piece! Regardless, I got what I wanted in the end.

After die cutting the letters, I punched two daisies from Watercolor Paper using the Daisy Punch and then colored them using sponge daubers. I shaped them slightly with a bone folder and adhered them together using liquid adhesive. A Gold Faceted Gem was added to the centre but I decided it needed to be more yellow so I touched it up with a yellow Sharpie.

I cut the DSP and matted it onto Tranquil Tide. The letters were adhered using liquid adhesive and then the daisy with Dimensionals.

The entire matte was adhered to the Calypso Coral card front using Foam Adhesive Strips.

On a Whisper White matte, I used my MISTI to stamp the flowers from the Word Words stamp set onto a corner of the matte using So Saffron. This was repeated and then I selectively added Calypso Coral to some flowers on the stamp using a sponge dauber and stamped it again, twice. This procedure was repeated with the opposite corner of the matte. A sponge dauber was then used to ink all four edges of the matte with So Saffron before adhering the matte inside the card.

Linda Vich Creates: Summer Daisy. Masking technique used to create two-toned letters on this Delightful Daisy summer card!

Linda Vich Creates: Summer Daisy. Masking technique used to create two-toned letters on this Delightful Daisy summer card!

Linda Vich Creates: Summer Daisy. Masking technique used to create two-toned letters on this Delightful Daisy summer card!

Linda Vich Creates: Summer Daisy. Masking technique used to create two-toned letters on this Delightful Daisy summer card!


I love the combo of Tranquil Tide with the Calypso Coral and I really like this piece of the Delightful Daisy DSP and I hope to find a use for it again soon!


Thursday, June 8, 2017

Explosion Box For Baby

Linda Vich Creates: Explosion Box For Baby. A variety of baby stamp sets, both retired and new, were used to create this lovely project for a new baby boy!
One of my managers at work is expecting a baby any day now. I decided to try my hand at an explosion box to give to her.

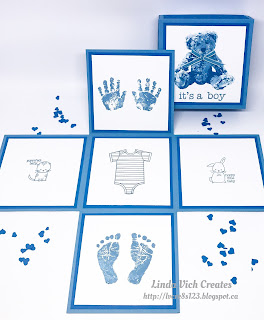
To create the box, I chose a 12 x 12" piece of Marina Mist card stock and scored each side at the 4" mark. I then cut up the score lines to cut off the "boxes" at each corner, leaving a shape like a plus sign. This would be used to form the base of the box.

For the lid of the box, I cut a piece of Marina Mist at 7 1/8 x 7 1/8" and scored each side at 1.5". I cut tabs on two sides of the piece and then used liquid adhesive to adhere them to form the lid.

I cut mattes from Pacific Point and Whisper White for each panel, inside and out, and both sides of the lid of the box. The Pacific Point mattes were adhered to the box using liquid adhesive and then I used various baby themed stamp sets, some new, some retired, to stamp the Whisper White panels using Marina Mist. The stamp sets I used were Baby Prints, Made With Love, Something For Baby, Baby Bear, and Moon Baby. These were then adhered on top of the Pacific Point mattes.

Linda Vich Creates: Explosion Box For Baby. A variety of baby stamp sets, both retired and new, were used to create this lovely project for a new baby boy!

Linda Vich Creates: Explosion Box For Baby. A variety of baby stamp sets, both retired and new, were used to create this lovely project for a new baby boy!

Linda Vich Creates: Explosion Box For Baby. A variety of baby stamp sets, both retired and new, were used to create this lovely project for a new baby boy!


For inside the box, I created a baby carriage, complete with baby! I referenced a video tutorial and downloaded a template from Steffi Von Stempelwiese. You should note that the video is in German and is actually for a basket that uses the same technique as the carriage but after downloading the template I was able to make sense of how the baby carriage was constructed.

I printed the template onto a 8.5 x 11" sheet of Pacific Point card stock and then scored and cut it out, using both my Stampin' Trimmer and scissors. I used the now retired Project Life Corner Rounder Punch to round each segment of the template that would be held together with a brad.

Once I had all the segments and the larger piece of the carriage from one side all piled up in order, I used my Paper Piercer to put a hole through all at once and then put in a now retired gold brad. I repeated this process with the other side to construct the carriage. (My one regret is not inking each piece before putting it together–it would have given it a better look.)

I used my 1" Circle Punch and retired 7/8" Scalloped Circle Punch to create the wheels of the carriage. For the handle, I cut a 1/2' strip of card stock, scored it and adhered it inside the carriage. I added a strip of Venetian Crochet Trim to the top of the carriage using Tear & Tape. A tiny bow was made from the retired 1/8" Marina Mist ribbon to adhere to the top of the carriage.

Linda Vich Creates: Explosion Box For Baby. A variety of baby stamp sets, both retired and new, were used to create this lovely project for a new baby boy!

Linda Vich Creates: Explosion Box For Baby. A variety of baby stamp sets, both retired and new, were used to create this lovely project for a new baby boy!


For the baby, I used the retired Baby Bumblebee stamp to stamp twice, once on watercolor paper and once on Whisper White. I used Marina Mist for one and Basic Black for the other. I then used a combination of Watercolor Pencils and Stampin' Write Markers together with an Aqua Painter to paint the baby's face on the watercolor paper. This was then cut out and glued onto the Marina Mist stamped piece, minus the wings and antennae.

To cover the baby, a piece of Marina Mist card stock was embossed with the Cable Knit Embossing Folder. The "blanket" was adhered over top of the baby using double Dimensionals to make the blanket look rounded.

Linda Vich Creates: Explosion Box For Baby. A variety of baby stamp sets, both retired and new, were used to create this lovely project for a new baby boy!

Linda Vich Creates: Explosion Box For Baby. A variety of baby stamp sets, both retired and new, were used to create this lovely project for a new baby boy!


I used the retired Confetti Hearts Border Punch to punch out Pacific Point strips to adhere around the lid of the box. The resulting confetti hearts were added inside the completed box.

Linda Vich Creates: Explosion Box For Baby. A variety of baby stamp sets, both retired and new, were used to create this lovely project for a new baby boy!

Linda Vich Creates: Explosion Box For Baby. A variety of baby stamp sets, both retired and new, were used to create this lovely project for a new baby boy!

Linda Vich Creates: Explosion Box For Baby. A variety of baby stamp sets, both retired and new, were used to create this lovely project for a new baby boy!


For my first explosion box, I think it turned out pretty well! One disappointment is that when I stamped the outside mattes, I didn't allow for the lid so you can't see the entire image until the lid is off the box :(  Oh, well! The next one I make will be better!

I think my manager will like it just fine, just the way it is!