Very soon we will bid farewell to a number of Stampin' Up! stamps, tools, colors and accessories. However, until June 2, you have the chance to buy retiring products for up to 50% off, while supplies last! Stampin' Up! has declared this, though:
*Note: Due to high demand for retiring stamps, we'll keep producing retiring stamps until May 26 (not accessories-accessories are only while supplies last).
You can access a PDF of the
Retiring Products. Don't wait!
SHOP NOW and don't be disappointed!
To view projects made with other retiring products you can view the following blog posts:
Stippled Blossoms Background Technique – Stippled Blossoms stamp set
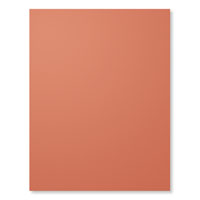
Remnants of Easter – Naturals White card stock, 2013-2015 In Color Designer Paper Stacks, Simply Pressed Clay, Buttons & Blossoms Simply Pressed Molds
My First Card Challenge – Bigz Autumn Accents
Here's Hoping It's Subtle – Dictionary Stamp
Love For The Lotus – Bloom With Kindness stamp set
Wreath Wrangling – Daydream Medallions stamp set
Watercolor Workout – Flower Frenzy Bigz L Die
My Least Favorite Card To Create – Love & Sympathy stamp set, Mossy Meadow 3/8" Stitched Ribbon
Stampin' Up! Weekly Deals, August 12-18 – Petite Purse Die
It's All About The Sparkle – On Film Framelits
Delightful Dahlias – Regarding Dahlias
Painted Blooms Valentine – Word Bubbles Framelits, Hearts Collection Framelits
Valentine Round Up – Hearts Collection Framelits
Starburst Meets Kinda Eclectic – Starburst Framelits
Hello Mojo! – Starburst Framelits, Sweet Taffy Designer Series Paper
Fusion Card Challenge – Hearts Collection Framelits
Also on the subject of goodbyes is the card I have for you today. An Assistant Manager at the Walmart where I work has just left us for greener pastures so I designed a card for him. The card uses three of the retiring products: Just Sayin' stamp set, Word Bubbles Framelits and Naturals White card stock.
Because I knew the card would be signed by several people, I decided to use the From The Herd stamp set.
I stamped onto the smooth side of a piece of Watercolor paper using Tuxedo Black Memento ink. I allowed it to dry thoroughly while I worked on the front of the card.
 |
| Using the MISTI to stamp my image. |
I knew that I wanted the stamp to show through an opening so I decided to use a framelit from the Circles Collection to cut a hole in a Real Red matte.
After cutting the hole, I used my MISTI to help with using the Hardwood stamp. Because the stamp was not big enough to stamp the entire matte at once, I needed to be very accurate at lining up my stamp.
If the Hardwood stamp had been photopolymer, this would not have been such a problem. My stamp had actually been a Wood Mount stamp that I had converted to Clear Mount using some of the retiring clear-mount cling foam (I think this may already be sold out, probably to new MISTI owners!). I stamped the stamp onto the sheet from my Stamp-a-ma-jig so that I could use it to line up my matte precisely for stamping.
 |
| Stamping the Hardwood on stamp on my Stamp-a-ma-jig sheet. |
I tested what ink would look best on the red to give a "red barn" feel to the matte. I tested Real Red, Cherry Cobbler and Blackberry Bliss. In the end, it was my favorite, Blackberry Bliss, that won out!
After stamping the matte, I inked the edges using a Sponge Dauber and then set it aside and used many reinkers and my Aqua Painter to color the stamped image. I found that by using an empty Aqua Painter and just dipping into water when needed, I could control how much water I added to my image.
I let the image dry naturally and then adhered it to a 5 x 7" Real Red card base, using Fuse Fast adhesive. I then used Dimensionals to mount the stamped matte on top of the card base, allowing the watercolored image to peek through the opening.
Using Memento ink with a stamp from Just Sayin', another retiring set, I stamped on Whisper White and then die cut using the also retiring Word Bubble Framelits. The sentiment was adhered on the card front with Dimensionals.
Inside the card, I cut and adhered two mattes, (so there would be plenty of room for people to sign the card) from the retiring Naturals White card stock.
For the final touch, I used Memento ink again to stamp one of the Just Sayin' stamp bubbles on Real Red card stock, however, before inking the stamp, I masked out the sentiment it contained using a piece of tape. After inking, I removed the tape and then stamped the word bubble. I then stamped the sentiment, "from the herd" into the stamped word bubble. The word bubble was then die cut using the coordinating framelit and adhered inside the card using Dimensionals, giving a "pop" of red to the inside. (Unfortunately, I had already written in the card before I photographed it so I don't have a photo of the inside.)
I am so glad that I have the retiring Word Bubbles Framelits as well as the Just Sayin' stamp set in my collection. There seems to be so many occasions when these can be used and they worked perfectly for my card! Be sure to get yours before they are gone!
Built for Free Using: My Stampin Blog

 I had to create a card for our neighbor's 65th birthday so it gave me a chance to break out my Crazy Birds stamps from Tim Holtz! As soon as I saw these birds on Pinterest, I knew I had to get them. They were just too cute!