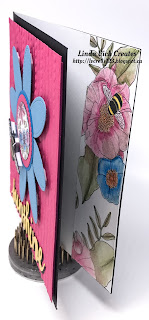
Showing posts with label watercolor pencils. Show all posts

Saturday, August 11, 2018

Part One: Edge Stamping With Blended Seasons

Linda Vich Creates: Part One: Edge Stamping With Blended Seasons. The Stamparatus is used for this Edge Stamping Technique which then uses Watercolor Pencils with the Blended Seasons Bundle to create this lovely card.
At times, I wrestle with my mojo but lately, idea after idea has been coming to me and all I need is time to craft those ideas into fruition!

Today's project is actually in two parts; I used Jennifer McGuire's wonderful Edge Stamping Trick to create two cards. One I will detail today, the other you will get to read about in tomorrow's post.

I had planned to snap photos of my use of the Stamparatus for this technique but realized, when I was coloring, that I hadn't! I plan to use this technique in the near future so I will try to remember to do it then.

Before trying this technique with the Stamparatus, you will need to watch Jennifer's video. She uses the MISTI for her stamp positioning tool and it is slightly larger than our Stamparatus.The technique is still possible though, due to the open sides of our Stamparatus, paper can easily extend out the side allowing for more flexibility when stamping.

To begin, I positioned two, 4 x 5.25" mattes of Thick Whisper White into the Stamparatus. I used the tool so that it opened toward the left. Both mattes were butted up against the hinge (left) side and against the bottom hinge. This left the top matte extending out the top slightly.

I added a magnet and then positioned my leaf cluster stamp so that it overlapped the corners of both mattes on the right side of the Stamparatus. Because the stamp would be offset, I used the piece of Stampin' Up Grid Paper that I had laminated, under the mattes so that I could easily clean up after stamping.

The stamp was inked with Stazon and then I stamped both mattes at the same time. I then removed the magnet, turned each matte around 180 degrees and replaced them in the Stamparatus and stamped again. This allowed me to stamp the two opposing corners of each matte.

I then removed the stamp, cleaned it, repositioned both my mattes and stamp to allow me to stamp the remaining two corners of each matte in the same manner.

When I was finished, I had two identical mattes, stamped in all four corners with leaf clusters. Though I only created two stamped mattes, this could easily be done for several cards at a time. Remember this when it comes time to create your Christmas cards!

I set one of the mattes aside for my second card. Once the ink was dry, I used Watercolor Pencils to add color to the leaves and used Wink of Stella to blend them. To do this I would take one pencil crayon and scribble (hard) in various areas of the leaf. This was repeated with all the colors I wanted to use. I then used the Wink of Stella to color over the colors, blending them together and giving them a wonderful sparkle! I so wish that you could see the lovely sparkle that Wink of Stella provides—it is magical!

After my leaves were colored, I stamped the sentiment on Merry Merlot and die cut it using the #3 oval in the Stitched Shapes Framelits. I used the #5 scalloped oval from the Layering Ovals to cut a matte from Copper Foil. (See my Numbered Die Sets.) While I was at it, I cut three copper leaves and a matte to go behind the colored leaves. The last die cut used the middle size of the stitched shapes from the Blended Seasons Bundle to cut a stitched shape from Merry Merlot.

Both liquid adhesive and Dimensionals were used to assemble the sentiment and mattes. Before adhering the colored leaves matte to the copper one, I used a Basic Black Stampin' Write Marker to run around the edge of the matte to mimic a very thin black matte. This made the matte "pop" more from the on top of the copper one. A length of the Copper Trim was added behind the matte before adhering to the card front.

Dimensionals were used to adhere the mattes to a 4.75 x 6" Merry Merlot card front and then the die cut leaves were adhered using a little bit of Glossy Accents.

For the matte inside the card, The Stamparatus was used in stamping the leaf cluster, repeatedly, on the Thick Whisper White matte. To do this, I inked up areas of the stamp with sponge daubers, and stamped, repeating the process to get the multicolored effect on the leaves. The edges of the matte were also sponged with inks before adhering inside the card.

Linda Vich Creates: Part One: Edge Stamping With Blended Seasons. The Stamparatus is used for this Edge Stamping Technique which then uses Watercolor Pencils with the Blended Seasons Bundle to create this lovely card.

Linda Vich Creates: Part One: Edge Stamping With Blended Seasons. The Stamparatus is used for this Edge Stamping Technique which then uses Watercolor Pencils with the Blended Seasons Bundle to create this lovely card.

Linda Vich Creates: Part One: Edge Stamping With Blended Seasons. The Stamparatus is used for this Edge Stamping Technique which then uses Watercolor Pencils with the Blended Seasons Bundle to create this lovely card.


I love how the Copper Foil pairs with the Merry Merlot!

Be sure to return tomorrow for Part Two to see the second card that I designed using the Edge Stamping Technique.


Product List


Saturday, June 24, 2017

June Wind Up and Projects

Linda Vich: June Wind Up and Projects. Balloons and a paper pieced stamp from Beautiful You produce a stunning layered card.
Friday night was our last stamping class until September. It was bittersweet because so many ladies, from our group, for various reasons, will not be returning to the group in the fall. However, we did have a lovely time by starting the night with goodies and socialization.

I was the lucky recipient of a beautiful card and a gift card to a local spa! It will be such a treat to look forward to using!

After gorging ourselves on various appetizers and desserts, it was a bit difficult to get going on crafting but we managed!

Our first card was a CASE from demonstrator Michelle Carter.

This card was not hard to make though it looks complicated!

A standard card base from Berry Burst was used as well as a small matte of 2.75 x 4". In addition to these, two Whisper White mattes were used, 2.5 x 3.75" and two 4 x 5.25". A piece of the Fresh Florals Designer Paper in Berry Burst was also cut 4 x 5.25" with it cut further at 2.25" to produce two strips.

The larger Whisper White matte was adhered to the card front using Fast Fuse. The larger strip of DSP was adhered onto the white matte.

The Beautiful You stamp set was used and the lady was stamped twice, using Basic Black–once onto the smallest Whisper White matte and once onto the smaller strip of DSP. The stamp on the DSP was fussy cut so that the dress and the hat were able to be glued onto the stamped image on the white card stock. This was then matted with the Berry Burst and adhered to the card front using Dimensionals.

From the remaining strip of DSP, two balloons were punched using the Balloon Bouquet Punch and three balloons were punched from scraps of Berry Burst card stock. Two card stock balloons were glued to the card front with one DSP balloon adhered over top using a Dimensional. The strings were drawn in using a fine point Sharpie.

Inside the card, the sentiment was stamped in Basic Black on a Whisper White matte and then two balloons, one from card stock and one from DSP were adhered, overlapping, on the side of the matte; strings were drawn in like before.

Linda Vich: June Wind Up and Projects. Balloons and a paper pieced stamp from Beautiful You produce a stunning layered card.

Linda Vich: June Wind Up and Projects. Balloons and a paper pieced stamp from Beautiful You produce a stunning layered card.

Linda Vich: June Wind Up and Projects. Balloons and a paper pieced stamp from Beautiful You produce a stunning layered card.


For the second card, the stampers had a choice of either a Sunset Silhouette or a Tropical card.

For the Sunset card, a standard card base of Pumpkin Pie was cut as well as a thin Basic Black matte and a Shimmery White matte.

The Embossing Buddy was used to remove any marks from touching the matte. Using Watercolor Pencils, bands of color were scribbled onto the Shimmery White matte using a vertical orientation. An Aqua Pen was then used to soften the pencil strokes into a watercolor wash. The heat tool was used to dry the matte and then, using the MISTI, the sentiment from the Colorful Seasons stamp set and the birds from the High Tide stamp set were stamped three times with Basic Black to produce a very black print.

After getting matte as flat as possible, the Adirondack chair was die cut from Basic Black using the Seasonal Layers Thinlits and then adhered to the matte using a sponge and liquid adhesive. The matte was then adhered to the Basic Black matte with Fast Fuse and then adhered to the card front using Dimensionals.

A leaf was stamped on the remaining Whisper White matte using Pumpkin Pie and then edges inked with Real Red before the matte was adhered inside the card.

Linda Vich: June Wind Up and Projects. Watercolor pencils are used to create a wash as the backdrop for this Sunset Silhouette, complete with an Adirondack chair die cut with the Seasonal Layers Thinlits.

Linda Vich: June Wind Up and Projects. Watercolor pencils are used to create a wash as the backdrop for this Sunset Silhouette, complete with an Adirondack chair die cut with the Seasonal Layers Thinlits.

Linda Vich: June Wind Up and Projects. Watercolor pencils are used to create a wash as the backdrop for this Sunset Silhouette, complete with an Adirondack chair die cut with the Seasonal Layers Thinlits.

Linda Vich: June Wind Up and Projects. Watercolor pencils are used to create a wash as the backdrop for this Sunset Silhouette, complete with an Adirondack chair die cut with the Seasonal Layers Thinlits.


For the Tropical card, a standard card base of Bermuda Bay was used with a thin Pacific Point matte as well as one from Shimmery White.

Like the previous version of the card, the Embossing Buddy was used to remove any marks from the Shimmery White matte and then Watercolor Pencils were used to lightly scribble alternating bands of Pacific Point and Bermuda Bay using a horizontal orientation this time. The Aqua Pen was used and then the heat tool was used to dry the matte. Using the MISTI, the sentiment was stamped in Versamark and heat embossed using White Stampin' Emboss Powder.

After getting matte as flat as possible, the Adirondack chair, branch and three flowers was die cut from Thick Whisper White using the Seasonal Layers Thinlits. The branch was trimmed in places and then the chair, branch and flowers were adhered to the matte using liquid adhesive. The watercolored piece was then matted with Pacific Point and then adhered to the Bermuda Bay card front using Dimensionals.

A flower was stamped on the remaining Whisper White matte using Bermuda Bay and the edges inked with Pacific Point before the matte was adhered inside the card.

Linda Vich: June Wind Up and Projects. Watercolor pencils are used to create a wash as the backdrop for this Tropical card, complete with an Adirondack chair and branch with blossoms die cut with the Seasonal Layers Thinlits.

Linda Vich: June Wind Up and Projects. Watercolor pencils are used to create a wash as the backdrop for this Tropical card, complete with an Adirondack chair and branch with blossoms die cut with the Seasonal Layers Thinlits.

Linda Vich: June Wind Up and Projects. Watercolor pencils are used to create a wash as the backdrop for this Tropical card, complete with an Adirondack chair and branch with blossoms die cut with the Seasonal Layers Thinlits.

Linda Vich: June Wind Up and Projects. Watercolor pencils are used to create a wash as the backdrop for this Tropical card, complete with an Adirondack chair and branch with blossoms die cut with the Seasonal Layers Thinlits.

Hopefully, everyone will enjoy a lovely summer if Mother Nature cooperates and I will prepare for September!


Thursday, March 30, 2017

Glitter Grid Birthday

Linda Vich Creates: Glitter Grid Birthday. Inside The Lines DSP takes centre stage on this cheerful birthday card that uses the Glitter Grid Technique.
As soon as I saw Tina Zinck's Glitter Grid Technique, I knew I would have to try it! I mean, who can resist Dazzling Diamonds Glitter? She has a great video tutorial for this so be sure to check it out.

I started by using my Watercolor Pencils to color in a piece of the Inside The Lines paper available only until tomorrow from Sale-A-Bration. On the back of the paper, I then drew three lines to section the paper and then subdivided them with vertical lines.

Versamark was used to ink up the entire surface of the paper and then it was sprinkled with Heat & Stick powder.

My heat tool was used to heat the paper until the powder melted and then I quickly coated it with Dazzling Diamonds glitter and heat set it. I then turned the paper upside down and burnished it with my hand to make sure the glitter was truly adhered to the Heat & Stick powder.

I used my Stampin' Trimmer to cut the paper up using the lines that had been drawn on the back of the paper. A matte was cut from Basic Black and I placed each piece of the cut up glitter panel on top, fitting the pieces together like a puzzle.

Once I was sure the pieces were in the correct places, I spread them out a little on the black matte so that black could be seen between the pieces. I used Snail Adhesive to adhere each section to the matte.

I ran a length of the Basic Black 3/8" Stitched Ribbon down the right side of the panel and secured it on the back with Fast Fuse. I then adhered the panel to a Bermuda Bay card base using Dimensionals. A bow was adhered to the ribbon using a Glue Dot.

Using Jet Black Stazon, the bee from the Dragonfly Dreams stamp set was stamped on both Daffodil Delight and Vellum. Each was fussy cut with the wings being cut off of the Daffodil Delight bee. A Basic Black Stampin' Write marker was used to edge both bees. Liquid adhesive was used to glue the bee's body onto the vellum one. Clear Wink of Stella added some nice glimmer. The bee was adhered to the card front using Foam Adhesive Strips.
The sentiment from the Rose Wonder stamp set was stamped with Versamark on Basic Black. It was heat embossed using White Stampin' Emboss Powder and then die cut using an oval from the Stitched Shapes Framelits. It was adhered to the card front using Dimensionals.

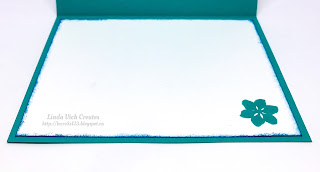
A Whisper White matte was cut for the inside of the card. Old Olive was sponged around the edges. A flower from the Inside The Lines DSP was colored with the Watercolor Pencils using the Clear Wink of Stella for blending. It was fussy cut and then adhered to the matte using liquid adhesive. The matte was adhered inside the card to complete it.

Linda Vich Creates: Glitter Grid Birthday. Inside The Lines DSP takes centre stage on this cheerful birthday card that uses the Glitter Grid Technique.

Linda Vich Creates: Glitter Grid Birthday. Inside The Lines DSP takes centre stage on this cheerful birthday card that uses the Glitter Grid Technique.

Linda Vich Creates: Glitter Grid Birthday. Inside The Lines DSP takes centre stage on this cheerful birthday card that uses the Glitter Grid Technique.

Linda Vich Creates: Glitter Grid Birthday. Inside The Lines DSP takes centre stage on this cheerful birthday card that uses the Glitter Grid Technique.


I hope you will try this Glitter Grid Technique using some of the Inside The Lines DSP or simply some other DSP cut up and used for this technique.


Friday, January 13, 2017

Hoping For Sunshine

Linda Vich Creates: Hoping For Sunshine. The Stitched Shapes Framelits are used to  create a brightly watercolored flower that adorns an embossed matte.
Tonight I was supposed to be teaching a stamping class but it ended up being postponed until Sunday so I got some play time!

With all the frigid temperatures we've been having, most people are longing for sunshine and warmer temperatures. I decided to make a card to reflect that hope.

With this one card, I was able to use a number of products and a try a few techniques.

I started by die cutting a small circle from a piece of the Inside The Lines paper. This designer paper is one of the FREE Sale-A-Bration products you can receive by placing a $60 order!

I used my new Watercolor Pencils to color it and blended with my Clear Wink of Stella pen. If you haven't yet purchased these, you should put them at the top of your list! They are wonderful! They can be used alone or with an Aqua Painter or Blender Pen or my personal favorite, Wink of Stella. My only complaint? I want more of them–in all of Stampin' Up's wonderful colors!

After coloring, I matted it with a Mambo Melon scalloped circle and then with a Pacific Point circle. I then die cut petals from Marina Mist using an oval from the Stitched Shapes Framelits. I used liquid adhesive to adhere them to the back of the circles.

Next I stamped a bee from the Dragonfly Dreams stamp set on watercolor paper using Basic Black Archival ink. I colored in the stripes of the bee with a watercolor pencil and then fussy cut the bee. Unfortunately, I cut off one of his antennas so I had to stamp another bee which I die cut with the Detailed Dragonfly Thinlits. I cut the wings off this one and glued it under the colored bee. I then used a Basic Black Stampin' Write Marker to trace the edges of the bee to cover up the white spots.

I cut a matte from Melon Mambo and embossed it with the Festive Embossing Folder. I used a piece of adhesive foam to adhere the matte to a Basic Black card front. I then adhered the flower to the matte using Dimensionals. The bee was added using Adhesive Strips.

I die cut the sentiment from both Daffodil Delight and Basic Black using a die from the Sunshine Wishes Thinlits. I gave the yellow piece a coat of Wink of Stella before using liquid adhesive to adhere the black behind the yellow, offset to create a shadow effect. The sentiment was then adhered to the card front.

I cut a Whisper White matte for inside the card and adhered a strip of the Inside The Lines paper down the right side. I used my Watercolor Pencils and Wink of Stella to color the strip to complete the card.

Linda Vich Creates: Hoping For Sunshine. The Stitched Shapes Framelits are used to  create a brightly watercolored flower that adorns an embossed matte.

Linda Vich Creates: Hoping For Sunshine. The Stitched Shapes Framelits are used to  create a brightly watercolored flower that adorns an embossed matte.

Linda Vich Creates: Hoping For Sunshine. The Stitched Shapes Framelits are used to  create a brightly watercolored flower that adorns an embossed matte.

Linda Vich Creates: Hoping For Sunshine. The Stitched Shapes Framelits are used to  create a brightly watercolored flower that adorns an embossed matte.

I'm hopeful that the warm thoughts I was thinking while creating this card will bring some warmer weather our way! What's the weather like where you are? Does it affect the type of cards you make?


Tuesday, December 20, 2016

Beautiful You

Linda Vich Creates: Beautiful You. Watercolor pencils blended with Clear Wink of Stella add flair to a stamp from the Beautiful You stamp set.
By now, you may have received your Stampin' Up! Occasions Catalog and Sale-a-Bration Brochure. If you have, you know that you are seriously going to want most of the items in the catalog! If you haven't yet received them, be prepared to be blown away!

I have had my demonstrator pre-order for some time now but have not had the opportunity to play with my new toys. If you live in Canada and would like to be able to order new goodies before anyone else, contact me today about becoming a Stampin' Up! Demonstrator!

Today's card uses one of the new stamp sets and it is probably going to be one of my favorites!

To begin, I stamped both the woman and the sentiment, from the Beautiful You stamp set, using Basic Black Archival ink on Watercolor paper. The stamped images were then die cut using the Stitched Shapes Framelits.

I used two of the new Watercolor Pencils to add a little color on the left side of the woman's dress and hat and then used my Clear Wink of Stella to work the color over the rest of the image, providing both shadow and highlight.

My first time using the Watercolor Pencils was definitely a delight! They go on easily and I love the shimmery blending when using the Wink of Stella with them! They can also be blended using the Aqua Painter or the Blender Pens.

A standard card base was cut from Emerald Envy and matte from Basic Black. I also cut a matte from a sheet of the Playful Palette DSP. The DSP was adhered to the Basic Black matte and then a length of the Sweet Sugarplum Glitter Ribbon was laid vertically and taped to the back of the matte. The matte was then adhered to the card front using Dimensionals.

The stitched squares were then layered on the card front using Dimensionals to complete the card.

Linda Vich Creates: Beautiful You. Watercolor pencils blended with Clear Wink of Stella add flair to a stamp from the Beautiful You stamp set.

I know I will be using this stamp set again soon, along with the Watercolor Pencils!