Showing posts with label scalloped tag topper punch. Show all posts

Monday, June 12, 2017

Gold Dipped Daisies

Linda Vich Creates: Gold Dipped Daisies. Dramatic mix of black and gold on this card that features the Daisy Punch.
On the weekend, I had some free moments at my job to brainstorm card ideas. I came up with a couple for using with the Daisy and couldn't wait to try them today! My first idea didn't work quite the way I wanted so I went on to the second idea.

I started by stamping a 4.25 x 5.5" Basic Black matte using the Diagonal Stripe stamp and Versamark and then heat embossed it with Gold Stampin' Emboss Powder. I really liked that effect!

Using the Daisy Punch, I punched six daisies from Basic Black. I also punched out six of the medium size blossom on the now retired Blossom Bunch Punch. I used a sponge dauber to dab Versamark on the ends of each daisy petal and embossed with gold. After using my Heartfelt Creations Deluxe Flower Shaping Kit to shape the small blossom punches, I stamped them with Versamark and embossed the whole blossom, one half at a time, with gold. AMAZING!

I adhered two daisies together and then two of the gold blossoms. A Dimensional adhered the gold blossom to the daisy. This was repeated to create two more flowers. I then colored a Clear Faceted Gem with a black Sharpie and adhered it in the centres of each daisy. Wow!

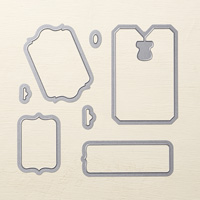
Next, I cut a strip of Gold Foil and stamped the sentiment with Jet Black Stazon using my MISTI to ensure a clean stamp on a slippery surface. I then used the Scalloped Tag Topper Punch to punch each end. A gold Sharpie was used to ink the edges so that the lighter core of the paper wouldn't show.

I threaded four strands of Basic Black Solid Baker's Twine through the openings in the tag and applied Mini Dimensionals to the back of it. I also taped the twine on the back to prevent the tag from sliding around. The tag was placed at the bottom of the striped embossed matte and the ends of the twine were taped to the back. The matte was then adhered to a 4.75 x 6" Basic Black card front.

The daisies were adhered to the card front using Dimensionals.

For inside the card, a Very Vanilla matte was stamped with the smaller daisy and stem and embossed with gold to complete the card.

Linda Vich Creates: Gold Dipped Daisies. Dramatic mix of black and gold on this card that features the Daisy Punch.

Linda Vich Creates: Gold Dipped Daisies. Dramatic mix of black and gold on this card that features the Daisy Punch.

Linda Vich Creates: Gold Dipped Daisies. Dramatic mix of black and gold on this card that features the Daisy Punch.

I must say that I am LOVING this card! It turned out even better than I imagined that it would! Unfortunately, the photos do not do this card justice. It is so difficult to get good pictures when you use foil on your cards!

Hope you liked my card anyway!


Wednesday, December 31, 2014

My 10 Favorite Cards From 2014

Can you believe that it is already the last day of the year? I know I can't! It seems that December and blogging don't work for me–only one blog post in December so I thought I better get another one in before 2015!
Anyway, I decided to round up my ten favorite cards to share with you. Click on each photo to be taken to the original article.

Enjoy and Happy New Year! See you in 2015.


Linda Vich Creates: My 10 Favorite Cards From 2014


Linda Vich Creates: My 10 Favorite Cards From 2014


Linda Vich Creates: My 10 Favorite Cards From 2014


Linda Vich Creates: My 10 Favorite Cards From 2014


Linda Vich Creates: My 10 Favorite Cards From 2014


Linda Vich Creates: My 10 Favorite Cards From 2014


Linda Vich Creates: My 10 Favorite Cards From 2014


Linda Vich Creates: My 10 Favorite Cards From 2014


Linda Vich Creates: My 10 Favorite Cards From 2014


Linda Vich Creates: My 10 Favorite Cards From 2014

Monday, September 29, 2014

Dream

I had plans to post this last night but apparently a tractor knocked over a hydro pole so we were without power from about 6:15 till 9:45! Needless to say, I didn't get to post before going to bed!

Inspiration for my card came from this card by Angie Leach:


I absolutely love the technique of using an embossing folder to stamp with—I have so many of them, it multiplies my stamping possibilities by quite a bit!

Basically, you use sponge daubers to apply ink to the top (raised portion) of the folder. Then, give it a few sprays of water with the mister and insert your paper (watercolor or Whisper White) into the folder and close it and smooth over the folder with your hand. I have seen a similar technique where you also run the folder through the BigShot to emboss as well as stamp!

This is the card I made:


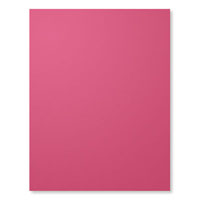
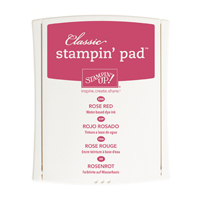
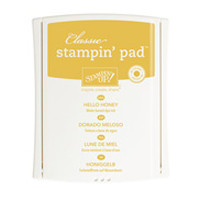
I used the Tim Holtz Honeycomb embossing folder and Rose Red, Hello Honey and Tangelo Twist inks.

I stamped the sentiment on Rose Red card stock with Memento Tuxedo Black using a stamp from the now retired, Loving Thoughts stamp set. I cut a tag using one of the Chalk Talk Framelits and then fancied it up by also punching each end with the Scalloped Tag Topper Punch. This produced a "ribbon slide." I also inked the tag with Rose Red ink.

After my inked paper was dry, the paper was cut to size. The tag was threaded onto a piece of Hello Honey ribbon, wrapped around the inked paper, and then the inked paper was adhered to a Hello Honey matte. This in turn was adhered to a Rose Red card base, using dimensionals.

The finishing touches were the rhinestones on the tag and a sprinkling of non Stampin' Up! silver sequins for added sparkle!

I hope you will try this technique for yourself!

Monday, July 28, 2014

Stampin' Up! Loot and an Anniversary Card

It was nice to chill out with my husband before supper and talk over how our days had gone. My feet definitely appreciated the soak in the water!

Feet in pool

I had had great plans for my day off, but I had to do a quick grocery shop BEFORE breakfast because we were out of orange juice! After breakfast, I was able to organize my loot from the Stampin' Up! Convention into the Krafts Inventory I use on my iPad. If you ever want to catalog your supplies (and I urge you to do so if only to calculate what they are worth) I highly recommend this database! It is very easy to use and you can tailor the records to the details you need eg. stamp name, price, tags (to make it easier to find what you need), photo, etc.

After cataloguing my supplies, I created a belated anniversary card for my husband. No, I didn't forget our anniversary (it was actually on Friday) but I just hadn't had time to make a card!
Luckily, I had a design in mind, using my new favorite stamp set, Kinda Eclectic.

Anniversary Card

I cut a standard card base from Blackberry Bliss Cardstock and a matte from Lost Lagoon. Using Blackberry Bliss ink I stamped the sentiment from the See Ya Later Alligator stamp set in the bottom right corner. The matte looked too plain so I used my piercing tool and one of the templates from the Essentials set to add a border.

I used my Scalloped Tag Topper Punch to create a ribbon slider and then heat embossed the slider using Gold Embossing Powder after first stamping the sun from Kinda Eclectic with Versamark ink.
I used one of the new Mini Metallic Clothespins to anchor a heart cut from Dazzling Diamonds to the slider. I also punched a smaller heart and colored it with my Blackberry Bliss Stampin Marker and attached it with Dimensionals to the larger heart.

Blackberry Bliss ribbon was threaded through the ribbon slider and fastened to the back of the Lost Lagoon matte. I adhered the matte to the card base using Dimensionals. To complete the card I added some rhinestones to the O's in the sentiment. Here are some close ups but they don't do justice to the Dazzling Diamonds paper or the rhinestones.

Card Detail

Card Detail

I'm pleased with how it turned out and my husband loved it, even if it was late!
After supper, I was able to photograph the stamp sets I received for free at the Convention—almost a $100 in total! The two sets underneath the others are from the new Holiday catalog (wait till you see it!) so I can only show you a portion of them.

Loot

I also scored a couple of paper packs, some Washi tape, an accessory pack for Stampin Up Project Life, and some of the new Mini Metallic Clothespins.

Free loot!

We also received a red iPad bag. Pretty nifty, huh? All in all, we scored a pretty nice haul of products, never mind what we were able to purchase from the new Holiday Catalogue! (Can't show you any of those products yet but I will say this, "YOU. WILL. LOVE. IT!")