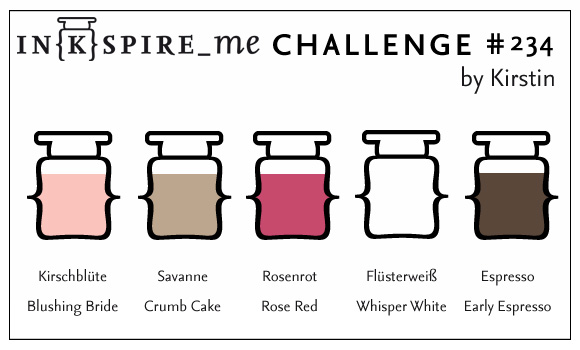
This morning I drew inspiration from the colors in the Inkspire_Me Challenge. The colors were lovely and coincided nicely with the Love Blossoms Designer Series Paper Stack. Of course they were also awesome colors for a valentine!
For this challenge, I knew I wanted to use the Cups & Kettle Framelits to create a card that represented a couple. To do this I wanted to use two cups facing each other with the steam wafting up to a heart above the cups.
The biggest challenge in creating this card was deciding on the patterned papers! Of course, all the papers in the Love Blossoms Designer Series Paper Stack coordinated but designing with patterns can be tricky. You have to choose colors and patterns wisely so that they don't overpower each other or look too busy. I finally decided on a Crumb Cake pattern for a strip at the bottom of the card and two Rose Red patterns for the cups.
I planned to divide the bottom and top by using a Blushing Bride ribbon from the Love Blossoms Embellishment Kit. This kit has all kinds of goodness in it! Satin ribbon, pearl trim, metallic doilies, sequins, glittered enamel dots as well as beautiful Rose Red bow clips!
For the upper part of the card, I needed to stamp on it so I would have chosen Whisper White but somehow all that bare whiteness was too much! That's when I got the idea to do a color wash on the background using Blushing Bride. This would give a lovely rest from the patterned paper while still providing some lovely texture.
I initially tried using the Watercolor Wash background stamp but it wasn't quite right. In the end, I decided to do a freehand wash so that I could control the amount of color I put onto the watercolor paper.
Using a flat paintbrush, I stroked on plain water to wet the watercolor paper. I then mixed clean water with some Blushing Bride reinker to create a very soft color and brushed it onto the paper. I used my heat tool to dry it and reshape it to its former flat state.
I used my heat tool to thoroughly dry the paper and then adhered a strip of Crumb Cake patterned paper to the bottom of it. I adhered a length of the ribbon over the top part of the patterned paper–it was starting to look really nice!
I used a cup die from the Cups & Kettle Framelits to die cut two cups, flipping one so that I had two cups that faced each other. I then also die cut some self-adhesive fun foam and adhered this to the back of each cup because I wanted added thickness for the cups. I used a sponge dauber and Early Espresso to ink all the edges to provide dimension and cover the white edges.
Using a Crumb Cake Stampin' Write Marker, I colored the modern heart from the A Nice Cuppa Stamp Set and stamped it at the top of the watercolor panel. I used the marker rather than the stamp pad because I wanted a looser looking, imperfect heart–one that could have been formed from steam perhaps?
At this point, I used foam tape to adhere the panel to a Crumb Cake card base. I chose the foam tape because I feel it works better with painted watercolor paper to keep it flat but popped up.
I cut a length of Metallic Gold Baker's Twine and unravelled it to get the gold thread. I placed a few glue dots on the spots that would be covered by the cups and then cut little pieces of the thread and stuck them down. Using Dimensionals, I adhered the cups and then played with the threads until they sort of stuck up like steam.
Using the banner die from the Large Numbers Framelits I cut a piece of watercolor paper. I gave it a Blushing Bride wash and dried it thoroughly. I then used Rose Red ink to stamp the sentiment. Because the sentiment stamp also contained a heart, I masked that with tape before inking and then removed it to stamp the sentiment itself. I inked the edges of the banner with Early Espresso and then adhered it across the two cups using Dimensionals.
I used the Confetti Hearts Border Punch to punch out hearts from both Crumb Cake and Rose Red card stock. I used glue to adhere them to the watercolor paper. My final task was to add little glimmer to the hearts by using my Clear Wink of Stella Glitter Brush.


9 comments:
Oh this is such a gorgeous card! Very good choice of the designerpaper, a perfect harmony! Thank you so much for playing Inkspire_me this week! Greetings from Bavaria, Kirstin
Wow! You put a lot of different techniques here again! I always forget about paper piecing - and it never fails to grab my attention when other people employ it, Linda! FABULOUS card design, right down to the metal unwoven threads for the steam! I guess it is that "golden" flavor you richly enjoy (pun intended LOL) - fabulous design, and a perfect take on the challenge! hugs, de
Thanks for the inspiration Kirstin!
Thanks Karen!
Thank you so much Donna! Have a great weekend!
Wonderful card! Love the tea cups and your card design. Thanks for joining us at Inkspire me. Marion
Thanks Marion!
The card is awesome and of detail. IT is amazing. Greatings from Doro
Thanks Doro!
Post a Comment