Our first project was a Valentine mailbox. We die cut two sheets of Sending Love DSP using the Baker's Box Thinlits, being sure to cut a slot in the top portion of one of the pieces.
Folding on all the score lines was somewhat difficult because patterned paper was being used but this was done and then the box was adhered together. The top flaps were punched with the 1/8" Circle Punch and then either a red or white ribbon was threaded through and tied into a bow.
Mini envelopes were die cut from both Real Red and Whisper White card stock and they were stamped with a variety of sentiments, lips, and hearts from the Sealed With Love stamp set. The envelopes were then glued shut.
One mini envelope was left open and a Love Note stamp was used on Whisper White card stock and die cut to form a ruffled note. This was placed in the open envelope and glued to the front of the mailbox. A heart die was used to cut two 3D hearts which were put on the sides of the mailbox.
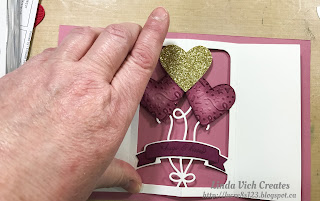
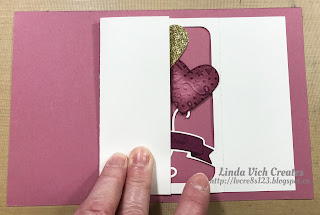
Our second project was a Valentine card that used a modified version of the Balloon Pop-Up Thinlits. In planning this card, I created a mock up using copy paper. This is a technique I use quite often when trying a new or finicky technique as a paper saving measure.
 |
| Mock up of inside of the card. |
The sentiment, from the Sealed With Love stamp set was stamped on Thick Whisper White and die cut using a square from the Stitched Shapes Framelits. A larger square was also die cut from Rich Razzleberry. A scalloped square was die cut from Gold Glimmer paper using the Layered Squares Framelits. These were then layered using Dimensionals.
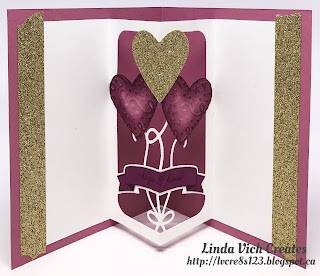
The pop-up section for the inside of the card was die cut from a 5 x 7.5" piece of Whisper White using the Balloon Pop-Up Framelits. Kay Kalthoff's video tutorial was helpful in setting up the die to cut the pop-up, especially in adding Sharpie marks to the die to line up the card stock properly on the Big Shot.
The pop-up piece was folded in half on the centre score line and then the side pieces were folded inward on their score lines. Using the MISTI, the banner from the Balloon Adventures stamp set was stamped on Rich Razzleberry in matching ink. The sentiment, from the Sealed With Love stamp set was curved to fit the banner and also stamped with Rich Razzleberry. The banner was fussy cut and adhered to the banner portion of the pop-up section.
insert photo
Removable adhesive was used on the punched hearts to position them over each of the balloons on the pop-up piece. Scissors were used to trim the excess from behind the hearts and then the hearts were secured permanently with liquid adhesive.
 |
| Photo shows balloon section trimmed for placement of heart. |
 |
| Photo shows back of pop-up after hearts are placed. Tracing the back of the hearts is helpful for glue placement. |
To tie in with the Glimmer balloon and the Glimmer scalloped square, Metallic Gold Washi Tape, from the 2016 Sale-A-Bration, was used on either side of the pop-up section.
Lastly, the layered sentiment piece was adhered to the card front to complete the card.
I hope you have enjoyed the Valentine projects from our Stamping Group. I can envision other projects that make use of a modified version of the Balloon Pop-Up Framelits in the future. Stay tuned!


2 comments:
You are always so creative and prolific, Linda! Your heart card is darling, and the goodie containers are fabulous! I love that you always use bright colors, and make everything feel so HAPPY! Hoping you are staying warm, my friend. hugs, de
So pretty!! Thank you for the tutorial also. I'm making this card for my two adult daughters for Valentine's this year!
Post a Comment