Wednesday, August 13, 2014

Hello Mojo!

Had the day off today and the house to myself from about 11:30. My mojo must have been happy about that because I finally created a card that I liked!

Brianna, one of the Customer Service Managers (CSM) at Walmart, is a wonderful, young girl. She is always upbeat, friendly and professional. I have worked with her for two years and I will be sorry to see her leave. However, she is off to start a new life in Calgary and I wish her the very best.

Brianna loves color so I knew that I wanted a good combination of fresh, bright colors. I finally decided on making a starburst card.

Starburst Card

I cut strips of Cardstock and Designer Series paper into 4 x 1 1/2" strips and then used my Stampin' Trimmer to cut them into triangles.

I cut a matte from Whisper White, 3 3/4 x 5". I punched a 1" circle from copy paper and adhered it to the upper right of the matte, following the Rule of Thirds, to maintain good design.

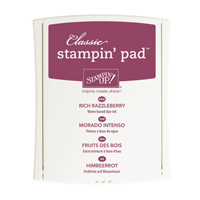
After deciding on the sequence of my triangle pieces, I used Snail Adhesive to quickly cover the matte. I then lined up my pieces one by one, with the points to the circle, till the matte was totally covered. I then flipped the matte over and used scissors to trim off the excess pieces. I used a sponge dauber with Rich Razzleberry to ink the edges of the completed matte.

I adhered the completed piece to a Whisper White matte, then onto a Rich Razzleberry matte, and finally onto a Whisper White card front, using Fast Fuse adhesive.

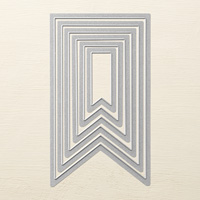
I used a stamp from the Really Good Greetings stamp set to stamp with Rich Razzleberry onto a scrap of Whisper White. I used one of the Starburst Framelits to cut out the sentiment and then used a Framelit from the Circles Collection Framelits to cut a matte for it from Rich Razzleberry. I used Dimensionals to pop up the greeting on the matte and to adhere it to the card. A bit of bling on the sentiment and the card was complete!

I'm pleased with how the card turned out. Starburst cards can be made several different ways and are perfect for using up scraps. You can use patterned paper interspersed with cardstock, if desired. You could even create a card completely with different colors of cardstock but emboss each piece using a different embossing folder. Here is an example of a Half Starburst card that we made last year in one of our card classes.

Half Starburst Card

Have you made a Starburst card before? Leave me a comment below to tell me about it!


Tuesday, August 12, 2014

Stampin' Up! Weekly Deals, August 12 - 18

As usual, Stampin' Up! has a nice roundup of products for you to consider this week! I thought I would share some ideas to get you considering the possibilities for this Week's Deals!

  • Want to take your card creations up a notch? Use the Envelope Liners Framelits to create coordinating liners to match your cards!
  • Have any female grandchildren? Wouldn't the Petite Purse die make the cutest favors for a little girl's party? I know I'm planning ahead with this item before Stampin' Up! decides to retire it! For more ideas, check on Pinterest.
  • How about the Natural Cotton Ribbon? Not enough color in it, you say? Did you know you can color the ribbon using the Blendability Markers? Keep a supply of this ribbon on hand and match it to your projects on-the-fly!
  • Have a desire to quickly add some pizazz to a card project or for some party decor? The Rosette Designer Bigz die not only creates rosettes in two styles but does so up to 10" in diameter!
I hope my ideas have you excited about this week's deals—I know I'm making my list!


Sunday, August 10, 2014

Empty Nesters—NOT!

So I feel terrible that it's been a few days without a blog post from me! This happened for a couple of reasons.

First, I had been hoping to do a blog post about a card I was making for a co-worker at Walmart. In the little time I had, I actually created two different cards but hated both of them!

Secondly, my daughter Courtney, her boyfriend, Steffan, and their daughter, Raine, have moved in with us for awhile (the definition of awhile is yet to be determined!) because they are finding it difficult now that Courtney's unemployment cheques have run out. They did not want to take a handout so they moved home with the expectation to help around the house with completing the rec room, etc. Courtney is also hoping to get on nights at Walmart to bring in some needed cash.

This weekend, we had already planned to babysit Raine, so Courtney & Steffan could have a fun weekend at the cabin in Lee River. However, with me working all weekend, it's just been Bob, Raine, and the dogs! When I arrive home from work, it's all Raine until we pack her off to bed—not much time for anything else after that.

I'm hopeful, that next week things will settle into a routine so I can get back to both card making and blogging!


Tuesday, August 5, 2014

Weekly Deals August 5 - 11

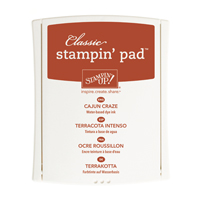
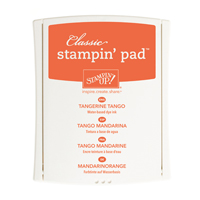
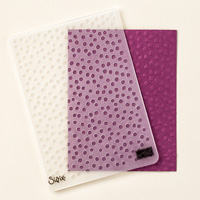
Another nice round up of products for you this week! Save 25% on these products while supplies last. It's a great time to stock up on some stamp pads you've yet to purchase as well as getting some really neat embossing folders or a die set!


Saturday, August 2, 2014

BigShot Workout

Well I definitely put my BigShot through its paces yesterday, creating this birthday card!


This is not my usual card style but I had a lot of fun in creating it and bringing two different stamp sets together as well as utilizing three sets of framelits!

I started with a standard card base in Tangerine Tango and cut a Basic Black matte to go on top. I cut a Melon Mambo matte to go on the very top.

I used my BigShot with the Magnetic Platform and the On Film Framelits to cut three film frames from Basic Black. I glued these together to make a sturdier piece with a little thickness.

I then cut three of the little cameras, one Basic Black and two, Tangerine Tango. The process for cutting these was different from the film frame. I laid the Framelit face up on the platform and placed the paper on top to give it a really embossed look.

I also cut out the arrow in Tangerine Tango. I used a sponge dauber and Cajun Craze ink to ink the edges of the arrow and the two cameras.

Next, used a stamp from the Amazing Birthday stamp set. I used Stampin Markers in Melon Mambo, Tangerine Tango and Basic Black to ink up the stamp. After stamping on Whisper White I used one of the Banners Framelits dies to cut it out. I stamped the cake stamp with Tangerine Tango and punched it out using the 1 1/4" Circle Punch. I used the 1 3/8" Circle Punch to punch a matte for it out of Basic Black and then glued the pieces together.

Lastly, I used the Just Sayin' stamp set with Tangerine Tango and then cut it out using the Word Bubble Framelits.

I used Dimensionals to pop up the slide frame and then tucked the Word Bubble behind it. The cameras, arrow and cake also used Dimensionals. I think it came together quite well!

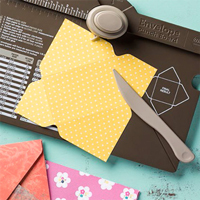
I used the Envelope Punch Board to create an envelope in Melon Mambo and added a little interest to it by using the Decorative Dots embossing folder with the BigShot to emboss the flap of the envelope. I could not have done this with my Cuttlebug because I had to turn the embossing folder sideways to go through the BigShot. The Cuttlebug does not have enough width to allow this strategy. I think it gives it the finishing touch it needs!

What are you going to create with your BigShot after purchasing it this month?