Tuesday, August 8, 2017

It's Official! My Daughter is a LPN!

Linda Vich Creates: It's Official! My Daughter is a LPN! Nurse scrub top card created with punches and assorted card stock scraps.
My daughter Courtney received notification that she passed the exam for her nursing so she is now officially a LPN! I wanted to mark the occasion so I made her a fitting card.

I purchased a template/tutorial from Lynn Pratt for this card. After receiving the tutorial, I imported the design into my Silhouette Cameo designs so that I could resize it and cut it out.

The card was cut from Night of Navy and stitching lines were added with a Sanford-Sharpie Extra Fine Point Poster Paint Marker. I find this works much better than a gel pen.

I created her stethoscope in green to match her real life stethoscope. It was created by using an assortment of punches–oval, word window and the Itty Bitty Shapes Punch Pack. Scraps of card stock were used to create her stethoscope: Cucumber Crush, Sahara Sand, Basic Black.

The sentiment from the Crazy About You stamp set was stamped with Versamark and heat embossed with White Stampin' Emboss Powder. A Whisper White matte was adhered inside the card.

Linda Vich Creates: It's Official! My Daughter is a LPN! Nurse scrub top card created with punches and assorted card stock scraps.

Linda Vich Creates: It's Official! My Daughter is a LPN! Nurse scrub top card created with punches and assorted card stock scraps.

So proud of our daughter! She is loving being a nurse.


Saturday, August 5, 2017

Dahlia Up Close

Linda Vich Creates: Dahlia Up Close. Rose Gold embossed dahlia is painted with shades of blue Color Burst watercolors on this lovely anniversary card.
How about something totally different?

Come on now, admit it. Even if you are a Stampin' Up! demonstrator, you have one or two other craft products lying around that you use from time to time! Let's face it–we are crafty individuals or we would never have got involved with Stampin' Up! in the first place!

I have soooooooooooooo many crafting tools and media that sometimes I have to take a break from crafting with Stampin' Up! to play with my other stuff! Or, I combine it with Stampin' Up! to get the best of BOTH worlds like I have done with this card!

Today's card is one I created for my brother and his wife for their anniversary. It is CASEd from a card by Jenny Lee Yamasaki.

I started by stamping the Dahlia Up Close stamp from The Ton on watercolor paper using Versamark using my MISTI after first using my Embossing Buddy. I then heat embossed it with Rose Gold Embossing Powder.

Next, I gathered together a few of my Color Burst colors in blue: Cerulean Blue, Ultramarine Blue, Indigo and Turquoise. I tapped a little of each powder in a watercolor palette I had and then wet a #4 watercolor brush and dipped into the Cerulean Powder and changed it to liquid watercolor.

I painted this over most of the flower and then, painting spots of each of the other colors, I added strategically to the image until I was pleased with the result. Sometimes, I used a paper towel to blot up some of the watercolor to make it paler. When I was finished, I heat set the image.

The next step is where I made a mistake but due to using my MISTI I was able to rectify it. After watercoloring and then drying my image, the watercolor paper was severely warped. I wanted to get it as flat as possible before adding it to my card front. To do this, I placed it face down on a piece of copy paper with another piece of copy paper on top and then an old pillowcase. I then proceeded to iron until the watercolor paper was flat.

I did end up with a flat paper, however, the ironing reheated my embossing and transferred it to the copy paper leaving behind a white outline where the embossing had been! Now this is actually a technique in itself and can be used to good effect but for this image I WANTED the Rose Gold embossing in place!

So, I went back to my MISTI and after using my Embossing Buddy, I re-inked the image with Versamark and heat embossed it AGAIN! Luckily, my stamp had remained in place in my MISTI and I was able to re-stamp the image. I was very careful to warm up the heat tool for awhile before doing the embossing to minimize warping.

Next, I cut a Pacific Point card front 4.75 x 6. I trimmed my painted matte to fit the card front but leave about a 3/4" strip of card front on the left side. I placed a strip of Burnished Rose Gold Foil Tape down the card front and then trimmed off the excess.

On a strip of vellum I stamped the sentiment from the Falling For You stamp set using Versamark and heat embossed it with the same Rose Gold embossing powder. I folded the strip around the edges of the painted matte and then taped the ends to the back. The matte was then adhered to the card front using Fast Fuse. To add a little more zing, several sequins were adhered to the card front using liquid adhesive.

A watercolor matte was cut for inside the card and the matching sentiment was stamped and heat embossed on it. I then used sponges to ink the edges in both Tempting Turquoise and Pacific Point. The matte was then adhered with Fast Fuse to complete the card.

Linda Vich Creates: Dahlia Up Close. Rose Gold embossed dahlia is painted with shades of blue Color Burst watercolors on this lovely anniversary card.

Linda Vich Creates: Dahlia Up Close. Rose Gold embossed dahlia is painted with shades of blue Color Burst watercolors on this lovely anniversary card.

Linda Vich Creates: Dahlia Up Close. Rose Gold embossed dahlia is painted with shades of blue Color Burst watercolors on this lovely anniversary card.

Linda Vich Creates: Dahlia Up Close. Rose Gold embossed dahlia is painted with shades of blue Color Burst watercolors on this lovely anniversary card.


Delighted is how I feel about how this card turned out! I have never "painted" with the Color Bursts before so it was a learning experience but one that ended well for me! I can't wait to give this to my brother and his wife to see their reaction!

I hope you have enjoyed my deviation from projects made strictly with Stampin' Up! materials! I think that we can only become more creative by exploring all brands of media and by appreciating the resulting art forms.

Thank you for visiting today!


Friday, August 4, 2017

30th Anniversary Card Using Foil Frenzy and Paisley Framelits

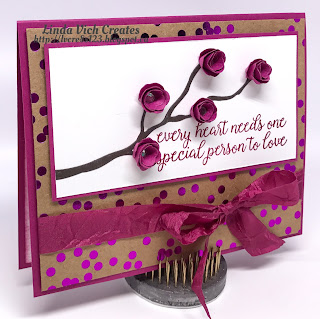
Linda Vich Creates: 30th Anniversary Card Using Foil Frenzy and Paisley Framelits. Rolled roses adorn an Early Espresso Branch on this card, accented with Foil Frenzy DSP and tied up with Berry Burst Crinkled Seam Binding Ribbon.
This July, my husband Bob and I celebrated our 30th anniversary–in this day and age, this is quite a milestone!

In creating his card, I cased a project by demonstrator Barbara Meyer. I cut a 4.75 x 6" card base from Berry Burst. After tying a bow using the luscious new Berry Burst Crinkled Seam Binding Ribbon around a matte from the Foil Frenzy DSP, the matte was adhered using Dimensionals.

On a strip of Whisper White, I stamped the sentiment from the Falling For You stamp set using Berry Burst. This strip was then matted with Berry Burst and adhered at the top of the card front using Dimensionals.

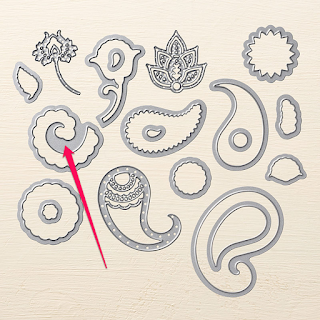
A branch was die cut from Early Espresso using the Seasonal Layers Thinlits and then the Paisley Framelits were used to die cut the rolled roses from Berry Burst. The image below shows the die used.

Photo shows Paisley Thinlits and the die used to create the rolled roses.

I was alerted to the possibility of creating these flowers after watching a video by fellow demonstrator Tan. Scroll down to see the little flowers on the makeup table. The video is here. Feel free to watch the entire video but the part about making the rolled rose flowers starts at about 12:43.

After die cutting five of the flowers, I took one of the die cuts, sprayed it lightly with water, and then used tweezers to roll it up. After releasing it from the tweezers, I rolled the remaining four flowers and then set them aside to dry.

I used drops of liquid adhesive to adhere the branch to the matte with the sentiment. To finish the flowers, I placed a glue dot on the end of each paper curl and adhered it to the bottom of each flower. Glue dots were used to adhere the blossoms to the branch. I added rhinestones to the centre of each blossom but they probably could have been omitted–they were hard to place inside the flowers and I'm not sure that they make that much of a difference.

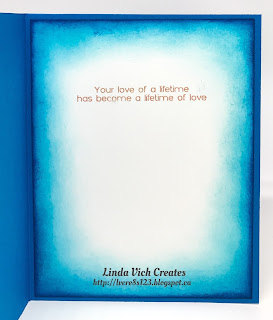
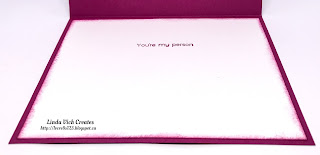
For inside the card, I simply stamped the matching sentiment on a Whisper White matte and inked the edges.

Linda Vich Creates: 30th Anniversary Card Using Foil Frenzy and Paisley Framelits. Rolled roses adorn an Early Espresso Branch on this card, accented with Foil Frenzy DSP and tied up with Berry Burst Crinkled Seam Binding Ribbon.

Linda Vich Creates: 30th Anniversary Card Using Foil Frenzy and Paisley Framelits. Rolled roses adorn an Early Espresso Branch on this card, accented with Foil Frenzy DSP and tied up with Berry Burst Crinkled Seam Binding Ribbon.

Linda Vich Creates: 30th Anniversary Card Using Foil Frenzy and Paisley Framelits. Rolled roses adorn an Early Espresso Branch on this card, accented with Foil Frenzy DSP and tied up with Berry Burst Crinkled Seam Binding Ribbon.

I am pleased with how this card turned out. Using the Foil Frenzy DSP really adds a punch to your card! I also enjoyed making the rolled roses and look forward to using these again soon. They aren't suitable for a mailed card, obviously, but they add such a nice touch to a card!

Thank you for stopping by today!


Thursday, August 3, 2017

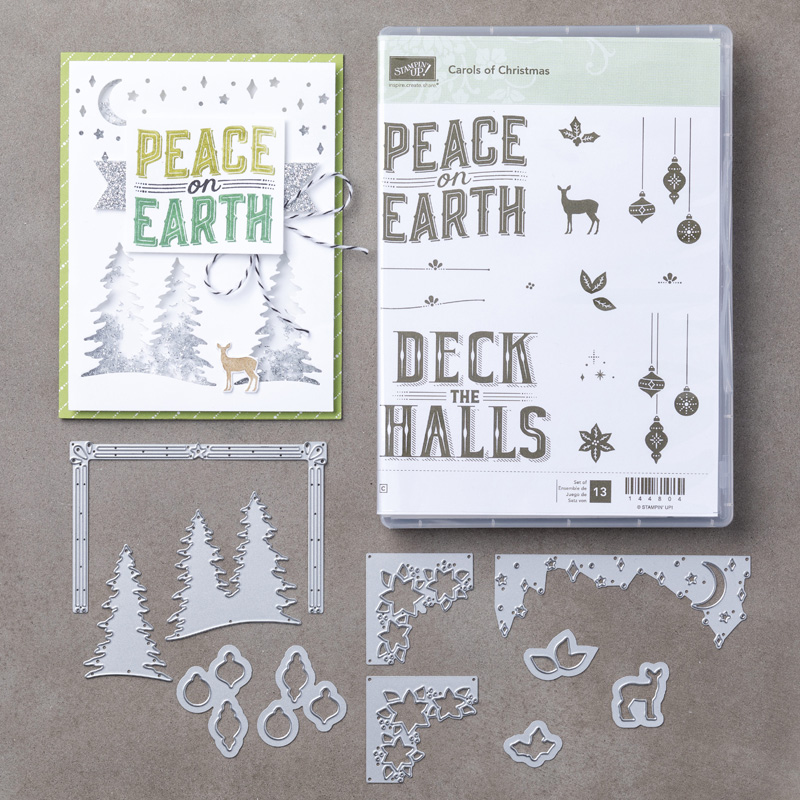
Carols of Christmas Early Release

Carols of Christmas Early Release

With the summer half over, I am looking forward to getting back to stamping classes and preparing to use all the goodies from the new Holiday Catalog! I know that you will be anxious, too, to get your hands on these goodies!

Good news! With the Early Release from Stampin' Up! you can redeem the coupons that you earned during July when you purchase the new Carols of Christmas Bundle this month! Just think, this could be the year that you get your Christmas cards done early! :)


Carols of Christmas Bundle

With the stamp set, you get two big and beautiful sentiments that can become the focal point of your card or be used to create a unique background.  In addition, there are lovely ornaments, leaves, holly, and deer which coordinate with the Thinlits. The thinlits set also contains lovely card builder dies that can be used to create a border around your card front. Check out the video below which shows how you can use the stamp set and thinlits to create your own beautiful holiday cards!


Here are the catalog numbers you need in order to purchase the bundle and save 10% or purchase the stamps or thinlits separately. Click on the table below to place your order in my online store!


Carols of Christmas Table

I hope you will take advantage of this special Early Release and place your order today!