Tuesday, January 31, 2017

So Detailed Floral Boutique Thank You

Linda Vich Creates: So Detailed Floral Boutique Thank You. A formal thank you card made with the So Detailed Framelits and the Floral Boutique DSP.
Today I sat down to create a card to go along with the welcome kit I was sending to my newest recruit. I wanted a card that was formal and classy. Because of this, I again reached for the So Detailed Thinlits as well as the Floral Boutique DSP.

I cut a standard card base from Night of Navy and then adhered a strip of the Floral Boutique DSP at the top of the card front. The largest die from the So Detailed Thinlits was used to die cut Whisper White card stock. This piece was adhered to conceal the edge of the DSP.

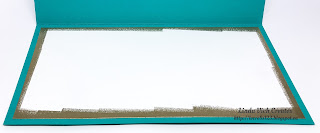
The sentiment, from the now retired Another Thank You stamp set, was stamped with Night of Navy on Thick Whisper White. It was die cut with an oval from the Stitched Shapes Framelits. A scalloped oval was die cut from Night of Navy using one of the Layering Ovals Framelits. The die cuts were layered and adhered using liquid adhesive. Dimensionals were used to adhere the sentiment to the card front. Pearls were added for some final bling. I kept the inside of the card simple with only a white matte and a strip of matching DSP.

I also decided to fancy up the envelope by adding an envelope liner. I die cut one from the DSP using the now retired Envelope Liners Framelits.

Linda Vich Creates: So Detailed Floral Boutique Thank You. A formal thank you card made with the So Detailed Framelits and the Floral Boutique DSP.

Linda Vich Creates: So Detailed Floral Boutique Thank You. A formal thank you card made with the So Detailed Framelits and the Floral Boutique DSP.

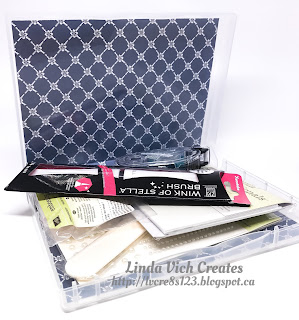
For the welcome kit for my recruit, I added a piece of the Floral Boutique DSP into a stamp box and then filled it with an assortment of Stampin' Up! goodies!

Linda Vich Creates: So Detailed Floral Boutique Thank You. A formal thank you card made with the So Detailed Framelits and the Floral Boutique DSP.

Linda Vich Creates: So Detailed Floral Boutique Thank You. A formal thank you card made with the So Detailed Framelits and the Floral Boutique DSP.
If you live in Canada and would like to receive a welcome kit from me, you can join my team! During Sale-A-Bration is the best time for you to join! Check out the details below.


I hope you'll choose to become a member of my team! Please contact me if you have any questions about joining.


Monday, January 30, 2017

So Detailed With Stamped Embossing

Linda Vich Creates: So Detailed With Stamped Embossing. Tempting Turquoise and Whisper White provide a fresh color scheme for this card that pairs stamped embossing with the So Detailed Thinlits.
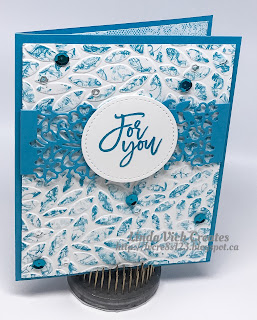
Today's card uses a technique called Stamped Embossing which I used on the cards on the blog post, Catalog Party Prep Part 5.

Because I wanted a fresh and clean color scheme, I chose to use Tempting Turquoise and Whisper White. I started bu cutting the following:

  • Tempting Turquoise card base, 4.25 x 5.5"
  • two, 4 x 5.25" mattes, one Whisper White, one Thick Whisper White
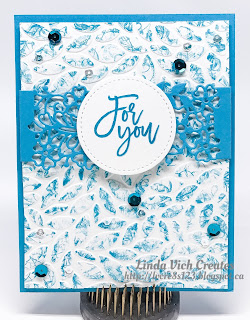
Choosing the Thick Whisper White matte, I embossed it using the Petal Burst Embossing Folder. Then, using a stamp from the now retired First Sight stamp set, I lightly stamped repeatedly over the embossed paper, continuing until it was necessary to ink up again and then stamping some more until I was pleased with the resulting pattern I achieved.

I then die cut a piece of Tempting Turquoise with a die from the So Detailed Thinlits. I used some Removable adhesive to hold the die cut in place over the matte and then used my Simply Scored tool to score on either side of the matte so that I could fold the die cut edges neatly and adhere them at the back of the matte. The matte was adhered to the card front using Dimensionals.

Using my MISTI, I stamped the sentiment, from the now retired Thoughtful Branches, on Thick Whisper White using Tempting Turquoise and then Versamark, finishing by heat embossing with Clear Stampin' Emboss Powder. The sentiment was the die cut using a circle from the Stitched Shapes Framelits. The sentiment was adhered with Dimensionals over the So Detailed die cut.

For the inside of the card, the Whisper White matte was stamped using stamps from the Touches of Texture stamp set. Unfortunately, I got some extra ink on the edge of the flower stamp and it stamped onto the matte. :(

Linda Vich Creates: So Detailed With Stamped Embossing. Tempting Turquoise and Whisper White provide a fresh color scheme for this card that pairs stamped embossing with the So Detailed Thinlits.
Photo shows ink smudge above flowers

I really didn't want to stamp the matte again so I used my trusty Mono Sand Eraser to lightly erase the ink smudge.

Linda Vich Creates: So Detailed With Stamped Embossing. Tempting Turquoise and Whisper White provide a fresh color scheme for this card that pairs stamped embossing with the So Detailed Thinlits.
Ink smudge removed thanks to the Mono Sand Eraser

After adhering the finished matte inside the card, I added a few sequins to the card front to complete the card.

Linda Vich Creates: So Detailed With Stamped Embossing. Tempting Turquoise and Whisper White provide a fresh color scheme for this card that pairs stamped embossing with the So Detailed Thinlits.

Linda Vich Creates: So Detailed With Stamped Embossing. Tempting Turquoise and Whisper White provide a fresh color scheme for this card that pairs stamped embossing with the So Detailed Thinlits.

Linda Vich Creates: So Detailed With Stamped Embossing. Tempting Turquoise and Whisper White provide a fresh color scheme for this card that pairs stamped embossing with the So Detailed Thinlits.


Wednesday, January 25, 2017

High Tide Hope

Linda Vich Creates: High Tide Hope. The High Tide stamp set is perfect for use on this multi-layered, highly textured, masculine card.
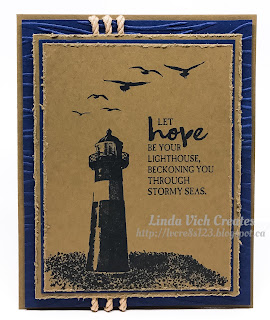
I was asked by a co-worker to design a card for her uncle who is undergoing treatment for cancer. I love to design masculine cards because I am a texture lover but was unsure of an appropriate sentiment. Luckily, I thought of the High Tide stamp set and it had several sentiments that would work.

I decided to incorporate several layers into the card and to avoid wasting paper during the design process, I turned to the software for my Silhouette Cameo. It let me quickly draw out my design and I also chose a color scheme of Night of Navy and Soft Suede–perfect for a man.

With my design planned, I started by cutting the pieces for my card:

Soft Suede

  • non-standard card base 5 x 6.25"
  • mattes, 4.25 x 5.5" and 3.875 x 5.125"

Night of Navy

  • mattes 4 x 5.25" and two, 4.75 x 6"

Very Vanilla

  • matte 4.5 x 5.75"
On the 3.875 x 5.125" Soft Suede matte I stamped the shore, the two-step lighthouse, the birds and the sentiment using Night of Navy.

Using my now retired Stampin' Distress Tool to distress the edges of the two Soft Suede mattes and then layered them with the smallest of the Night of Navy mattes and adhered them using Fast Fuse.

After embossing the 4.75 x 6" Night of Navy matte using the Seaside Embossing Folder, I wrapped three pieces of the Kraft Rope Trim around the matte and secured at the back using tape. I adhered this layer to the card front using Dimensionals. The other layered mattes were then adhered on top of the embossed matte using doubled Dimensionals.

On the Very Vanilla matte I stamped the shore, filling in the hole with the little piece of shore stamp, some grasses and the shore birds. This matte was adhered to the remaining 4.75 x 6" Night of Navy matte and then adhered inside to finish the card.

Linda Vich Creates: High Tide Hope. The High Tide stamp set is perfect for use on this multi-layered, highly textured, masculine card.

Linda Vich Creates: High Tide Hope. The High Tide stamp set is perfect for use on this multi-layered, highly textured, masculine card.

Linda Vich Creates: High Tide Hope. The High Tide stamp set is perfect for use on this multi-layered, highly textured, masculine card.

Linda Vich Creates: High Tide Hope. The High Tide stamp set is perfect for use on this multi-layered, highly textured, masculine card.


I love the texture in this card! Such fun to play with several layers and if you haven't already purchased the High Tide set, you can shop for it here.


Monday, January 23, 2017

Love You Lots Valentine

Linda Vich Creates: Love You Lots Valentine. A faux quilted background showcases two little ladybugs on this sparkly red Valentine.
I have been wanting to try the Faux Quilted Background technique that Dawn Griffith demonstrates in her video tutorial. I thought that it would work nicely for a Valentine card.

I started by die cutting a piece of Watercolor Paper with one of the squares from the Stitched Shapes Framelits. I then stamped the ladybugs using Basic Black Archival ink.

After heat setting the image with my Heat Tool, I colored the insects using a Real Red Stampin' Write Marker. I added a layer of the now retired Crystal Effects and set it aside to dry.

I die cut two more mattes, one from Real Red and one from Thick Whisper White. These were layered with Dimensionals.

The sentiment was stamped on another piece of Thick Whisper White. I then used another technique from Dawn for using a square stitched die to cut a stitched rectangle. The technique involves cutting part of the die, using a cutting pad that didn't cover the die completely. The die was then run through the Big Shot again from the other direction, after lining up the die using the cutting marks left by the die. Great technique as an interim solution but I am hopeful that Stampin' UP! will come out with many more stitched dies, including rectangles and other shapes.

A 5.5 x 5.5" card base was cut from Thick Whisper White. A matte was cut, from the Sending Love DSP,  to fit the card front exactly and adhered with Snail Adhesive. A matte was also cut from Real Red.

I used the now retired Diagonal Scoring Plate for the Simply Scored to score the matte at .75" intervals and then turned the matte 90 degrees and scored again to produce the diamond effect. The matte was then folded on all the score lines and then one by one, each fold was inked on both sides with Real Red using a Sponge Dauber. After heat setting the ink, Gold Glitz Dazzling Details was used to add sparkle points to each diamond intersection. I then set the matte aside to dry.

Once everything was dry, I adhered the quilted matte to the card front using Fast Fuse. The ladybugs layer was adhered with Dimensionals on top of the other two stitched layers.

The stack was then adhered to the card front using Dimensionals, with a nest of the Gold Metallic Thread secured underneath. The sentiment was also adhered to the card front. Three Rhinestones were colored with a Sharpie marker and added to the sentiment.

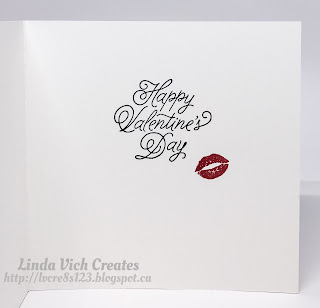
A sentiment from the Sealed With Love stamp set was stamped inside using Basic Black. The lips were also stamped using Real Red to complete the card.

Linda Vich Creates: Love You Lots Valentine. A faux quilted background showcases two little ladybugs on this sparkly red Valentine.

Linda Vich Creates: Love You Lots Valentine. A faux quilted background showcases two little ladybugs on this sparkly red Valentine.

Linda Vich Creates: Love You Lots Valentine. A faux quilted background showcases two little ladybugs on this sparkly red Valentine.


I really like how this card turned out! The faux quilting technique does take some time to complete but I love the way it looks and I will definitely use it again!


Thursday, January 19, 2017

So Detailed Valentine

Linda Vich Creates: So Detailed Valentine. A highly textured card with a dynamic color scheme delivers a sweet Valentine message.
Smoky Slate and Real Red makes for a dynamic color scheme, though one not typically used for a Valentine card.

A standard card base was cut from Smoky Slate and a Smoky Slate matte was also cut to completely cover the card front. The matte was dry embossed using the new Falling Petals Embossing Folder.

One of the So Detailed Thinlits was used to die cut a piece of Real Red card stock which was then adhered across the top of the matte using liquid adhesive. A length of the now retired Real Red Satin Woven Ribbon was adhered across the top of the die cut. (I had planned to use the 3/8" Stitched Real Red Ribbon but discovered that I hadn't yet ordered it! Horrors! Needless to say, I immediately rectified this mistake!) A bow was adhered to the ribbon using a Glue Dot.

The "love" sentiment was die cut three times using the Sunshine Wishes Thinlits. Liquid adhesive was used to adhere the three die cuts together. A coating of Clear Wink of Stella gave it a lovely shimmer. The sentiment was adhered to the card front using Glue Dots. A few red sequin hearts were also added to the card front with Glue Dots to complete the card.

Linda Vich Creates: So Detailed Valentine. A highly textured card with a dynamic color scheme delivers a sweet Valentine message.

Linda Vich Creates: So Detailed Valentine. A highly textured card with a dynamic color scheme delivers a sweet Valentine message.

Along with the unusual color scheme, this card is made even more dynamic by the use of several forms of texture–the lacy die cut, the dry embossed matte, a shiny ribbon, a shimmery sentiment and bright little hearts.

On a more personal note, though still related to Stampin Up, in the order I received today was a small black box.

Linda Vich Creates: So Detailed Valentine. A highly textured card with a dynamic color scheme delivers a sweet Valentine message.

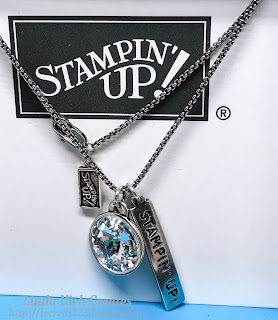
In this box was a silver necklace to commemorate my promotion to the level of Silver demonstrator! So exciting! I will wear this necklace proudly! I would like to thank my customers and my new recruit, Shawna Lee, for making this possible–I couldn't have done this without your help!

Linda Vich Creates: So Detailed Valentine. A highly textured card with a dynamic color scheme delivers a sweet Valentine message.

Linda Vich Creates: So Detailed Valentine. A highly textured card with a dynamic color scheme delivers a sweet Valentine message.


Tuesday, January 17, 2017

January Stamping Projects with A Modified Use of the Balloon Pop-Up Framelits

Linda Vich Creates: January Stamping Projects with A Modified Use of the Balloon Pop-Up Framelits. The Baker's Box Thinlits are used to create a Sending Love Valentine Mailbox.
At our stamping group on Sunday afternoon, we worked on projects for Valentine's Day.

Our first project was a Valentine mailbox. We die cut two sheets of Sending Love DSP using the Baker's Box Thinlits, being sure to cut a slot in the top portion of one of the pieces.

Folding on all the score lines was somewhat difficult because patterned paper was being used but this was done and then the box was adhered together. The top flaps were punched with the 1/8" Circle Punch and then either a red or white ribbon was threaded through and tied into a bow.

Mini envelopes were die cut from both Real Red and Whisper White card stock and they were stamped with a variety of sentiments, lips, and hearts from the Sealed With Love stamp set. The envelopes were then glued shut.

One mini envelope was left open and a Love Note stamp was used on Whisper White card stock and die cut to form a  ruffled note. This was placed in the open envelope and glued to the front of the mailbox. A heart die was used to cut two 3D hearts which were put on the sides of the mailbox.

Linda Vich Creates: January Stamping Projects with A Modified Use of the Balloon Pop-Up Framelits. The Baker's Box Thinlits are used to create a Sending Love Valentine Mailbox.

Linda Vich Creates: January Stamping Projects with A Modified Use of the Balloon Pop-Up Framelits. The Baker's Box Thinlits are used to create a Sending Love Valentine Mailbox.


Our second project was a Valentine card that used a modified version of the Balloon Pop-Up Thinlits. In planning this card, I created a mock up using copy paper. This is a technique I use quite often when trying a new or finicky technique as a paper saving measure.

Linda Vich Creates: January Stamping Projects with A Modified Use of the Balloon Pop-Up Framelits. The Balloon Pop-Up Framelits die cut is modified to create a pop-up Valentine Balloon Bouquet card.
Mock up of inside of the card.
A standard card base was cut from Sweet Sugarplum as well as a matte. The matte was embossed using the Happy Hearts Embossing Folder. The matte was then sponged lightly with Rich Razzleberry ink and then about 1/4 of the way down, it was sponged heavier with the same ink. The retired Blackberry Bliss was then sponged 1/2 of the way down and then heavier 3/4 to the bottom of the matte. This created an ombré effect. The matte was adhered to the card front.

The sentiment, from the Sealed With Love stamp set was stamped on Thick Whisper White and die cut using a square from the Stitched Shapes Framelits. A larger square was also die cut from Rich Razzleberry. A scalloped square was die cut from Gold Glimmer paper using the Layered Squares Framelits. These were then layered using Dimensionals.

Three hearts were punched with the now retired Extra Large Full Heart Punch, two from Sweet Sugarplum, one from Gold Glimmer. The two Sweet Sugarplum hearts were embossed using the Confetti Embossing Folder. The Gold Glimmer heart was scored down the middle on the non-Glimmer side. Rich Razzleberry ink was used on the edges of the Sweet Sugarplum hearts to make them look more like 3D heart balloons.

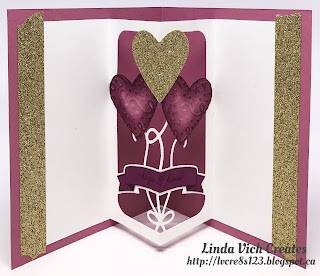
The pop-up section for the inside of the card was die cut from a 5 x 7.5" piece of Whisper White using the Balloon Pop-Up Framelits. Kay Kalthoff's video tutorial was helpful in setting up the die to cut the pop-up, especially in adding Sharpie marks to the die to line up the card stock properly on the Big Shot.

The pop-up piece was folded in half on the centre score line and then the side pieces were folded inward on their score lines. Using the MISTI, the banner from the Balloon Adventures stamp set was stamped on Rich Razzleberry in matching ink. The sentiment, from the Sealed With Love stamp set was curved to fit the banner and also stamped with Rich Razzleberry. The banner was fussy cut and adhered to the banner portion of the pop-up section.

insert photo

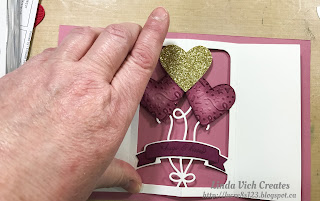
Removable adhesive was used on the punched hearts to position them over each of the balloons on the pop-up piece. Scissors were used to trim the excess from behind the hearts and then the hearts were secured permanently with liquid adhesive.

Linda Vich Creates: January Stamping Projects with A Modified Use of the Balloon Pop-Up Framelits. The Balloon Pop-Up Framelits die cut is modified to create a pop-up Valentine Balloon Bouquet card.
Photo shows balloon section
trimmed for placement of heart.

Linda Vich Creates: January Stamping Projects with A Modified Use of the Balloon Pop-Up Framelits. The Balloon Pop-Up Framelits die cut is modified to create a pop-up Valentine Balloon Bouquet card.
Photo shows back of pop-up
after hearts are placed. Tracing
the back of the hearts is helpful
for glue placement.

Linda Vich Creates: January Stamping Projects with A Modified Use of the Balloon Pop-Up Framelits. The Balloon Pop-Up Framelits die cut is modified to create a pop-up Valentine Balloon Bouquet card.

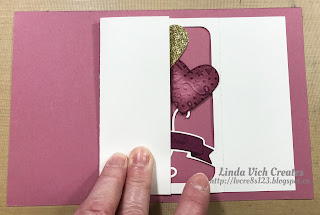
After the hearts were in place, the pop-up section could be adhered inside the card base. First, the pop-up piece needed to be aligned on the score line of the card base, keeping both top and bottom margins equal.

Linda Vich Creates: January Stamping Projects with A Modified Use of the Balloon Pop-Up Framelits. The Balloon Pop-Up Framelits die cut is modified to create a pop-up Valentine Balloon Bouquet card.

Next, one side panel was folded back toward the centre and adhesive applied. It was then folded back into place to adhere to the card base. This was repeated with the other side.

Linda Vich Creates: January Stamping Projects with A Modified Use of the Balloon Pop-Up Framelits. The Balloon Pop-Up Framelits die cut is modified to create a pop-up Valentine Balloon Bouquet card.

Linda Vich Creates: January Stamping Projects with A Modified Use of the Balloon Pop-Up Framelits. The Balloon Pop-Up Framelits die cut is modified to create a pop-up Valentine Balloon Bouquet card.

To tie in with the Glimmer balloon and the Glimmer scalloped square, Metallic Gold Washi Tape, from the 2016 Sale-A-Bration, was used on either side of the pop-up section.

Linda Vich Creates: January Stamping Projects with A Modified Use of the Balloon Pop-Up Framelits. The Balloon Pop-Up Framelits die cut is modified to create a pop-up Valentine Balloon Bouquet card.

Lastly, the layered sentiment piece was adhered to the card front to complete the card.

Linda Vich Creates: January Stamping Projects with A Modified Use of the Balloon Pop-Up Framelits. The Balloon Pop-Up Framelits die cut is modified to create a pop-up Valentine Balloon Bouquet card.

Linda Vich Creates: January Stamping Projects with A Modified Use of the Balloon Pop-Up Framelits. The Balloon Pop-Up Framelits die cut is modified to create a pop-up Valentine Balloon Bouquet card.


I hope you have enjoyed the Valentine projects from our Stamping Group. I can envision other projects that make use of a modified version of the Balloon Pop-Up Framelits in the future. Stay tuned!


Monday, January 16, 2017

Beautiful You Trio

Linda Vich Creates Beautiful You Trio. Coordinated set of cards using Beautiful You.
I had a lovely breakfast out with my daughter this morning! It was great to catch up and hear about her nursing practicum placement from last week. She is doing really well and has had great comments from her supervisors.
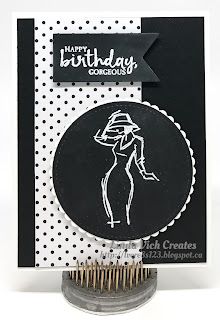
Back at home this afternoon, I was able to play in my craft room for awhile. I was excited to finally get to create the cards I had been envisioning since I first saw the Beautiful You stamp set. With my love for contrast, I just knew I had to create some cards in black and white.

I started by stamping each image and sentiment in Versamark on Basic Black. Each was heat embossed with White Stampin' Emboss Powder.

The images were die cut using the largest square, oval, and circle of the Stitched Shapes Framelits. Two of the sentiments were die cut with the Banners Framelits, and one with a smaller stitched square. Each image and the one sentiment were matted with a coordinating scalloped die from the Layering Squares, Circles and Ovals Framelits, cut from Thick Whisper White.

Three standard card bases were cut from Thick Whisper White and mattes from Basic Black. Strips of polka dot paper from the Pop of Pink DSP were layered over the black mattes and the mattes were adhered to the card fronts.

Dimensionals were used to adhere the images and sentiments to the card fronts.

Linda Vich Creates Beautiful You Trio. Coordinated set of cards using Beautiful You.

Linda Vich Creates Beautiful You Trio. Coordinated set of cards using Beautiful You.

Linda Vich Creates Beautiful You Trio. Coordinated set of cards using Beautiful You.


Have you purchased Beautiful You yet? If not, you can purchase the Clear-Mount Set here or Wood Mount here.


Sunday, January 15, 2017

Stitched Thank You Cards

Linda Vich Creates: Stitched Thank You Cards. This simple thank you card makes use of gold embossed layered die cuts and a die cut sentiment thinlit.
I am so in love with the Stitched Shapes Framelits that I use them every chance I get! Of course, after you purchase them, you will want to get the three Layering Framelits sets–circles, ovals, and squares–because they layer so nicely together!

Today's cards use the smallest squares with a retired alpha–Sophisticated Serifs.

To begin, I cut a card base 8.5 x 4.5" from Bermuda Bay. I chose a piece of the Brights Designer Series Paper Stack for a matte.

Using Versamark, I stamped the letters on Bermuda Bay and heat embossed them with Gold Stampin' Emboss Powder. Each letter was die cut using a square from the Stitched Shapes Framelits. These were then layered onto a scalloped square die cut from Gold Foil.

The letters were adhered to the card front using Dimensionals. The "you" was cut from Gold Foil using the now retired Hello You Thinlits. It was adhered with liquid adhesive.

Versamark was used to ink the edges of a Whisper White matte and then they were heat embossed using Gold Stampin' Emboss Powder.

Linda Vich Creates: Stitched Thank You Cards. This simple thank you card makes use of gold embossed layered die cuts and a die cut sentiment thinlit.


Linda Vich Creates: Stitched Thank You Cards. This simple thank you card makes use of gold embossed layered die cuts and a die cut sentiment thinlit.

The second card was created using Elegant Eggplant.

Linda Vich Creates: Stitched Thank You Cards. This simple thank you card makes use of gold embossed layered die cuts and a die cut sentiment thinlit.


I can't part with my alpha stamps because I like to use a variety of styles and know that as soon as I get rid of one, I'll need it! Do you still use your retired alpha stamp sets?


Friday, January 13, 2017

Hoping For Sunshine

Linda Vich Creates: Hoping For Sunshine. The Stitched Shapes Framelits are used to  create a brightly watercolored flower that adorns an embossed matte.
Tonight I was supposed to be teaching a stamping class but it ended up being postponed until Sunday so I got some play time!

With all the frigid temperatures we've been having, most people are longing for sunshine and warmer temperatures. I decided to make a card to reflect that hope.

With this one card, I was able to use a number of products and a try a few techniques.

I started by die cutting a small circle from a piece of the Inside The Lines paper. This designer paper is one of the FREE Sale-A-Bration products you can receive by placing a $60 order!

I used my new Watercolor Pencils to color it and blended with my Clear Wink of Stella pen. If you haven't yet purchased these, you should put them at the top of your list! They are wonderful! They can be used alone or with an Aqua Painter or Blender Pen or my personal favorite, Wink of Stella. My only complaint? I want more of them–in all of Stampin' Up's wonderful colors!

After coloring, I matted it with a Mambo Melon scalloped circle and then with a Pacific Point circle. I then die cut petals from Marina Mist using an oval from the Stitched Shapes Framelits. I used liquid adhesive to adhere them to the back of the circles.

Next I stamped a bee from the Dragonfly Dreams stamp set on watercolor paper using Basic Black Archival ink. I colored in the stripes of the bee with a watercolor pencil and then fussy cut the bee. Unfortunately, I cut off one of his antennas so I had to stamp another bee which I die cut with the Detailed Dragonfly Thinlits. I cut the wings off this one and glued it under the colored bee. I then used a Basic Black Stampin' Write Marker to trace the edges of the bee to cover up the white spots.

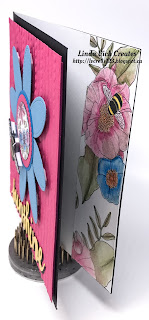
I cut a matte from Melon Mambo and embossed it with the Festive Embossing Folder. I used a piece of adhesive foam to adhere the matte to a Basic Black card front. I then adhered the flower to the matte using Dimensionals. The bee was added using Adhesive Strips.

I die cut the sentiment from both Daffodil Delight and Basic Black using a die from the Sunshine Wishes Thinlits. I gave the yellow piece a coat of Wink of Stella before using liquid adhesive to adhere the black behind the yellow, offset to create a shadow effect. The sentiment was then adhered to the card front.

I cut a Whisper White matte for inside the card and adhered a strip of the Inside The Lines paper down the right side. I used my Watercolor Pencils and Wink of Stella to color the strip to complete the card.

Linda Vich Creates: Hoping For Sunshine. The Stitched Shapes Framelits are used to  create a brightly watercolored flower that adorns an embossed matte.

Linda Vich Creates: Hoping For Sunshine. The Stitched Shapes Framelits are used to  create a brightly watercolored flower that adorns an embossed matte.

Linda Vich Creates: Hoping For Sunshine. The Stitched Shapes Framelits are used to  create a brightly watercolored flower that adorns an embossed matte.

Linda Vich Creates: Hoping For Sunshine. The Stitched Shapes Framelits are used to  create a brightly watercolored flower that adorns an embossed matte.

I'm hopeful that the warm thoughts I was thinking while creating this card will bring some warmer weather our way! What's the weather like where you are? Does it affect the type of cards you make?