Friday, January 29, 2016

Teal Toned Atypical Valentine

In my blog post Rustic Wooden Valentine I shared a technique I had learned for creating your own Woodgrain. I had so much fun making the first woodgrain that I made a few in other colors! Today I made use of these ones:

Panels created using the Woodgrain Technique and Weathered Wood, Peacock Feathers, Evergreen Bough and Black Soot Distress Inks.

Be sure to check Rustic Wooden Valentine if you didn't already read about the Woodgrain Technique. These colors are my favorites so I couldn't go too long without using them! I had another idea for a Valentine card that used both the larger panel for a background and the smaller panel for die cutting.

I started with a Bermuda Bay card base and adhered the background panel to it with Dimensionals. Using the Hearts Collection Framelits, I die cut three hearts from the smaller panel. I used a sponge dauber to add Black Soot Distress Ink around the die cuts.

I cut a piece of vellum to lay over the Woodgrain panel but still show the ends. I used a sentiment from the now retired Happy Watercolor Stamp Set to stamp with Versamark and then heat embossed with Silver Stampin' Emboss Powder.

I laid out my hearts on top to establish their positions and then cut some thick Bermuda Bay Twine to fasten between them. I used glue dots to attach the twine to the hearts. I applied Dimensionals to the back of each heart and then adhered them to the vellum. I then adhered the vellum to the Woodgrain panel by applying glue dots to the vellum under the hearts so that the adhesive would not show.

I adhered a selection of sequins to the vellum using glue to provide interest and a little sparkle. Gotta have sparkle!

For inside the card I used a matte of Thick Whisper White (because I had a piece the right size handy, otherwise I would have used the regular Whisper White) and used the heart from the Bloomin' Love Stamp Set to stamp with Versamark and heat emboss again with silver. I also stamped the little hearts from the Perpetual Calendar Stamp Set in Bermuda Bay. I inked the edges of the matte with more Bermuda Bay and then adhered the matte with Fast Fuse Adhesive to complete the card.


Sorry about the color here . . . it looks like Island Indigo but it really is Bermuda Bay like above!

I think that the teal tones of the Distress Inks work really well with Bermuda Bay to provide an atypical Valentine!


I am entering this in the Stamp Ink Paper Challenge #32 and I played the diagonal from the bottom left to the top right.

SIP Tic Tac Toe 32


Thursday, January 28, 2016

Have A Cuppa Valentine

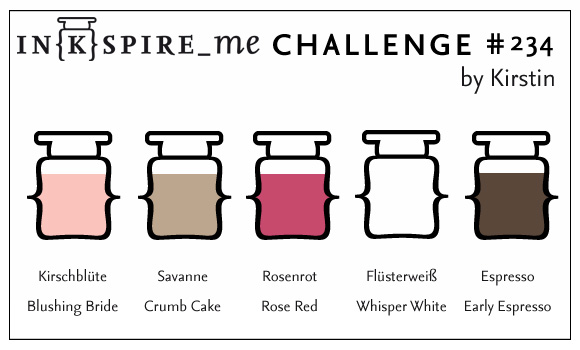
This morning I drew inspiration from the colors in the Inkspire_Me Challenge. The colors were lovely and coincided nicely with the Love Blossoms Designer Series Paper Stack. Of course they were also awesome colors for a valentine!


For this challenge, I knew I wanted to use the Cups & Kettle Framelits to create a card that represented a couple. To do this I wanted to use two cups facing each other with the steam wafting up to a heart above the cups.

The biggest challenge in creating this card was deciding on the patterned papers! Of course, all the papers in the Love Blossoms Designer Series Paper Stack coordinated but designing with patterns can be tricky. You have to choose colors and patterns wisely so that they don't overpower each other or look too busy. I finally decided on a Crumb Cake pattern for a strip at the bottom of the card and two Rose Red patterns for the cups.

I planned to divide the bottom and top by using a Blushing Bride ribbon from the Love Blossoms Embellishment Kit. This kit has all kinds of goodness in it! Satin ribbon, pearl trim, metallic doilies, sequins, glittered enamel dots as well as beautiful Rose Red bow clips!

For the upper part of the card, I needed to stamp on it so I would have chosen Whisper White but somehow all that bare whiteness was too much! That's when I got the idea to do a color wash on the background using Blushing Bride. This would give a lovely rest from the patterned paper while still providing some lovely texture.

I initially tried using the Watercolor Wash background stamp but it wasn't quite right. In the end, I decided to do a freehand wash so that I could control the amount of color I put onto the watercolor paper.

Using a flat paintbrush, I stroked on plain water to wet the watercolor paper. I then mixed clean water with some Blushing Bride reinker to create a very soft color and brushed it onto the paper. I used my heat tool to dry it and reshape it to its former flat state.

I used my heat tool to thoroughly dry the paper and then adhered a strip of Crumb Cake patterned paper to the bottom of it. I adhered a length of the ribbon over the top part of the patterned paper–it was starting to look really nice!

I used a cup die from the Cups & Kettle Framelits to die cut two cups, flipping one so that I had two cups that faced each other. I then also die cut some self-adhesive fun foam and adhered this to the back of each cup because I wanted added thickness for the cups. I used a sponge dauber and Early Espresso to ink all the edges to provide dimension and cover the white edges.

Using a Crumb Cake Stampin' Write Marker, I colored the modern heart from the A Nice Cuppa Stamp Set and stamped it at the top of the watercolor panel. I used the marker rather than the stamp pad because I wanted a looser looking, imperfect heart–one that could have been formed from steam perhaps?

At this point, I used foam tape to adhere the panel to a Crumb Cake card base. I chose the foam tape because I feel it works better with painted watercolor paper to keep it flat but popped up.

I cut a length of Metallic Gold Baker's Twine and unravelled it to get the gold thread. I placed a few glue dots on the spots that would be covered by the cups and then cut little pieces of the thread and stuck them down. Using Dimensionals, I adhered the cups and then played with the threads until they sort of stuck up like steam.

Using the banner die from the Large Numbers Framelits I cut a piece of watercolor paper. I gave it a Blushing Bride wash and dried it thoroughly. I then used Rose Red ink to stamp the sentiment. Because the sentiment stamp also contained a heart, I masked that with tape before inking and then removed it to stamp the sentiment itself. I inked the edges of the banner with Early Espresso and then adhered it across the two cups using Dimensionals.

I used the Confetti Hearts Border Punch to punch out hearts from both Crumb Cake and Rose Red card stock. I used glue to adhere them to the watercolor paper. My final task was to add little glimmer to the hearts by using my Clear Wink of Stella Glitter Brush.


I'm pleased with how this card turned out and it gave me a chance to use up a lot of patterned paper!


Wednesday, January 27, 2016

Rustic Wooden Valentine

So, have you tried the latest paper crafting trend–creating your own wood grain? A lady in my Stamping Enablers Facebook group posted a tutorial for creating your own wood grain panels using Distress inks and glue and several people have been trying the technique.

Basically, you score a piece of watercolor paper to look like planks, flip the sheet over and rub distress inks over it. You can add water to help the colors blend but that's it! I hadn't given my new mini distress inks a good work out yet so this was a good project for them!

I knew before starting that I would be using one of my panels to make a Valentine so for my first effort, I assembled a number of red inks as well as some of my neutrals. I used a strip of watercolor paper to swatch out my inks as a reference before beginning.

I wanted to use the rough side of the watercolor paper for my wood so I scored on the opposite side. I decided to use a score of every half inch.

I then started dragging my lightest red down the panel. I then alternated between my other reds, adding strips of color around the panel until I was totally satisfied. During the process, I also sprayed water a few times and blotted with a paper towel and then added more ink. I also added in some of my neutrals. In the end, I used all of these: Candied Apple, Barn Door, Fired Brick, Aged Mahogany, Hickory Smoke, Ground Espresso, and Black Soot.

This is what my first attempt looked like:

First attempt at wood tutorial

My first try and I was hooked on this technique! I decided to try a few other color combinations while I had the inks at hand. You'll probably see these used in other projects sometime soon!

Here are some more that I did:

Second attempt with additional, smaller scale, scored panel
Third attempt. I'm definitely hooked!
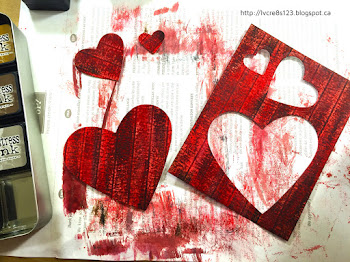
Eventually, I turned back to my first red panel and die cut three hearts from it, angling my hearts so that the planks ran at an angle. For the smaller hearts, it would have been better if I had had a smaller scale of wood panel because you can't see much more than one or two planks in the die cuts. I learned from this so I created a smaller scale panel for the teal color that I wanted to work with on a future project.

Die cuts from panel.
After die cutting the hearts, I inked the edges with Aged Mahogany and then used my Distress Glaze to seal the colors so that they wouldn't come off on anything else as I worked with them.

I cut a matte from Coastal Cabana and embossed it using the Happy Heart Embossing Folder. I inked the edges using Early Espresso.

On a piece of Thick Whisper White I stamped the sentiment, using my MISTI; I used Early Espresso and then Versamark, heat embossing it with Clear Stampin' Emboss Powder. To give the tag a little interest, I used the Curvy Corner Trio Punch on the corners. I then inked the edges using both Aged Mahogany and Candied Apple.

I adhered both the tag and the heart die cut to the embossed matte using Dimensionals. I tied a length of Thick Coastal Cabana Twine around the matte and then adhered it to a Early Espresso card base using Dimensionals.

For the inside, I sponged the edges of a Whisper White matte using Coastal Cabana and then adhered the two smaller hearts using Fast Fuse Adhesive and Glue Dots.


To complete the card, I added a variety of sequins to the heart and a single red heart sequin to the tag.


My card will be entered in the following challenges:


Love Theme Challenge 179 for the Paper Craft Crew.


I encourage you to try the woodgrain tutorial and then link me to your results. It's so much fun!


Tuesday, January 26, 2016

Valentine For Global Design Project

I am off work until Saturday so I am looking forward to some creative time in my craft room!

With Valentine's Day just around the corner, hearts seem to be front and centre on cards!

My card today is a 5 x 7" card designed for the Global Design Project #20.

The assignment this week is to CASE the Designer. While CASE generally means Copy And Share Everything, for the Global Design Project it translates as Copy And Selectively Edit. This enables the participants to be inspired by various things–colors, pattern or even the theme of the card–and truly make a design of their own.

I actually have a couple of ideas in mind for this challenge which I hope to work on this week but today's card has me focusing on the large heart, little hearts, and the twine from Connie's card design.

I cut a 5 x 7" card base from Crumb Cake card stock as well as a matte of 4.25 x 6.25". I cut 4.5 x 6.5" and 3.75 x 4" mattes from Very Vanilla. I also cut a small piece of Blushing Bride to go behind the smaller Very Vanilla matte.

Using a heart from the Hearts Collection Framelits Dies I die cut the smaller Very Vanilla matte. I then die cut five of the smallest heart die and punched several hearts using a punch from the Itty Bitty Accents Punch Pack. In addition, I used the Confetti Hearts Border Punch to punch some tiny hearts from Blushing Bride card stock.

I used one of my Tsukineko Fastastix Brushes to ink the edges of all the small hearts and used a Stampin' Sponge to ink the edges of both Very Vanilla mattes with Blushing Bride ink. Glue dots were used to adhere the Very Vanilla hearts around the cut out heart on the matte and then I used my Fine Tip Glue Pen to adhere the tiniest Blushing Bride hearts. I added some Wink of Stella to each Blushing Bride heart for a hint of glimmer.

Dimensionals were used to adhere the heart-encrusted matte to the Blushing Bride matte. The smaller Crumb Cake matte was adhered to the larger Very Vanilla matte using Fast Fuse Adhesive.

Linen thread was wrapped around the two mattes and secured with tape. Two Blushing Bride card stock hearts were punched and another die cut. They had their edges inked and a coat of Wink of Stella was applied to each. Once dry, the hearts were adhered on top of the linen thread using Dimensionals and glue dots. The mattes were then adhered tot he card front using Fast Fuse Adhesive.

Using my MISTI, the sentiment was stamped with Crumb Cake and Versamark on Very Vanilla and heat embossed with Clear Stampin' Emboss Powder. The sentiment was die cut using the banner die from the Large Numbers Framelits Dies. The sentiment was adhered to the bottom of the card front using Dimensionals.

A matte of Very Vanilla was cut for inside the card. A border stamp and Crumb Cake ink was used at the bottom and was heat embossed with Clear Stampin' Emboss Powder. The edges were inked with Blushing Bride and then the matte was adhered with Fast Fuse Adhesive.


I love the color scheme of this card but I'm not sure if I really like the card. I am somewhat troubled by the large Blushing Bride area inside the heart cut out but not sure what else to do with it.

Sometimes it is difficult to decide when a card is "finished!" Does this ever happen to you? Do you think this card is finished or do you have a suggestion for how I could improve it? Leave me a comment below!


Thursday, January 21, 2016

Picture Perfect Practice

Today I had the opportunity to work with the Picture Perfect Stamp Set. At first glance, it seems that these stamps have no relationship to one another. What ties these stamps together is that they are multi-step stamps; they use at least two different stamps to create a final image.

The set contains some lovely sentiments along with a hummingbird, a rose, leaves, and a starfish. I chose to use the starfish for my card today and I have Lydia Fiedler, from Understand Blue, for the wonderful color scheme!

The stamps in the set are photopolymer so it makes it fairly easy to see how to line the stamps up when using more than one. Each stamp also has a tab at the top which is your reminder to point all the stamps in the same direction. Though these stamps can be used with clear blocks for stamping, I chose to use my MISTI to allow for perfect placement.

The stamps for each image are numbered on the enclosed sheet. Generally, you would start with the number 1 stamp and progress from there, each stamp giving more detail to the final image. Also, the last image stamped is usually stamped in the darkest ink.

I stamped the first stamp using Watermelon Wonder and then completed the image by stamping with Elegant Eggplant. I fussy cut the image and then used a Stampin' Sponge to sponge the edges with Elegant Eggplant to give more of a 3D quality to the image.

I decided to use a 4.75 x 6" card base in Watermelon Wonder. For my next layer, rather than use colored card stock, I used a piece of the Thick Whisper White and chose a stamp from the Timeless Textures Stamp Set to stamp around the matte using Elegant Eggplant. This was adhered to the card base using Dimensionals.

I used a 3.75 x 5" piece of the Thick Whisper White for my last layer, to allow the wonderful stamped edge in Elegant Eggplant to show.

I cut a strip of the Watermelon Wonder 1" Stitched Ribbon and determined its placement with the starfish on top. I then used both Gorgeous Grunge and Timeless Texture stamps to add color to the matte. I also stamped the sentiment in the top right corner, inking my stamp first with Versamark and then Elegant Eggplant and heat embossing with Clear Stampin' Emboss Powder.

I adhered the ribbon using Tear & Tape Adhesive. I added Dimensionals to my starfish and then created a messy circle of Gold Metallic Thread which I secured under the starfish.

For the inside of the card, I stamped around the edge of a Whisper White matte using the wood texture stamp from the Timeless Textures set and adhered the matte using Fast Fuse Adhesive.


To complete the card, I added a few sequins to the card front, adhering them with the Fine Tip Glue Pen.


Close up showing texture and metallic thread.

I love the texture on this card and think that the unusual color scheme works well! Hope you like it!


Wednesday, January 20, 2016

Sunburst Valentine

Can you believe that it is already the middle of January? I'm still putting away Christmas decorations but I don't feel too bad because we were a little late in getting them up this year!

Besides un-decorating, I've been enjoying a little down time and catching up with some Netflix tv series. I'm watching Prison Break and it is quite exciting!

Today, after delivering my latest workshop orders, I had the chance to play. As sometimes is the case, I started making one card but it morphed into another! The card today was to be a Valentine card but the background that I created didn't work with my concept so I will save it for another card.

Today's card is 5 x 7" and uses a Melon Mambo card base. I started by creating my heart embellishment. I chose one of the Heart Framelits Collection dies and laid it over top of my Sunburst die to see if my idea would work. It did!

I used the Sunburst die to cut out a section of Dazzling Diamonds Glimmer paper that would fit the heart die. I glued the die cut to some Melon Mambo card stock and then used the heart die to cut out the heart. I then used two heart dies, with Melon Mambo card stock, to cut out a frame for the die cut.

The frame was embossed with the retired Swiss Dots embossing folder and then I used a sponge dauber with Blackberry Bliss to ink the inside of the frame.

I used the smallest Hearts die to cut two hearts from Dazzling Diamonds Glimmer paper and then punched four hearts from Melon Mambo card stock using the heart from the Itty Bitty Accents Punch Pack.
I sandwiched a piece of Silver Metallic Thread between the two glimmer hearts as well as the card stock ones and adhered them together with Fast Fuse Adhesive. I used a sponge dauber with Blackberry Bliss to ink the edges of each complete heart.

The three heart strings were sandwiched between the heart and its frame, and the frame was adhered using Fast Fuse Adhesive.

I cut five, one inch strips of a paper from the Have A Cuppa DSP pack and adhered them to the front of the card base using Fast Fuse Adhesive.

Using the heart from the Occasions Paper Piercing Pack along with my Stampin' Pierce Mat and Paper Piercing Tool, I pierced holes around the framed heart. I then used my 1/8" Circle Punch to punch larger holes. I sewed around the heart using the 1/8" Bermuda Bay Stitched Ribbon, finishing with a bow at the top.

The sentiment from the Bloomin' Love Stamp Set was stamped with Melon Mambo on Whisper White and then die cut using the arrow die from the retired On Film Framelits Dies. A sponge dauber and Bermuda Bay was used to ink the edges.

The completed heart embellishment was adhered to the card front using Dimensionals, leaving the hearts to dangle as they may. The arrow was adhered using triple Dimensionals on one side and a single Dimensional on the heart side.


I'm entering this card in The Paper Players Challenge:


Now that it is complete, I'm quite liking this card even though it is not the card I set out to create! Have you started working on Valentine's Day cards yet? Drop me a link below and let me know!


Wednesday, January 13, 2016

I Never Promised You A Rose Garden, Or Did I?

Linda Vich Creates: I Never Promised You A Rose Garden, Or Did I? A Dazzling Diamonds Rose Garden die cut adorns the front of a Night of Navy card.
Hi there! I hope it is warm where you are today–where I am is frigid! However, cold temperatures are a good excuse to stay inside and make cards, right?

Today I worked on two cards, the first of which was on my Evernote list that I mentioned in my Solid Gold Tips For Using The Bloomin' Hearts Framelits Die.

Have you tried using Evernote yet? I have been slowly re-organizing my crafting supplies from another app that no longer meets my needs.

Evernote is wonderful for organizing your crafting supplies (and everything else) because you can tag everything with a few key words and then just do a search to bring up all your Valentine's Day stamps, for instance.

Kathleen Driggers has a wonderful video tutorial on how to create a stamp inventory using Evernote.

What is really cool about the program is that you can run it on your computer, the web, your iPhone (or Android) or your iPad (or Android tablet). So, when you go shopping for craft supplies, you won't buy duplicates of things and you'll end up being able to buy more new things!

One of my favorite purchases from the 2016 Occasions Catalog was the Bundle of the Rose Garden Thinlits Dies and the Rose Wonder Stamp Set. My first card uses both but primarily the dies to create a one layer card.

To start with, I die cut the large rose and leaf combo using Dazzling Diamonds Glimmer paper. Because this die has a lot of intricacy, I used my special Big Shot sandwich because I wanted a clean cut but I also wanted to catch all the pieces that were cut out by the die so I could use them in the future.
I used the Fine Tip Glue Pen to carefully add adhesive to the die cut and then placed it on the front of a Night of Navy, 4.75 x 6" card front. After putting it into place, I put a piece of scrap paper over top and smoothed over it with my hands to ensure it was adhered.

Next, I stamped a sentiment from the Lovely Amazing You Stamp Set (love this stamp set!)  using Versamark and heat embossed it using white Stampin' Emboss Powder.

Because the card base was dark, I created a matte for the inside of the card using Whisper White card stock. I stamped leaves at the bottom of the card using Night of Navy and then lightly sponged over them using the same ink.

Linda Vich Creates: I Never Promised You A Rose Garden, Or Did I? A Dazzling Diamonds Rose Garden die cut adorns the front of a Night of Navy card.

Linda Vich Creates: I Never Promised You A Rose Garden, Or Did I? A Dazzling Diamonds Rose Garden die cut adorns the front of a Night of Navy card.

This is a very simple yet effective card to create and can be done fairly quickly! The picture really doesn't do this card justice because you can't see the glimmer from the Dazzling Diamonds paper.

The second card was a little more labor intensive but fun to create!

Linda Vich Creates: I Never Promised You A Rose Garden, Or Did I? Patterned paper Rose Garden die cut filled with Dazzling Diamonds adds glitz to a Bermuda Bay and Melon Mambo birthday card.

I knew that I wanted to try cutting the rose from a sheet of patterned paper. I chose to use the Have A Cuppa Designer Series Paper Stack and selected a sheet of hearts in shades of Bermuda Bay, Melon Mambo and Basic Gray. I chose to use Bermuda Bay and Melon Mambo card stock to coordinate with it. I cut a strip of the patterned paper and adhered it to the left edge of a Bermuda Bay matte.

I used the thinlits to cut out the rose and leaves from a sheet of the patterned paper and I adhered this to a Bermuda Bay matte. I retrieved the dryer sheet on which were stuck the Dazzling Diamonds pieces from my previous card and carefully fit each piece into the openings in the rose die cut. Once I had them all in place, I used the Fine Tip Glue Pen to glue each fragment back into place. To hold each piece while applying the glue, I used my Embellie Gellie Tool, a useful product for holding and releasing little things.

After getting all the pieces in place, I decided that I needed a bit more definition for the rose, so I outlined the rose with a Basic Black Stampin' Write Marker. I liked what it did but it made me feel that I should outline the whole thing! I decided THAT was not happening!

Moving on from there, I stamped the sentiment on Thick Whisper White and then die cut it. This was actually two separate stamps–the sentiment and the little frame around it. I find it easiest to stamp the sentiment first and then line up the frame stamp over it. Then it's an easy matter to line up the thinlit over it to die cut it. I adhered the sentiment onto the card front with Dimensionals.

To provide a bit more definition to the matte, I used a sponge dauber to ink the edges with Basic Black Archival ink. I used my Handheld Stapler to staple a scrap of Melon Mambo Stitched Ribbon onto the top left of the matte. After adhering the finished matte to a Melon Mambo card base, I added a few crystal sequins from Pretty Pink Posh.

For the inside of the card, I stamped a section of the rose onto a Whisper White matte using Versamark and then heat embossed it with Clear Stampin' Emboss Powder. I used both Melon Mambo and Bermuda Bay inks with sponges to add a little color to the petals and leaves and then inked the remaining edges with Basic Black Archival ink using a Sponge Dauber.

Linda Vich Creates: I Never Promised You A Rose Garden, Or Did I? Patterned paper Rose Garden die cut filled with Dazzling Diamonds adds glitz to a Bermuda Bay and Melon Mambo birthday card.

Linda Vich Creates: I Never Promised You A Rose Garden, Or Did I? Patterned paper Rose Garden die cut filled with Dazzling Diamonds adds glitz to a Bermuda Bay and Melon Mambo birthday card.


What do you think?

I think it is really cool that you can create at least two cards using the Rose Garden Thinlits Dies! However, you could go on forever, because as you use the outline of the rose for one card, you cut another paper for the insides of the rose and then you have another outline to create another card and so on and so on . . . :) Kind of like a never-ending card!

I hope you've enjoyed reading about these two cards–enjoy your day!


Tuesday, January 12, 2016

Bloomin' Masculine Valentine

Linda Vich Creates: Bloomin' Masculine Valentine. Kraft and black combine in this masculine styled card using the Bloomin' Heart Thinlits Die and the Bloomin' Love stamp set.
It happened again last night.

Just as I was falling asleep, my mind provided me with a card idea, this time using the Bloomin' Heart Framelits Dies and the Bloomin' Love stamp set. It was not until I started writing this blog post that I realized what a perfect Valentine card this would be for a man!

The first thing I did was to decide that the standard A2 card would be too small for what I had envisioned so I went with my next favorite size, 4.75 x 6."

I cut a Basic Black card base and then cut a matte measuring 4.25 x 5.5" from Kraft card stock. I positioned the Bloomin' Heart Framelits Die centred horizontally but near the top of the matte. Of course, I used my Big Shot Sandwich that I detailed in my blog post, Solid Gold Tips For Using The Bloomin' Heart Thinlits Die, to ensure a clean cut. However, this time I set aside the actual heart die cut for another time and kept the matte for my card. I used a sponge dauber with Basic Black Archival to ink the edges of the matte and inside the heart die cut.

I cut another Kraft card stock matte of the same size and ran it through my paper crimper so that the lines ran vertically on the matte. I then took my Basic Black Archival ink pad and slid it over the top of the matte, adding ink to the ridges. I used the same technique in Love For the Lotus.

Next, I used Versamark and the heart from the Bloomin' Love Stamp Set to stamp on a piece of Kraft card stock and then heat embossed it with Black Stampin' Emboss Powder. To avoid a horrible black mess, I was sure to use my Embossing Buddy before inking. This is definitely necessary when using black! I then fussy cut the heart.

I ran a length of Basic Black Stitched ribbon around the bottom of the die cut matte and then used the Botanical Builder Framelits Dies to cut flowers and leaves both from black and Kraft card stock. I used Dimensionals, Glue Dots and the Fine Tip Glue Pen to adhere these. I added some tiny rhinestones, colored black with a Copic marker, to the centre of the smallest blossoms.

I adhered the die cut matte to the crimped matte using Dimensionals and then to the card front using Fast Fuse Adhesive.

I decided to add a hint of gold to the card so I bundled up some Gold Metallic Thread and secured it with glue dots to the crimped matte showing through the heart die cut. I adhered the heat embossed heart over the thread bundle using Dimensionals.

I stamped the sentiment with the banner stamp, again on Kraft card stock, and then die cut it using the Large Numbers Framelits Dies. I adhered it to the top of the card front using Dimensionals.

For the inside of the card, I cut a matte from the now retired Naturals Ivory card stock, and stamped a border image at the bottom using Basic Black Archival Ink. Using a sponge dauber, I inked the sides using Crumb Cake ink and then adhered the matte using Fast Fuse Adhesive to complete my card.

Linda Vich Creates: Bloomin' Masculine Valentine. Kraft and black combine in this masculine styled card using the Bloomin' Heart Thinlits Die and the Bloomin' Love stamp set.

Linda Vich Creates: Bloomin' Masculine Valentine. Kraft and black combine in this masculine styled card using the Bloomin' Heart Thinlits Die and the Bloomin' Love stamp set.


I've entered this card in the Global Design Project because I felt it fit nicely with their sketch for #GDP018.


Drop me a comment below and let me know how you've used the Bloomin' Heart or Bloomin' Love sets!


Friday, January 8, 2016

The Sky Really Is The Limit!

Follow my blog with Bloglovin

Linda Vich Creates: The Sky Really Is The Limit! Mint Macaron Bloomin' Heart die cut with Blushing Bride flowers dresses up a distressed Rose Red matte in this delightful Valentine card.
It is so nice to start a new year with new Stampin Up products with which to play! As can be glimpsed on Pinterest, card making mojo is at a very high level and it seems that the sky really is the limit when it comes to creating!

In preparing for my stamping group on Friday, I knew I wanted to use both the Sky Is The Limit Stamp Set and the Bloomin' Heart Thinlits.

I started my first card by choosing a color scheme of Rose Red, Blushing Bride and Mint Macaron in preparing what could be used as a Valentine card.

I die cut the Bloomin' Hearts Thinlits Die using a metal shim on my Magnetic Platform and also used a dryer sheet under my card stock to ensure that I got both a good clean cut and that I would not be sitting picking out bits! I ran the sandwich through forward and then back and was pleased with my first time cutting results. I also die cut two of the larger flowers and three of the little flowers from Blushing Bride card stock.

I decided on the placement of the intricate heart die cut on my Rose Red matte and then used my MISTI to stamp the sentiment from the Bloomin' Love Stamp Set with Rose Red ink in the bottom right corner. To punch the matte up a bit, I decided to use my Stampin' Distress Tool to distress the edges.

I adhered the Rose Red matte to a Mint Macaron matte and then adhered the heart die cut to the Rose Red Matte using the Fine Tip Glue Pen. It was very quick to add adhesive to even the little parts of the die cut. After placing it on the matte, I put a scrap paper over it and smoothed it with my hands to ensure that it adhered well.

Next, I adhered the flowers to the solid flower spots on the die cut, again using the Fine Tip Glue Pen. It takes a little work to match up the petals of the flowers but you can do it! I then added Wink of Stella to each of the flowers.

After the flowers were dry, I attached a knotted piece of the Mint Macaron ribbon to the left side of the mattes. To tie the knot, I used a new method learned from a great video tutorial by Sage Kimble, that has you use a clear block to tie the knot or bow and then add it to your project. I admit I was doubtful at first but the method works great!

On the inside of the Thick Whisper White card base, I stamped the intricate heart stamp from the Bloomin' Love set, using Rose Red.

Finally, I adhered the mattes to the front of the card base using Dimensionals.

Linda Vich Creates: The Sky Really Is The Limit! Mint Macaron Bloomin' Heart die cut with Blushing Bride flowers dresses up a distressed Rose Red matte in this delightful Valentine card.
My first attempt at this card before I remade it.

At this point, I finished card making for the day but was not quite satisfied with my card. I kept mulling it over in my mind to try and find ways to improve it. I thought that the card front was just too plain looking but I was unsure how to give it a bit more zest.

When I eventually got back to card making again, I remade the card but instead of scrapping my process, I thought I would share it with you so you could see how I made my changes and the difference that the changes made in the resulting card.

  • This time, I used a Blushing Bride card base instead of the white and the colors seemed to blend better with it than the stark contrast of the white. It also served to reinforce the use of Blushing Bride for the flowers.
  • Next, though I used Rose Red again for the matte and distressed it as before, I also sponged the edges with Rose Red which created a kind of glow effect on the matte.
  • The die cut was done the same way but I sponged the edges and lightly across the die cut itself with Mint Macaron ink.
  • Each of the Blushing Bride flowers were also sponged, this time with Blushing Bride ink. I also used my Flower Tool Kit to give a little shape to each flower.
  • In adhering the die cut to the matte this time, I only added glue to the solid flower areas which gave the die cut a more 3D and looser look than before.
  • I also adhered the flowers differently, choosing to use glue dots in the centre of each flower to allow the flower to maintain its shape.
  • In addition, I added a thicker coating of Wink of Stella and completed each flower by adding a pearl to its centre.

Linda Vich Creates: The Sky Really Is The Limit! Mint Macaron Bloomin' Heart die cut with Blushing Bride flowers dresses up a distressed Rose Red matte in this delightful Valentine card.

Linda Vich Creates: The Sky Really Is The Limit! Mint Macaron Bloomin' Heart die cut with Blushing Bride flowers dresses up a distressed Rose Red matte in this delightful Valentine card.

I am pleased with the changes that I made and believe that my card was much improved by them. What would you have done differently?

I chose the Sky Is The Limit Stamp Set to use for my second card because this FREE Sale-a-Bration stamp set is only available until February 15 and I wanted my stamping group to see what a great stamp set it is, filling that masculine card niche that we all struggle to fill! You can get this stamp set FREE just by placing an order of $60 or more with me!

Linda Vich Creates: The Sky Really Is The Limit! A biplane soars across a cloud scudded, Pool Party sky, trailing Baker's Twine contrails in this long, narrow card.

I had already used the stamp set in my Sale-a-Bration Freebie Sneak Peek but wanted something different for class. I liked the idea of using twine for contrails but knew that I would need to use a different card format for them to be effective. In the end, I chose a completed card size of 8.5 x 3.5", long enough to provide a nice swoop of twine!

I cut a Pool Party card base and attached a thin, Basic Black matte using Dimensionals.

On a 8.25 x 3.25" Whisper White matte, I used my cloud template to sponge clouds using Pool Party and a sponge. Toward the bottom, I tried to add a bit of plain sky and also made sure to sponge all the edges of the matte.

Using my MISTI I stamped the plane image on Whisper White using Jet Black Stazon ink. I did this twice to ensure a deep black color. I then fussy cut the plane.

After deciding on the placement of the plane, I used the MISTI again with the Stazon to stamp the sentiment in the bottom right corner of the matte.

I punched three clouds using the Tree Builder Punch and edged each with the Wink of Stella. I drew a mark at the end of the plane and then drew three curved lines out from the plane to the left edge of the card. To make it easier to draw the lines I used a flex curve ruler. I used the 2-Way Glue Pen to trace over the lines and then adhered Basic Black Baker's Twine. I used scissors to trim off the excess twine. I attached the finished matte to the black matte using Fast Fuse Adhesive.

Next, I used doubled Dimensionals on the left side of the plane and a single Dimensional on the right to attach the plane to the card front, as if the plane was turning. I layered one of the clouds over the end of the plane's wing to enhance the 3D appearance.

Linda Vich Creates: The Sky Really Is The Limit! A biplane soars across a cloud scudded, Pool Party sky, trailing Baker's Twine contrails in this long, narrow card.
Close up showing the dimension achieved with the strategic use of Dimensionals.

I layered two more clouds in the top left of the card front to complete the card.

Linda Vich Creates: The Sky Really Is The Limit! A biplane soars across a cloud scudded, Pool Party sky, trailing Baker's Twine contrails in this long, narrow card.

For the inside of the card, I thought it would be fun to have the plane execute a barrel roll!

This time I used Basic Black Archival ink and I stamped off twice on scrap paper before stamping the plane, upside down, in the bottom middle of a Whisper White matte.

Without reinking, I stamped two, right-side-up planes on either side of the middle one. I thought by stamping them lighter it would give the illusion of the plane flying in from farther away, doing the barrel roll and then flying away again! Do you think that I achieved this? Drop me a comment below!

Linda Vich Creates: The Sky Really Is The Limit! A biplane soars across a cloud scudded, Pool Party sky, trailing Baker's Twine contrails in this long, narrow card. An inside matte showcases a stamped border with the plane executing a barrel roll.

I hope you enjoyed reading about the cards for my stamping group!

Built for Free Using: My Stampin Blog

Thursday, January 7, 2016

Solid Gold Tips For Using The Bloomin' Heart Thinlits Die

Linda Vich Creates: Solid Gold Tips For Using The Bloomin' Heart Thinlits Die. Dramatic Valentine card created with both the Sunburst and Bloomin' Heart Thinlits Dies.
I had such fun playing with my new supplies today! Yesterday, I created a list in Evernote of all the ideas I had for cards using the new products, and linked this list to all the new products I owned that it referenced. This morning, I sat down in my craft room to make one of the cards.

I cut a standard card base from Blackberry Bliss card stock and then used the Sunburst Thinlits Die to die cut Gold Glimmer paper. I adhered it to my card front using the Fine Tip Glue Pen and then cut off the excess.

Next, I die cut the heart using the Bloomin' Hearts Thinlits Die. Stampin Up recommends that you cut this intricate die using the Precision Plate on the Magnetic Platform and running it back and forth through the Big Shot several times to get a clean cut. Then they also recommend using the new Big Shot Die Brush to get all the little pieces out of the die.

I have neither the Precision Plate or the Big Shot Die Brush so I will share with you how I got a very clean cut and was able to lift my die right off the die cut and didn't have to poke all the little bits out of the die cut either!

This is the sandwich that I used for my Big Shot with 7 being the bottom of the sandwich:
  1. Cutting Pad
  2. Bloomin' Heart Thinlits Die
  3. Card stock
  4. Dryer Sheet, left folded as it came from the box
  5. Cutting Pad
  6. Metal Shim
  7. Magnetic Platform
I ran this sandwich through and back in the Big Shot twice. It was a bit of a tight fit but I did not have to force it through.

I then removed the two cutting pads from the Magnetic Platform, took off the top one, and picked up the Bloomin' Heart Thinlits Die. If you try to do this on top of the Magnetic Platform, the magnet is too strong to do this easily.

I then was able to peel off the card stock from around the die cut heart. Next, I peeled the dryer sheet, with die cut attached, off the bottom cutting pad. Then, starting with a solid flower section of the die cut, I carefully peeled it back, carefully lifting the fine edges back from the dryer sheet, leaving the little bits of the die cut behind on the dryer sheet!

Now this method worked successfully for me but every Big Shot is calibrated a little differently so you may experience different results.

I used the Fine Tip Glue Pen to put glue only on the solid flower parts of the die cut and then placed it on top of the Sunburst die cut. I placed a piece of scrap paper over top to allow me to smooth it down, and then left my iPad sitting on top of it for a few minutes to ensure that the glue held.

To die cut these flowers it is necessary to use a slightly different method to that of the flower thinlits that we have used up to now. The flower dies that match the flowers embedded in the heart die cut are "closed" dies meaning that you cannot see through them to allow you to place them over the stamped image. Both the dies and the stamps, however, have a tab at the top of them.

Next, I stamped the solid flowers from the Bloomin' Hearts Stamp Set on Blackberry Bliss card stock using Versamark, keeping the tab of the stamps at the top. I heat embossed them with Gold Stampin' Emboss Powder.

To be able to die cut the stamped flowers successfully, I made a template for the flower dies by cutting out each of them from card stock being sure to keep the die tab at the top. Next, I placed my stamped images on my cutting pad and placed the template over the embossed flower and ensuring it was lined up correctly.

I remembered to snap some photos to show you how I used the template for the closed die. You will catch a glimpse of my well used bottom cutting pad in the photos!

Linda Vich Creates: Solid Gold Tips For Using The Bloomin' Heart Thinlits Die. Image shows template in use for die cutting with a "closed" die.
Template in place over gold-embossed flower stamp

Linda Vich Creates: Solid Gold Tips For Using The Bloomin' Heart Thinlits Die. Image shows "closed" flower die in place in the template.
Die set in place in the template
When using small dies on the Magnetic Platform, you sometimes find that they change positions due to the polarity of the magnets in the platform itself. Because of this, I used some Washi to tape the die and card stock in place before running through the Big Shot.

Once cut out, I used my Flower Tools to shape the flowers a bit and then adhered them to the heart die cut using Glue Dots. I added a rhinestone to the centre of each flower.

Finally, I decided to use a folded banner for my sentiment. I cut a piece of card stock 4.5 x .75" and then stamped the sentiment in Versamark using my MISTI for alignment. I heat embossed it using the Gold Stampin' Emboss Powder.

Next, I used the Triple Banner Punch to flag each end of the banner. I used the Simply Scored tool to score .5" and .75" from each end of the banner. Each .75" scored line was a mountain fold and the remaining scored lines were valley folds. This gave me a banner that stands up in the middle with two flat banner ends–a nice touch that you don't often see.

Linda Vich Creates: Solid Gold Tips For Using The Bloomin' Heart Thinlits Die. Dramatic Valentine card created with both the Sunburst and Bloomin' Heart Thinlits Dies.


I think the Gold Glimmer and the Blackberry Bliss paired with the Sunburst and Bloomin' Heart dies makes this card very dramatic!

Have you got your dies yet? Place an order with me today!

Built for Free Using: My Stampin Blog