Showing posts with label timeless textures. Show all posts

Monday, April 3, 2017

Stamping Mistake? Learn How I Fixed Rather Than Trashed This Card!

Linda Vich Creates: Stamping Mistake? Learn How I Fixed Rather Than Trashed This Card! Textural card created with Butterflies Thinlits.
It was with great pleasure that I sat down to create this thank you card for a friend. She had told me the type of sentiment she wanted and I chose the Floral Phrases stamp set. After she decided on the colors and style, I showed her a couple of cards in the style she wanted and we had a plan!

I started by cutting a standard card base from Crumb Cake and two mattes from Very Vanilla. Next, using Sahara Sand, I stamped the leafy image from the Number of Years stamp set all over one of the mattes.

One of the edge stamps from the Timeless Textures stamp set was stamped around the edge of the matte. Finally, I stamped the distressed leafy image in Cherry Cobbler in two opposing corners of the matte.

A piece of the Regals Designer Paper Stack was adhered to the middle of the matte. Two lengths of the Sale-A-Bration gold metallic ribbon were adhered to hide the seam of the DSP. Linen thread was then wrapped around the matte and secured at the back using Fast Fuse. The matte was then adhered to the card front using Dimensionals.

Using my MISTI, the sentiment from the Floral Phrases stamp set was stamped three times on a strip of Cherry Cobbler using Crumb Cake. I had wanted to use a stitched die for the sentiment but it was too long to fit  a Stampin Up die, even if I extended one of the stitched squares into a rectangle. As a work-around I used Lawn Cuts Stitched Borders to create my own stitched rectangle. I then matted this strip onto a strip of Very Vanilla. This was then adhered to the card front using Dimensionals.

On a piece of Very Vanilla, I stamped two identical butterflies using the Watercolor Wings stamp set and Sahara Sand, Crumb Cake and Cherry Cobbler inks. The two butterflies were die cut, one with Bold Butterfly Framelits and one with the Butterflies Thinlits dies. The two butterflies were adhered together using Glue Dots. A strip of pearls was adhered to the body of the top butterfly. After shaping the wings a bit, the butterfly was adhered to the card front using Foam Adhesive Strips.

Linda Vich Creates: Stamping Mistake? Learn How I Fixed Rather Than Trashed This Card! Textural card created with Butterflies Thinlits.

Linda Vich Creates: Stamping Mistake? Learn How I Fixed Rather Than Trashed This Card! Textural card created with Butterflies Thinlits.

For the remaining matte, it was prepared in the same way as the one for the card front with the exception that the stamp was stamped off each time as well as stamping the corner stamps in Sahara Sand as well. The sentiment was stamped using Crumb Cake.

The smaller butterfly was stamped on Very Vanilla using Sahara Sand, Crumb Cake and Cherry Cobbler. The Bold Butterfly Framelits and one with the Butterflies Thinlits dies were used to die cut the butterflies. They were adhered together and to the matte using Glue Dots.

Linda Vich Creates: Stamping Mistake? Learn How I Fixed Rather Than Trashed This Card! Textural card created with Butterflies Thinlits.

Linda Vich Creates: Stamping Mistake? Learn How I Fixed Rather Than Trashed This Card! Textural card created with Butterflies Thinlits.

Lastly, I used the Envelope Punch Board to create a matching envelope from Crumb Cake. It was stamped on the front using Crumb Cake and the leafy stamp from the Number of Years stamp set. The envelope was lined with a matching piece of Regals Designer Paper Stack. Mary Fish has a great tutorial for an envelope liner.

Linda Vich Creates: Stamping Mistake? Learn How I Fixed Rather Than Trashed This Card! Textural card created with Butterflies Thinlits.

Linda Vich Creates: Stamping Mistake? Learn How I Fixed Rather Than Trashed This Card! Textural card created with Butterflies Thinlits.

After finishing the card, I noticed that the sentiment on the front of the card was not totally distinct after having dried completely. How exasperating!

I knew that I would have to use a darker ink to correct the look of the sentiment. With hopes that I didn't have to remake the sentiment strip, I used some of my trusty Un-Du to remove the butterfly and sentiment strip. The card front and strip were completely saturated with the Un-Du solution so I used my heat tool to dry them.

Next, I used my MISTI to stamp the sentiment on the clear matte from my Stamp-a-ma-jig using a bright color of ink. I then placed my sentiment strip under the matte and played with it until I thought that both sentiments were in total alignment. I then carefully removed the plastic matte and secured the sentiment strip with magnets. I then inked up the sentiment with Early Espresso and re-stamped the sentiment.

Upon careful examination, I discovered that the restamp was not in exactly the same spot as the original. However, by happy accident, the stamping looked like it had been planned "shadow" stamping because the lighter, originally stamped sentiment acted as a shadow for the newer, crisply stamped sentiment! BONUS! It actually now had a kind of 3D quality to it!

Linda Vich Creates: Stamping Mistake? Learn How I Fixed Rather Than Trashed This Card! Textural card created with Butterflies Thinlits.
Original sentiment stamped in Crumb Cake.

Linda Vich Creates: Stamping Mistake? Learn How I Fixed Rather Than Trashed This Card! Textural card created with Butterflies Thinlits.
Sentiment Restamped in Early Espresso. Click on the
image to view a larger size to see the 3D shadowed detail.
So, the moral of this story is . . . if you make a stamping mistake, think about it and attempt a fix before having to trash your card completely. You might be pleasantly surprised!


>

Tuesday, November 15, 2016

Beautiful Butterfly Birthday

Linda Vich Creates: Beautiful Butterfly Birthday. Timeless Textures combines with beautiful butterflies to produce a elegant vintage-style card.
On Sunday it was my mother's 91st birthday. Quite a milestone! I wanted to create a very special card for her. I looked through Pinterest for ideas and decided to CASE one by Areli Johnson.

I started by cutting a 4.25 x 5.5" vertical card base from Crumb Cake. I also cut a Very Vanilla matte on which to stamp.

A stamp from the Number of Years stamp set was used to stamp a random leafy pattern all over the card stock using Sahara Sand. I then used an edge stamp from one of my all time favorite sets, Timeless Textures. I stamped this all around the edges of the card stock, again using Sahara Sand.

Choosing another stamp from the same set, I switched to Sweet Sugarplum and stamped in the top right and bottom left corners.

I cut a piece of the Playful Palette DSP and adhered it to the centre of the matte and then added some lace trim (it's a retired one from a Stampin' Up kit but it was unmarked so not sure which one) to the top and bottom of the DSP. Linen Thread was wrapped around the centre of the DSP and adhered to the back with Fast Fuse.

The sentiment, from the Butterfly Basics stamp set, was stamped with Crumb Cake on Sweet Sugarplum card stock and then die cut using an oval die from the Stitched Shapes Framelits. A scalloped oval from the Layering Ovals Framelits was die cut from Very Vanilla and adhered to the stamped oval. The finished piece was adhered over the linen thread using Dimensionals.

Next, I used my MISTI to stamp two butterflies using the Watercolor Wings stamp set. I used Sahara Sand and Sweet Sugarplum and stamped two of the same butterflies and then die cut one using the Bold Butterfly Framelits and one using the Butterflies Thinlits. The two were adhered together and then adhered to the card front using Glue Dots. A strip of pearls was added to the body.

For inside the card, I stamped a Very Vanilla matte using the same two stamps from Timeless Textures but stamped each in Sahara Sand after first stamping off. I also stamped the smaller butterfly, from the Butterfly Basics stamp set, two times using Sweet Sugarplum. One was die cut using the Bold Butterfly Framelits, and one using the Butterflies Thinlits. This was adhered near the top of the matte (not the best place as I discovered!) to complete the card.

I also decided to stamp the envelope and used my Envelopes Liners Framelits to line the envelope with matching paper.

Linda Vich Creates: Beautiful Butterfly Birthday. Timeless Textures combines with beautiful butterflies to produce a elegant vintage-style card.

Linda Vich Creates: Beautiful Butterfly Birthday. Timeless Textures combines with beautiful butterflies to produce a elegant vintage-style card.

Linda Vich Creates: Beautiful Butterfly Birthday. Timeless Textures combines with beautiful butterflies to produce a elegant vintage-style card.

I'm pretty pleased with how the card turned out! Who wouldn't love a combination of Timeless Textures and butterflies?

Here's a picture of my Mom carefully studying the card I gave her.


And here is a picture of her holding one of the nighties I gave her!


All in all I think my mom had a happy day!


Sunday, October 16, 2016

Stamp Class #2 Projects

Linda Vich Creates: Stamp Class #2 Projects. Heat embossed background serves as a pretty backdrop for the Jar of Cheer candle embellishment in this cheery Christmas card.
When I was a kid, time seemed to pass soooooo slowly. It took forever just to get to the weekend. Christmas and summer vacation were eons away. And growing up, in general, seemed like it would never happen. Now, one week runs into the next, and the months gallup into years!

Though it seems like only a few days ago, I met with my second stamp group at the end of September. All but three were new to stamping but they did fabulously with the two projects I created for them.

The first card started with a standard card base cut from Thick Whisper White card stock. A matte of Real Red received a stamped background of Versamark using one of the stamps from the Timeless Textures stamp set. It was Heat embossed using Clear Stampin' Emboss Powder.

A length of the metallic gold twine from the Baker's Twine Trio Pack was wrapped around the matte and secured with tape. The matte was then adhered to the card front using Dimensionals.

On a square of Thick Whisper White, the candle from the Jar of Cheer stamp set was stamped using Basic Black Archival ink. The heat tool was used to set the ink before coloring with Stampin' Write Markers. The candle and flame also received some Gold Wink of Stella.

The candle and a piece of gold foil were die cut using the Layering Circles Framelits and then adhered together using liquid adhesive. The finished embellishment was then adhered over the twine using Dimensionals.

To complete the card, a sentiment from the Tin of Tags stamp set was stamped in Real Red on the inside of the card.

Linda Vich Creates: Stamp Class #2 Projects. Heat embossed background serves as a pretty backdrop for the Jar of Cheer candle embellishment in this cheery Christmas card.


Linda Vich Creates: Stamp Class #2 Projects. Heat embossed background serves as a pretty backdrop for the Jar of Cheer candle embellishment in this cheery Christmas card.


The second card was CASEd from here. The standard card base was cut from Crushed Curry and two mattes cut from Very Vanilla and Rich Razzleberry.

The Rich Razzleberry matte was spritzed lightly with water and then embossed using the Cable Knit Embossing Folder. It was adhered to the Very Vanilla matte with liquid adhesive and then to the card front.

Crumb Cake was used to stamp a leaf from Vintage Leaves on watercolor paper and then after die cutting, color was sponged onto the leaf using Crushed Curry, Pumpkin Pie, Rich Razzleberry and Old Olive. Two pieces of Linen Thread were tied around the leaf stem and then the leaf was adhered to the card front using Dimensionals.

The Triple Banner Punch was used to flag one end of a strip of Very Vanilla and then Rich Razzleberry was used to stamp the sentiment from Basket of Wishes Stamp set. The strip was adhered using Dimensionals.

Linda Vich Creates: Stamp Class #2 Projects. Rich Razzleberry Cable Knit background is paired with a colorful autumn leaf in this thinking of you card.

Linda Vich Creates: Stamp Class #2 Projects. Rich Razzleberry Cable Knit background is paired with a colorful autumn leaf in this thinking of you card.

The ladies had a lot of fun and the time flew by!


Thursday, August 4, 2016

Thoughtful Branches Thank You

Linda Vich Creates: Thoughtful Branches Thank You. A lovely hydrangea blossom from Thoughtful Branches, in shades of Bermuda Bay and Island Indigo, rests against a grungy, Peekaboo Peach brick background.
When I sat down to design this card, I knew that I was going to use Bermuda Bay and Island Indigo, because they were favorites of the recipient, and I also added Cucumber Crush because the three colors produced a lovely analogous color scheme. However, I chose a complementary color, Peekaboo Peach, to really add some punch.

I started by stamping the blossoms, from the Thoughtful Branches stamp set, in both Bermuda Bay and Island Indigo on Thick Whisper White. They were die cut with the matching Thinlits. A set of leaves were also die cut from Cucumber Crush.

A matte was cut from Thick Whisper White and embossed with the Brick Wall Embossing Folder. I really love using the Thick Whisper White because it embosses so nicely! The Watercolor Wash stamp was used to stamp over the bricks using Peekaboo Peach to give them a nice grungy look. I also added in a few ink splatters by flicking the long end of a Tangerine Tango Stampin' Write Marker against its cap.

A 4.75 x 6" card base was cut from Peekaboo Peach as well as mattes from both Cucumber Crush and Bermuda Bay. I used a sponge dauber to ink the edges of all three mattes to provide separation of the colors and then Iadhered the embossed matte to the Cucumber Crush one with Fast Fuse. Dimensionals were used to adhere this combined matte to the Bermuda Bay one.

I chose the woodgrain stamp from Timeless Textures to add Tangerine Tango around the edges of the card base, echoing the splatters on the embossed matte. The mattes were then adhered with Dimensionals.

Using cut up Dimensionals, the two flower die cuts were adhered to one another, the Island Indigo one inverted under the Bermuda Bay one. The blossoms and the leaves were then adhered to the card front using Glue Dots.

The sentiment, from the Bunch of Blossoms stamp set, was masked so that I could stamp each part in different colors onto Thick Whisper White. The sentiment and a matte from Island Indigo was then die cut using the Tags & Labels Framelits. They were adhered to the card front and a small bow from Peekaboo Peach Ruched Ribbon was added to finish the card front.

A Whisper White matte was cut for the inside of the card. Stems were stamped in Cucumber Crush and the blossoms stamped three times in Island Indigo to provide some dimension.

Linda Vich Creates: Thoughtful Branches Thank You. A lovely hydrangea blossom from Thoughtful Branches, in shades of Bermuda Bay and Island Indigo, rests against a grungy, Peekaboo Peach brick background.

Linda Vich Creates: Thoughtful Branches Thank You. A lovely hydrangea blossom from Thoughtful Branches, in shades of Bermuda Bay and Island Indigo, rests against a grungy, Peekaboo Peach brick background.

Though I would not have immediately chosen this five color combo for a card, I believe that these colors work well together to provide a stand-out card! Feel free to save this color combo for your own creations.

Linda Vich Creates: Color Combo from Thoughtful Branches Thank You card.


Tuesday, June 14, 2016

Flourish Thinlits For Global Design Project

Linda Vich Creates: Flourish Thinlits For Global Design Project. Shabby chic style card using the Flourish Thinlits.
I'm in love!

I had my first play today with the Flourish Thinlits and the coordinating stamp set, Flourishing Phrases. I was a little leery about die cutting them with my Big Shot because Stampin' Up has recommended that both the Precision Plate and the new Big Shot Platform be used with these detailed dies.

I'm happy to say that by using a dryer sheet with my magnetic platform, I was easily able to cut my card stock with these dies! To be sure, I ran it through twice but I might have only needed the one run through because the dies cut like butter for me!

Now because every Big Shot is a little bit different, you may not get the same results as me; you might need what is recommended by Stampin' Up and/or you may need to use some shims to cut successfully.

Choosing Soft Suede for my flourish die cut I then coordinated my mattes around that choice. I used a Soft Suede card base to make a 4.75 x 6" card and cut a matte from a piece of Dapper Denim in the 2016-2018 In Color DSP Stack. I also cut two tall and narrow mattes, one from Crumb Cake and one from Very Vanilla.

Some texture was added to the Very Vanilla matte by using the flourish from Timeless Textures to stamp with Sahara Sand after first stamping off. I repeated this process with the Crumb Cake matte with full-strength inking.

Next, I used the now retired Distress Tool to roughen the edges of both mattes and then inked the Very Vanilla matte with Soft Suede and the Crumb Cake one with Dapper Denim.

I lightly sponged Soft Suede onto two lengths of Linen Thread and wrapped them around the top and bottom of the Very Vanilla matte, securing on the back with Fast Fuse Adhesive.

My Marsupial Layering Tool was used to adhere the Dapper Denim matte to the card front and then the Crumb Cake matte was adhered on top. The Very Vanilla matte was adhered using Dimensionals.
After die cutting the flourish from Soft Suede, I cut two of the blossoms again, this time from Dapper Denim. I also punched 10 circles using the 1/4" Circle Punch. The flowers and the circles were glued onto the die cut and then it was glued to the card front.

The sentiment from the Garden in Bloom stamp set was inked with Soft Suede and stamped onto a strip of Soft Suede. The strip was then distressed and inked with Soft Suede. Dimensionals were used at one end of the strip and it was tucked between the two mattes on the card front.

Sahara Sand ink was used on the flourish to stamp the edges of a Very Vanilla matte, stamping off first. Then the large flourish stamp from the Flourishing Phrases stamp set was inked with Dapper Denim and stamped in the bottom right corner. The matte was distressed with the Distressing Tool and then the edges were inked with both Soft Suede and Dapper Denim. The matte was adhered with Fast Fuse inside the card.

Linda Vich Creates: Flourish Thinlits For Global Design Project. Shabby chic style card using the Flourish Thinlits.

Linda Vich Creates: Flourish Thinlits For Global Design Project. Shabby chic style card using the Flourish Thinlits.

Linda Vich Creates: Flourish Thinlits For Global Design Project. Shabby chic style card using the Flourish Thinlits.

I'm really liking this card, especially all the distressing and the wonderful color combination. Feel free to save this color combo if you'd like to use it for your own cards!


I'm entering this card in the Global Design Project #040. Why not come out and play with us?


My one regret is that I wish I had used a baby wipe to dab away a little of the ink from my stamp when stamping the Dapper Denim flourish inside the card. I think that a more distressed version of the stamp would have looked better with the other distressing on the card.

Have you had a chance to play with the Flourish Thinlits yet? Let me know what you think of them by leaving me a comment below!


Friday, June 3, 2016

Catalog Party Prep Part 4

Linda Vich Creates: Catalog Party Prep Part 4. Timeless Textures provide the distressed foundation for a butterfly in this set of cards.
Today brings us to Part 4 in my 5-part series. If you missed them, here are Part 1, Part 2 and Part 3.

The card set today was CASEd from Stamper's Blog.

A standard card base was cut from Crumb Cake card stock for all five cards. Mattes were cut from each of the five new In Color card stocks and a smaller Whisper White matte was also cut for each card.

Both the Bold Butterfly Framelits and the Butterflies Thinlits were used to die cut both intricate and solid butterflies for each card.
The In Colors were paired together as follows:

Peekaboo Peach and Flirty Flamingo
Dapper Denim and Peekaboo Peach
Flirty Flamingo and Sweet Sugarplum
Dapper Denim and Emerald Envy
Flirty Flamingo and Emerald Envy

Multi Medium Matte was used to adhere the ornate butterflies on top of the solid ones. A swirl of Linen Thread and a pearl was attached to the centre of each butterfly using glue dots.

Four different stamps from the Timeless Textures stamp set were used on each Whisper White matte using Crumb Cake as well as the two inks that matched the butterflies.

The grid stamp was first used to create an L-shape on the bottom left of the matte. Over that was stamped the wood grain stamp in Crumb Cake. The ornate stamp was stamped at the intersection of the L and along each axis. The dots were sprinkled around the first three stamps. The sentiment from the Butterfly Basics stamp set was stamped in one of the matching ink colors at the top of the card.

The stamped matte was adhered to the colored matte with Fast Fuse and then adhered to the card front using Dimensionals. The butterfly was adhered using a Dimensional to complete the card.

Linda Vich Creates: Catalog Party Prep Part 4. Timeless Textures provide the distressed foundation for a butterfly in this set of cards.

Linda Vich Creates: Catalog Party Prep Part 4. Timeless Textures provide the distressed foundation for a butterfly in this set of cards.

Linda Vich Creates: Catalog Party Prep Part 4. Timeless Textures provide the distressed foundation for a butterfly in this set of cards.

Linda Vich Creates: Catalog Party Prep Part 4. Timeless Textures provide the distressed foundation for a butterfly in this set of cards.

Linda Vich Creates: Catalog Party Prep Part 4. Timeless Textures provide the distressed foundation for a butterfly in this set of cards.

 I just love the juxtaposition of the distressed textures with the ornate butterflies!


Sunday, April 10, 2016

Painted Rose For Global Design Project

Linda Vich Creates: Painted Rose For Global Design Project. A watercolored Watermelon Wonder rose topped by its matching Basic Black thinlit sits atop an ornately cut matte stamped with Timeless Textures.
On my way home from work today, I stopped to pick up a prescription for my husband. As I passed the magazine rack in the store, some colorful covers caught my eye and I had to stamp some pictures for inspiration. As I drove home, a card design was staring to gel in my mind.

After supper, I quickly began making my card because I had to finish it tonight in time for the Global Design Project deadline!

The color scheme for my card changed dramatically from the one I first thought I'd use! I will still utilize the color scheme I first thought of but I'm pleased with the one I selected for this card.

I used Jet Black Stazon to stamp the rose from the Rose Wonder stamp set on a piece of the Typeset DSP. I used the same watercolor technique as I did yesterday, placing rubbing alcohol in my Aqua Painter instead of water, and painted using the Watermelon Reinker. I set it aside to dry thoroughly.

A Basic Gray card base for a 4.75 x 6" card was cut and then I cut a partial matte from Watermelon Wonder and used one of the now retired Adorning Accents Edgelits on it to give an ornate edge to my matte. I then used the matching piercing template from the Paper-Piercing Pack Essentials to pierce a line that followed the cut edge.

Next, I stamped the matte using Watermelon Wonder and stamps from the Timeless Textures stamp set. The matte was then adhered to the card base using Fast Fuse adhesive.

I used the Rose Garden Thinlits to cut the rose and two stems of the leaves from Basic Black and cut off the rose's leaves. Now that my painted rose was dry I was able to glue the die cut rose over top of the painted rose using Multi Medium Matte.

I cut a strip of Basic Gray to go across the card front and embossed it using the Pretty Print Embossing Folder and then sponged a bit of Smoky Slate ink onto it to make the embossing stand out more. It was adhered to the card front using a strip of self-adhesive fun foam. The leafy stems were adhered to the strip using Multi Medium Matte and then the rose was adhered over top using Dimensionals.

Using Jet Black Stazon ink, the sentiment from the Bloomin' Love stamp set was stamped and the scroll from the Number of Years stamp set was stamped over it on Watermelon Wonder. It was then die cut using the die from the Large Numbers Framelits. It was adhered at the bottom of the card using Dimensionals.

Three pearls were placed under the embossed strip of Basic Bray to complete the card front.
The inside was kept pretty simple. Whisper White was matted with Watermelon Wonder and adhered to the card with Fast Fuse. One stamp from the Timeless Textures stamp set was stamped in the bottom right corner to complete the card.

Linda Vich Creates: Painted Rose For Global Design Project. A watercolored Watermelon Wonder rose topped by its matching Basic Black thinlit sits atop an ornately cut matte stamped with Timeless Textures.

Linda Vich Creates: Painted Rose For Global Design Project. A watercolored Watermelon Wonder rose topped by its matching Basic Black thinlit sits atop an ornately cut matte stamped with Timeless Textures.

So, do you like it? I think the Watermelon Wonder and Basic Gray work well together, accented by the Basic Black. If you would like to use this color scheme, feel free to save the graphic below.


I've entered this card in the Global Design Project #30. Why don't you come and play sometime?


I'd love it if you could leave me a comment below to let me know you stopped by! Have a great day!


Sunday, March 27, 2016

Spring Butterfly

I absolutely adore the papers in the Birthday Bouquet DSP! Such lovely colors and patterns to play with–what's not to like? These papers were the inspiration for my card today.

Die cutting a butterfly from the Birthday Bouquet DSP using the large die in the Bold Butterfly Framelits was my first step, as it was to be my focal point. I used the small die to cut a butterfly from Watermelon Wonder card stock.

Next, I used my Fun Flower Punch to punch one flower from Watermelon Wonder and another from Blushing Bride. I used the Blossom Bunch Punch as well as a punch from the now retired Itty Bitty Shapes Punch Pack to punch flower centres and one smaller flower using Pool Party, Mint Macaron and Watermelon Wonder card stock. The Bird Builder Punch was used to punch two leaves, one Old Olive and one Mossy Meadow.

My card base was cut from Watermelon Wonder in my new favorite 4.75 x 6" size and a matte was cut from the Perfectly Artistic DSP. Using stamps from the Timeless Textures, I stamped using Pool Party and then taped a piece of Pool Party Glitter Ribbon around the bottom of the matte. It was then adhered to the card front using Fast Fuse Adhesive.

Using a Tea Lace Paper Doily as a base, I designed my flower arrangement and snapped a photo. I then inked the edges of all the flowers parts, leaves and smallest butterfly with matching inks and brushed each piece with Wink of Stella. I also inked the the large butterfly with Soft Suede. Once the pieces were dry, I shaped them using both my Bone Folder and my McGill Paper Blossom Tool Kit. The flowers and butterfly were then adhered together using Multi Medium Matte.

The doily , leaves and large butterfly were adhered with a couple of drops of Multi Medium Matte and then the flowers were adhered with Dimensionals. I added pearls to both the flowers and butterfly.
The sentiment from the Rose Garden stamp set was stamped in Watermelon Wonder on Thick Whisper White and die cut with a die from the Rose Garden Thinlits. It was popped up over the flowers with Dimensionals.

For the inside matte, I used some of the now retired Naturals White card stock. I stamped a flower from the Beautiful Bunch in Blushing Bride and inked the edges using Pool Party. I die cut a butterfly from a piece of the Birthday Bouquet DSP using the smallest butterfly from the Butterflies Thinlits Dies and inked its edges in Soft Suede. It was adhered with Multi Medium Matte. It and the solid part of the flower stamp were coated with Wink of Stella and the matte was adhered with Fast Fuse to complete the card.


I am loving the color combination on this card–it is so airy and Spring-like! Feel free to copy it if you are inspired by these colors.


If you use these colors in a card, drop me a link below. I'd love to take a look!


Saturday, February 20, 2016

Timeless Textures Thank You

Those of you who know me well, or at least follow my blog, know that I love texture. Because of this, I was immediately drawn to this card by Dena Rekow.

Dena's card employs texture in a few ways:

  1. By using a patterned paper
  2. By stamping with ink with the Timeless Textures Stamp Set
  3. By stamping with water
Yes, you read that right! Stamping with water is a really neat technique that produces texture by subtracting color! But I'm getting ahead of myself.

I decided to CASE Dena's card but change up the colors and use it for thank you cards for my stamping group.

I started by cutting a standard card base from Basic Black. I cut a skinny Island Indigo matte and finally a matte from a piece of the Typeset DSP.

I used Island Indigo with the mottled edge stamp from Timeless Textures to stamp around the outside of the matte. I then used another of the stamps to stamp a couple of times with Basic Black Archival ink on the matte itself.

I cut a tag for the card from Whisper White by using a die from the Lots of Labels Framelits Dies. I used a sponge dauber to color the entire tag with Bermuda Bay ink and then covered it again using Island Indigo ink. Using the swirly stamp from Timeless Textures, I spritzed it 4-5 times with my Mini Mister (until water beaded on the stamp). I then stamped it onto the paper and held it there for about 10 seconds.

What was left was a very light swirl stamp that deepened as it dried. I stamped it a second time and then made sure it was totally dry by zapping it with my Heat Tool. I then stamped the sentiment from the Crazy About You Stamp Set using Basic Black Archival ink.

I adhered the stamped matte to the Island Indigo matte using Snail Adhesive. A length of the 3/8" Basic Black Stitched Ribbon was knotted around the matte. This was then adhered with Dimensionals to the Basic Black card front.

The edges of the tag were inked with Basic Black Archival ink and then it was adhered with Dimensionals to the card front.

A matte of Whisper White was cut for the inside. (This is where I made an error but it was too late to correct. I should have used a Very Vanilla matte for the inside because the Typeset Paper has a Very Vanilla background rather than one that is white.) I inked the edges with the same stamp as on the front of the card and stamped one swirl stamp. The matte was adhered with Fast Fuse Adhesive to complete the card.


What is important to note about this card technique is that Clear Mount stamps were used. I'm not sure if Photopolymer stamps would work as well for this technique. In addition the stamps were "distressed" stamps so that weird effects from the water would be acceptable.

I will definitely use this technique again and I will try it with Photopolymer stamps to see if my hypothesis is valid. I'm thinking that the Awesomely Artistic Stamp Set might be a good one to try. The First Sight Stamp Set would also be another possibility. Even Kinda Eclectic could produce some neat results! It will be fun to experiment to see what works best!

I hope you try the water stamping technique–let me know how it works for you!


Wednesday, February 3, 2016

Sky Is The Limit Birthday

>>>>>Update<<<<<

My card was chosen as a Top Pick on Stampin' Royalty #315! Woohoo! Click on the picture below to come and play!


Wow! Have you ever had one of those crafting sessions where everything just goes together tickety-boo? I certainly had one of those days today!

I was actually working on a couple of different projects–coloring for a card challenge project and creating a new card.
When I started, I knew three things:
  1. color scheme–Kraft and Always Artichoke
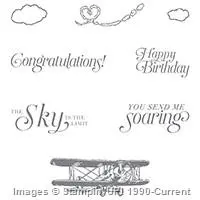
  2. stamp sets–Sky Is The Limit and Timeless Textures
  3. layout–two mattes, one embossed; burlap trim
This was one of those cards that I got an inkling for and I mulled it over in my mind since last night. This morning, the idea really gelled so I could go ahead and create the card!

As I often do, I had the design software for my Silhouette open so I could draw out my idea and modify it as I worked on my card. I find this very useful because I can choose the exact size for mattes, etc. I even copy a picture of the stamp and put it into place to get an idea of how everything will fit together. It also cuts down on paper waste.

Linda Vich Creates: Sky Is The Limit Birthday. Timeless Textures gets a workout in this masculine card that showcases the Sky Is The Limit plane.
Card design in Silhouette Design Software
I cut a standard size card base from Kraft card stock and also cut a matte that was 3 x 4.25." I had a scrap piece of the Kraft which I used to test out the inks that I might use on it. I find that I waste less card stock this way. Also, ink looks different on different card stocks as well as looking different when it is dry compared to how it looks wet. I tried Baked Brown Sugar, Tip Top Taupe and Soft Suede. Soft Suede was the winner!

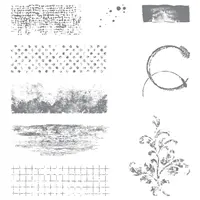
I opened the Timeless Textures stamp set and started by choosing the grid pattern stamp. The Timeless Textures stamp set was a no-brainer purchase for me! So many useful stamps that can be used and used for years to come! This Sale-A-Bration stamp set is only available FREE with a $60 purchase until February 15. If you haven't yet got it, put it at the top of your list–you won't regret it!

I chose the grid stamp and inked it up with the Soft Suede and stamped once at an angle on the left of the matte and then "dabbed" parts of it around the matte. Next, I used the kind of smudgy edge stamp and stamped it on the top and right edges of the matte. The coffee ring stamp was next. I stamped it off once and then stamped it once on the bottom and twice on the top. I used some of the grunge dots to sort of fill in the rest of the matte with texture. To give the whole matte some depth, I sponged deep edges and corners with the ink.
Basic Black ink was used to stamp both the plane and the sentiment.

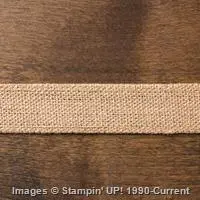
I cut a small piece of the Burlap ribbon and then cut it in half lengthwise. I folded one of the pieces in half and cut the ends at an angle. I knew that I wanted to staple the burlap to the matte but I didn't want a silver staple but that's all that we have from Stampin Up. So, what to do? I used a E15 Copic marker to color the staples and then stapled the burlap to the matte. The staples now looked just like I wanted them to look!

For the Always Artichoke matte, I didn't want to use the texture stamps but it was looking a little bare. I looked through my embossing folders from Stampin Up but didn't have one that would give the look I was after. I decided to use my Cheetah Print embossing folder (which is part of a set of two embossing folders) because I thought it sort of resembled camouflage which kind of went with the grungy card I was creating.

After embossing the matte, I sponged the edges as well as the embossed pattern to give it a bit of life.
All that was left to do was put the card together! I used Dimensionals for both mattes, turning the stamped matte at an angle.


I am really liking this masculine card! The Sky Is The Limit stamp set will be one that I turn to often. To see other projects that use this stamp set, be sure to view The Sky Really Is The Limit! and Sale-a-Bration Freebie Sneak Peek.

I'm entering this card in the Stampin' Royalty Challenge #SR315. The theme is Cards For Guys.

Wear Our Badge

One last thing before I leave you . . . did you spot the "oops" on my card? Leave me a comment below with your guess!