Wednesday, June 28, 2017

Magical Mermaid Birthday

Linda Vich Creates: Magical Mermaid Birthday. A sparkly, tropical underwater scene is created with both the Magical Mermaid and Seaside Shore stamp sets.
The card share I have for you today is a card I have been working on for a few days, getting it just the way that I wanted it. I used a 5 x 7" card size so I would have lots of room for my deep sea scene. I have had so much fun stamping, coloring, and blending!

I started with a piece of Watercolor Paper and I sponged the bottom with Sahara Sand. I a stamp from the Magical Mermaid to stamp over this to create the sandy bottom.

After heat setting this, I stamped seaweed from the Magical Mermaid stamp set using Pear Pizzazz. I used several different Stampin' Write Markers to color these and then heat set them. I sponged a little more Sahara Sand over the bottom of the plants to "ground" them.

I used the MISTI to repeatedly stamp the mermaid after coloring portions of the stamp with a variety of markers. A Blender Pen was then used to fill in the scales and the other parts of the mermaid before heat setting again. Finally, I stamped over the mermaid using Versamark and heat embossed it with Clear Stampin' Emboss Powder.

Next, I used a sponge to apply Pool Party, Bermuda Bay and Island Indigo from the top to the bottom of the matte. I used some Clear Wink of Stella on the mermaid's tail and to highlight her hair.

Using the plant from the Seaside Shore stamp set, I stamped it twice on Watercolor Paper using Garden Green and then colored them in with markers and the Blender Pen, finishing by fussy cutting them. A Garden Green marker was used to ink the edges of the plant so no white was visible.

The two angel fish were also stamped on Watercolor Paper but with Jet Black Stazon. After heat setting, they were colored with a Lemon Lime Twist marker and fussy cut. After applying a coat of Clear Wink of Stella to the colored parts of the fish, they were clear embossed two times to make them very glossy. The fussy cut plants were also clear embossed.

I used my Silhouette Cameo to cut out the anchor from the Seaside Shore stamp set, cutting four separate anchors. Liquid adhesive was used to glue these together.

To make the anchor look rusty, I started by stamping parts of the anchor with Delicata Gold ink and then heat embossing slightly with Gold Stampin' Emboss Powder. I repeated by stamping and embossing with Versamark and using Copper, Gold and Clear Embossing Powders and also by distressing it with some Jet Black Stazon ink.

Of course, the anchor had to have a chain to lower it into the ocean so I cut a length of silver chain and gave it a faux rust effect by applying Inka Gold in Copper, Old Gold and Graphite colors. The top of the chain and the anchor was adhered to the matte using Glue Dots. Seaweed was adhered over the anchor and to the side of it using both Glue Dots and Mini Dimensionals.

The sentiment was stamped with Basic Black on Cajun Craze and then die cut using the #2 circle from the Stitched Shapes Framelits. A matte was die cut using the #4 scalloped circle from the Layering Circle Framelits. After adhering them together with liquid adhesive, Foam Adhesive Strips were used to adhere it over the top of the anchor's chain.

The angel fish were adhered to the matte using Dimensionals and then liquid adhesive was used to add Dazzling Diamonds selectively to the mermaid's headband and to her tail. Clear sequins were used as bubbles and other sequins were used to add a bit more glitz to this under the sea scene. The matte edges were sponged with Cajun Craze before adhering to a Cajun Craze card front using Dimensionals.

A second Watercolor matte was cut for inside the card. The tail of the mermaid was stamped in Bermuda Bay and seaweed was stamped repeatedly using various colors of green ink–Pear Pizzazz, Old Olive, Garden Green and Lemon Lime Twist. A sponge was used to ink the edges of the matte with Lemon Lime Twist and then the matte was adhered inside the card to complete it.

Linda Vich Creates: Magical Mermaid Birthday. A sparkly, tropical underwater scene is created with both the Magical Mermaid and Seaside Shore stamp sets.

Linda Vich Creates: Magical Mermaid Birthday. A sparkly, tropical underwater scene is created with both the Magical Mermaid and Seaside Shore stamp sets.

Linda Vich Creates: Magical Mermaid Birthday. A sparkly, tropical underwater scene is created with both the Magical Mermaid and Seaside Shore stamp sets.


I'm so pleased with how this turned out! I plan to give it to my sister-in-law for her birthday when we go to visit in July and August.


Saturday, June 24, 2017

June Wind Up and Projects

Linda Vich: June Wind Up and Projects. Balloons and a paper pieced stamp from Beautiful You produce a stunning layered card.
Friday night was our last stamping class until September. It was bittersweet because so many ladies, from our group, for various reasons, will not be returning to the group in the fall. However, we did have a lovely time by starting the night with goodies and socialization.

I was the lucky recipient of a beautiful card and a gift card to a local spa! It will be such a treat to look forward to using!

After gorging ourselves on various appetizers and desserts, it was a bit difficult to get going on crafting but we managed!

Our first card was a CASE from demonstrator Michelle Carter.

This card was not hard to make though it looks complicated!

A standard card base from Berry Burst was used as well as a small matte of 2.75 x 4". In addition to these, two Whisper White mattes were used, 2.5 x 3.75" and two 4 x 5.25". A piece of the Fresh Florals Designer Paper in Berry Burst was also cut 4 x 5.25" with it cut further at 2.25" to produce two strips.

The larger Whisper White matte was adhered to the card front using Fast Fuse. The larger strip of DSP was adhered onto the white matte.

The Beautiful You stamp set was used and the lady was stamped twice, using Basic Black–once onto the smallest Whisper White matte and once onto the smaller strip of DSP. The stamp on the DSP was fussy cut so that the dress and the hat were able to be glued onto the stamped image on the white card stock. This was then matted with the Berry Burst and adhered to the card front using Dimensionals.

From the remaining strip of DSP, two balloons were punched using the Balloon Bouquet Punch and three balloons were punched from scraps of Berry Burst card stock. Two card stock balloons were glued to the card front with one DSP balloon adhered over top using a Dimensional. The strings were drawn in using a fine point Sharpie.

Inside the card, the sentiment was stamped in Basic Black on a Whisper White matte and then two balloons, one from card stock and one from DSP were adhered, overlapping, on the side of the matte; strings were drawn in like before.

Linda Vich: June Wind Up and Projects. Balloons and a paper pieced stamp from Beautiful You produce a stunning layered card.

Linda Vich: June Wind Up and Projects. Balloons and a paper pieced stamp from Beautiful You produce a stunning layered card.

Linda Vich: June Wind Up and Projects. Balloons and a paper pieced stamp from Beautiful You produce a stunning layered card.


For the second card, the stampers had a choice of either a Sunset Silhouette or a Tropical card.

For the Sunset card, a standard card base of Pumpkin Pie was cut as well as a thin Basic Black matte and a Shimmery White matte.

The Embossing Buddy was used to remove any marks from touching the matte. Using Watercolor Pencils, bands of color were scribbled onto the Shimmery White matte using a vertical orientation. An Aqua Pen was then used to soften the pencil strokes into a watercolor wash. The heat tool was used to dry the matte and then, using the MISTI, the sentiment from the Colorful Seasons stamp set and the birds from the High Tide stamp set were stamped three times with Basic Black to produce a very black print.

After getting matte as flat as possible, the Adirondack chair was die cut from Basic Black using the Seasonal Layers Thinlits and then adhered to the matte using a sponge and liquid adhesive. The matte was then adhered to the Basic Black matte with Fast Fuse and then adhered to the card front using Dimensionals.

A leaf was stamped on the remaining Whisper White matte using Pumpkin Pie and then edges inked with Real Red before the matte was adhered inside the card.

Linda Vich: June Wind Up and Projects. Watercolor pencils are used to create a wash as the backdrop for this Sunset Silhouette, complete with an Adirondack chair die cut with the Seasonal Layers Thinlits.

Linda Vich: June Wind Up and Projects. Watercolor pencils are used to create a wash as the backdrop for this Sunset Silhouette, complete with an Adirondack chair die cut with the Seasonal Layers Thinlits.

Linda Vich: June Wind Up and Projects. Watercolor pencils are used to create a wash as the backdrop for this Sunset Silhouette, complete with an Adirondack chair die cut with the Seasonal Layers Thinlits.

Linda Vich: June Wind Up and Projects. Watercolor pencils are used to create a wash as the backdrop for this Sunset Silhouette, complete with an Adirondack chair die cut with the Seasonal Layers Thinlits.


For the Tropical card, a standard card base of Bermuda Bay was used with a thin Pacific Point matte as well as one from Shimmery White.

Like the previous version of the card, the Embossing Buddy was used to remove any marks from the Shimmery White matte and then Watercolor Pencils were used to lightly scribble alternating bands of Pacific Point and Bermuda Bay using a horizontal orientation this time. The Aqua Pen was used and then the heat tool was used to dry the matte. Using the MISTI, the sentiment was stamped in Versamark and heat embossed using White Stampin' Emboss Powder.

After getting matte as flat as possible, the Adirondack chair, branch and three flowers was die cut from Thick Whisper White using the Seasonal Layers Thinlits. The branch was trimmed in places and then the chair, branch and flowers were adhered to the matte using liquid adhesive. The watercolored piece was then matted with Pacific Point and then adhered to the Bermuda Bay card front using Dimensionals.

A flower was stamped on the remaining Whisper White matte using Bermuda Bay and the edges inked with Pacific Point before the matte was adhered inside the card.

Linda Vich: June Wind Up and Projects. Watercolor pencils are used to create a wash as the backdrop for this Tropical card, complete with an Adirondack chair and branch with blossoms die cut with the Seasonal Layers Thinlits.

Linda Vich: June Wind Up and Projects. Watercolor pencils are used to create a wash as the backdrop for this Tropical card, complete with an Adirondack chair and branch with blossoms die cut with the Seasonal Layers Thinlits.

Linda Vich: June Wind Up and Projects. Watercolor pencils are used to create a wash as the backdrop for this Tropical card, complete with an Adirondack chair and branch with blossoms die cut with the Seasonal Layers Thinlits.

Linda Vich: June Wind Up and Projects. Watercolor pencils are used to create a wash as the backdrop for this Tropical card, complete with an Adirondack chair and branch with blossoms die cut with the Seasonal Layers Thinlits.

Hopefully, everyone will enjoy a lovely summer if Mother Nature cooperates and I will prepare for September!


Monday, June 19, 2017

Ornate Orchid

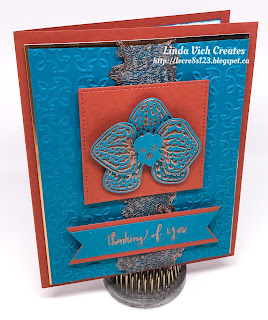
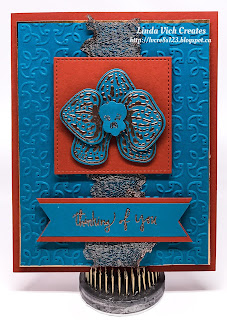
Linda Vich Creates: Ornate Orchid. Copper embossed climbing orchid sits atop a Cajun Craze stitched square. Ruffled copper trim and Island Indigo matte embossed with the Garden Trellis embossing folder as well as some copper foil and this card screams, "ornate!"
I tried a new spin on the Climbing Orchids today by designing a fancy, formal card.

For the orchid, I stamped with Versamark on Island Indigo card stock and then heat embossed using Copper Embossing Powder. After die cutting with the Orchid Builder Framelits, I adhered the flower using Dimensionals.

Next, I die cut a square from Cajun Craze using the #4 square die from the Stitched Shapes Framelits. The orchid was adhered to it using Dimensionals.

A matte of Island Indigo was dry embossed using the new Garden Trellis Embossing Folder and then a strip of the Copper Trim was pulled apart to create a ruffle and then run down the front of the matte and taped in the back. This matte was then adhered with Dimensionals to a Copper Foil matte and then to a Cajun Craze card front.

The stitched square was adhered over top of the Copper Trim using Foam Adhesive Strips. The sentiment was stamped on Island Indigo and heat embossed with copper. The Triple Banner Punch flagged each end and then was matted with a flagged piece of Cajun Craze. It was adhered to the embossed matte using double Dimensionals.

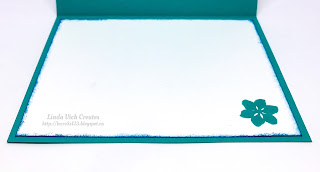
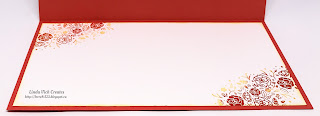
A matte of Very Vanilla was used for the inside of the card. The leaves from the stamp set were stamped on two corners using Versamark and embossed with copper. The edges were then sponged with Island Indigo before adhering the matte to complete the card.

Linda Vich Creates: Ornate Orchid. Copper embossed climbing orchid sits atop a Cajun Craze stitched square. Ruffled copper trim and Island Indigo matte embossed with the Garden Trellis embossing folder as well as some copper foil and this card screams, "ornate!"

Linda Vich Creates: Ornate Orchid. Copper embossed climbing orchid sits atop a Cajun Craze stitched square. Ruffled copper trim and Island Indigo matte embossed with the Garden Trellis embossing folder as well as some copper foil and this card screams, "ornate!"

Linda Vich Creates: Ornate Orchid. Copper embossed climbing orchid sits atop a Cajun Craze stitched square. Ruffled copper trim and Island Indigo matte embossed with the Garden Trellis embossing folder as well as some copper foil and this card screams, "ornate!"


One strange result of the embossing on this card is that the orchid almost looks like a face–spooky!

Do you like the color scheme of this card? I think that Island Indigo and Cajun Craze look wonderful together! If you like, save the color scheme for your own projects.

Linda Vich Creates: Ornate Orchid. Copper embossed climbing orchid sits atop a Cajun Craze stitched square. Ruffled copper trim and Island Indigo matte embossed with the Garden Trellis embossing folder as well as some copper foil and this card screams, "ornate!"


Sunday, June 18, 2017

Seaside Shore Father's Day

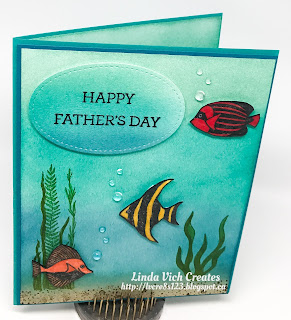
Linda Vich Creates: Seaside Shore Father's Day. Both Seaside Shore and Magical Mermaid have been used to create this tropical scene on a Father's Day card.
I had so much fun creating this card for my husband for Father's Day! I really enjoy sponging–especially on watercolor paper which is more forgiving–to get a beautiful blend of colors.

For this card, I started by stamping the two plants using Pear Pizzazz. The plant on the right is from the Seaside Shore stamp set and the other is from Magical Mermaid. I then used my Stampin' Write Markers to color them in and then heat set them.

Next, I did my sponging on a Watercolor paper matte. I used Sahara Sand at the bottom and for the water I used Pool Party, Bermuda Bay, and Island Indigo, sponging right over the plants.

Using Soft Suede, I stamped the little collection of shells and debris on the sandy bottom.

The fish were stamped on watercolor paper as well, using Basic Black Archival. I heat set the ink and then colored them with the markers. After heat setting again, I stamped them with Versamark and heat embossed them with Clear Stampin' Emboss Powder, doing half at a time. I repeated this to make them extra glossy and then even added a touch of Clear Wink of Stella.

On another piece of Watercolor paper I repeated my sponging and then, using my MISTI, I stamped the sentiment from the Crazy About You stamp set using Basic Black and then Versamark which allowed me to heat emboss it with Clear Stampin' Emboss Powder. I then die cut the sentiment using the #3 oval die from the Stitched Shapes Framelits.

The finished sponged matte was adhered to a thin Island Indigo matte using Fast Fuse and then to a Bermuda Bay card front using Dimensionals. The fish and the sentiment were adhered using Dimensionals. I adhered some Papertrey Ink Rainstones for bubbles using liquid adhesive.

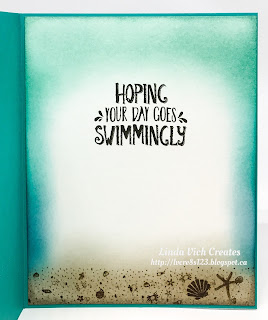
I also used watercolor paper for a matte inside the card. I sponged on some Sahara Sand at the bottom and stamped on the shells using Soft Suede. I had planned to just sponge the top and side edges of the card next but forgot and sponged all the way across the top with Pool Party so I went with it! I added Bermuda Bay and Island Indigo at the sides. The sentiment was stamped with Soft Suede.

Linda Vich Creates: Seaside Shore Father's Day. Both Seaside Shore and Magical Mermaid have been used to create this tropical scene on a Father's Day card.

Linda Vich Creates: Seaside Shore Father's Day. Both Seaside Shore and Magical Mermaid have been used to create this tropical scene on a Father's Day card.

Linda Vich Creates: Seaside Shore Father's Day. Both Seaside Shore and Magical Mermaid have been used to create this tropical scene on a Father's Day card.

I'm pleased with the way this turned out–what's not to love with these tropical colors?


Wednesday, June 14, 2017

Fresh Spring Climbing Orchids

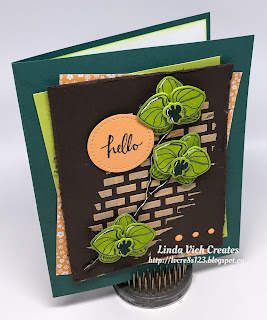
Linda Vich Creates: Fresh Spring Orchids. Lemon Lime Twist Climbing Orchids are featured on this card, displayed on a backdrop of Peekaboo Peach embossing paste bricks.
Edited: It appears that I am somewhat "orchid dyslexic" in that it was brought to my attention that my orchids were upside down! :(  This has been corrected. :)

Woke up with a Spring-like color scheme and card idea in my head this morning. Glad that I didn't have to work today and got to try it out!

I tried several new things on my card today but the first thing I tried was the new Embossing Paste because I knew I would need to let it dry before I could complete my card. I used the new Palette Knives to mix up some of the paste with Peekaboo Peach reinker and then used the brick design from the Pattern Party Decorative Masks to apply the paste to an Early Espresso matte. I set it aside to dry while I worked on the other parts of the card.

On Watercolor paper, I used my MISTI to stamp the two smaller petals and the centre from the Climbing Orchid stamp set using Tranquil Tide. I repeated the stamping three times and then heat set the ink so that I could then stamp it with Versamark. I heat embossed the images using Clear Stampin' Emboss Powder. I stamped enough petals for three complete blooms and then die cut them using the Orchid Builder Framelits.

I also stamped and clear embossed the largest complete orchid onto a Whisper White matte for inside the card. I used a sponge to sponge over and around the orchid using Lemon Lime Twist. I also sponged the edges of the matte before adhering it inside a 4.75 x 6" Tranquil Tide card base.

Using Lemon Lime Twist, I sponged color onto each piece of the orchids. I used Dimensionals to assemble each orchid.

The Seasonal Layers Thinlits were used to Idie cut a branch from Early Espresso and then I played with the arrangement of the orchid pieces on the branch. I trimmed a few of the branches to get the look and placement of the orchids that I wanted.

Once the embossing paste was dry–I left it for a couple of hours though it might have been dry before that– I used rolled up Glue Dots to adhere the branch to the Early Espresso matte. Dimensionals were used to adhere the orchids. Next, I used the now retired Distress Tool to distress the edges of the matte.

I cut two mattes of the same size as the Early Espresso one, a Lemon Lime Twist and a flowered paper from the now retired 2016-2018 In Color DSP Stack. These I stacked under the Early Espresso matte, adjusting them to be angled out from the top matte. Once I got them in the position I liked, I held the centre of the papers and added liquid adhesive in between the layers to adhere them together. They were then adhered to the card front using liquid adhesive. The Early Espresso matte was adhered on top of them using Dimensionals.

The sentiment was stamped with Early Espresso on Peekaboo Peach and then die cut with the #1 Circle from the Stitched Shapes Framelits. It was adhered to the card front using Dimensionals.

At the last minute, I decided to try adding shadows and highlights to the branch and the orchids, similar to what Vicky Papaioannou does (of course she does it much better than me!). I used an Early Espresso Stampin' Write Marker to add a shadow line to the branch and then used a Sharpie Extra Fine Point Poster Paint White Marker to add highlights to the branch and the orchids. Obviously, I need some practice with this but I don't think they look too bad!

Lastly, I added three Peekaboo Peach Enamel Shapes to the card front to complete the card. This creates a visual triangle of Peekaboo Peach that includes the patterned paper, the sentiment and the enamel shapes. This is an excellent design principle to use in cardmaking as well as scrapbooking and other layouts.

Linda Vich Creates: Fresh Spring Orchids. Lemon Lime Twist Climbing Orchids are featured on this card, displayed on a backdrop of Peekaboo Peach embossing paste bricks.

Linda Vich Creates: Fresh Spring Orchids. Lemon Lime Twist Climbing Orchids are featured on this card, displayed on a backdrop of Peekaboo Peach embossing paste bricks.

Linda Vich Creates: Fresh Spring Orchids. Lemon Lime Twist Climbing Orchids are featured on this card, displayed on a backdrop of Peekaboo Peach embossing paste bricks.

Though I do like the color scheme, I go back and forth between liking and not liking the card. What do you think? Does this color scheme and design work? Drop me a comment below to let me know what you think!

If you do like the color scheme, feel free to grab it for use in your own projects!

Linda Vich Creates: Fresh Spring Orchids. Lemon Lime Twist Climbing Orchids are featured on this card, displayed on a backdrop of Peekaboo Peach embossing paste bricks.


Tuesday, June 13, 2017

Tie Dye Thank You Cards

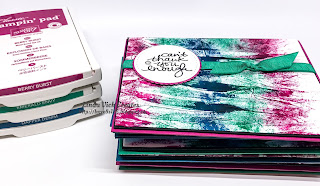
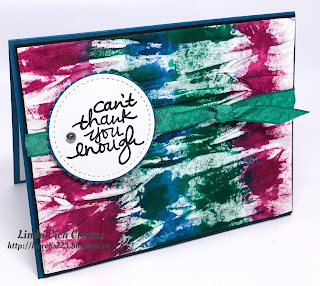
Linda Vich Creates: Tie Dye Thank You Cards. Vibrant tie dye backgrounds using Berry Burst, Emerald Envy and Dapper Denim inks, take centre stage on these thank you cards.
Yesterday, I had a most productive day! I was able to blog, do a couple of projects, and make thank you cards using a new technique!

I never actually got to try tie dye as a kid but I was impressed with the results of using the technique for card making after reading Cindee Wilkinson's blog post.

For my attempt at tie dye, I used a very lively and bright color scheme. If you like it, feel free to save it for use with your own projects.

Linda Vich Creates: Tie Dye Thank You Cards. Vibrant color scheme using Berry Burst, Emerald Envy, and Dapper Denim.

I started by scrunching up a 12 cup size coffee filter and then opened it up again. I then gathered the filter to form pleats. Using a wadded up baby wipe, I proceeded to dab on my colors. After applying ink to both sides, I carefully opened up the filter and added ink wherever needed. I made eight of these and then set them aside to dry while working on other things.

When they were dry, I adhered them to 4 x 5.25" pieces of Thick Whisper White. To adhere them, I coated one side with a glue stick and then pressed the filter down onto it, being careful to retain the pleated look for added texture.

Once all eight were adhered, I trimmed each piece to about 1/2" on all four sides. I then used Fast Fuse to adhere each edge down, forming proper corners on all four sides. I used the Fast Fuse to adhere each tie dye piece to a thin Basic Black matte.

Around each matte I knotted a length of ribbon, in one of the three colors. The sentiment, from the now retired Lovely Amazing You stamp set, was stamped with Basic Black on Thick Whisper White and then die cut using the #2 stitched circle die from the Stitched Shapes Framelits. The #4 scalloped circle from the Layering Circles Framelits was used to die cut a matte from one of the three colors. These mattes were adhered to the stitched mattes using liquid adhesive.

Standard card bases were cut in the three different colors and the tie dye mattes were adhered with Dimensionals. The sentiments with mattes of the same color as the card base were adhered onto the card fronts with Dimensionals. A rhinestone was added to each sentiment for a little bling.

For inside the card, Whisper White mattes were stamped with all three colors using a stamp from the Happy Celebrations stamp set.

Linda Vich Creates: Tie Dye Thank You Cards. Vibrant tie dye backgrounds using Berry Burst, Emerald Envy and Dapper Denim inks, take centre stage on these thank you cards.

Linda Vich Creates: Tie Dye Thank You Cards. Vibrant tie dye backgrounds using Berry Burst, Emerald Envy and Dapper Denim inks, take centre stage on these thank you cards.

Linda Vich Creates: Tie Dye Thank You Cards. Vibrant tie dye backgrounds using Berry Burst, Emerald Envy and Dapper Denim inks, take centre stage on these thank you cards.

Linda Vich Creates: Tie Dye Thank You Cards. Vibrant tie dye backgrounds using Berry Burst, Emerald Envy and Dapper Denim inks, take centre stage on these thank you cards.

Linda Vich Creates: Tie Dye Thank You Cards. Vibrant tie dye backgrounds using Berry Burst, Emerald Envy and Dapper Denim inks, take centre stage on these thank you cards.


Linda Vich Creates: Tie Dye Thank You Cards. Vibrant tie dye backgrounds using Berry Burst, Emerald Envy and Dapper Denim inks, take centre stage on these thank you cards.


This technique is really fun and addicting and I love the texture this produces! Each time the results are different. Next time I use this technique I am going to experiment with other tie dye patterns.


Monday, June 12, 2017

Gold Dipped Daisies

Linda Vich Creates: Gold Dipped Daisies. Dramatic mix of black and gold on this card that features the Daisy Punch.
On the weekend, I had some free moments at my job to brainstorm card ideas. I came up with a couple for using with the Daisy and couldn't wait to try them today! My first idea didn't work quite the way I wanted so I went on to the second idea.

I started by stamping a 4.25 x 5.5" Basic Black matte using the Diagonal Stripe stamp and Versamark and then heat embossed it with Gold Stampin' Emboss Powder. I really liked that effect!

Using the Daisy Punch, I punched six daisies from Basic Black. I also punched out six of the medium size blossom on the now retired Blossom Bunch Punch. I used a sponge dauber to dab Versamark on the ends of each daisy petal and embossed with gold. After using my Heartfelt Creations Deluxe Flower Shaping Kit to shape the small blossom punches, I stamped them with Versamark and embossed the whole blossom, one half at a time, with gold. AMAZING!

I adhered two daisies together and then two of the gold blossoms. A Dimensional adhered the gold blossom to the daisy. This was repeated to create two more flowers. I then colored a Clear Faceted Gem with a black Sharpie and adhered it in the centres of each daisy. Wow!

Next, I cut a strip of Gold Foil and stamped the sentiment with Jet Black Stazon using my MISTI to ensure a clean stamp on a slippery surface. I then used the Scalloped Tag Topper Punch to punch each end. A gold Sharpie was used to ink the edges so that the lighter core of the paper wouldn't show.

I threaded four strands of Basic Black Solid Baker's Twine through the openings in the tag and applied Mini Dimensionals to the back of it. I also taped the twine on the back to prevent the tag from sliding around. The tag was placed at the bottom of the striped embossed matte and the ends of the twine were taped to the back. The matte was then adhered to a 4.75 x 6" Basic Black card front.

The daisies were adhered to the card front using Dimensionals.

For inside the card, a Very Vanilla matte was stamped with the smaller daisy and stem and embossed with gold to complete the card.

Linda Vich Creates: Gold Dipped Daisies. Dramatic mix of black and gold on this card that features the Daisy Punch.

Linda Vich Creates: Gold Dipped Daisies. Dramatic mix of black and gold on this card that features the Daisy Punch.

Linda Vich Creates: Gold Dipped Daisies. Dramatic mix of black and gold on this card that features the Daisy Punch.

I must say that I am LOVING this card! It turned out even better than I imagined that it would! Unfortunately, the photos do not do this card justice. It is so difficult to get good pictures when you use foil on your cards!

Hope you liked my card anyway!


Sunday, June 11, 2017

Summer Daisy

Linda Vich Creates: Summer Daisy. Masking technique used to create two-toned letters on this Delightful Daisy summer card!
With the glorious weather lately, it's not hard to tell that summer is the topic on everyone's mind. Popular items through my till at Walmart include fans, air conditioners, pools, barbecues and patio furniture. Because of this, I thought it fitting then to create a summer card!

I started by selecting a piece of the Delightful Daisy DSP and then selected colors from within the pattern–Tranquil Tide and Calypso Coral–to use for a matte and card base. I also chose to use So Saffron and Calypso Coral for my letters. Though Daffodil Delight is supposed to be the yellow in the Delightful Daisy DSP, I found it to be too bright for the yellow of this particular pattern.

Next, I lined up the letter stamps from the Letters For You stamp set on my MISTI to spell SUMMER, leaving out the U and leaving a space for a second M.

I used washi tape to hold a piece of scrap paper across the letters as a mask so that I could ink up half of the letter at a time. I started with So Saffron and I inked up the letters first with Versamark and then the So Saffron so that it would ink up better. After carefully removing the mask, I stamped twice onto Watercolor Paper to get the color strength that I wanted. I then masked up the part of the letters I had stamped and then inked the remaining half of the letters with the Versamark and Calypso Coral and stamped two times.

And then, being the linear thinker that I am, I made my BIG mistake.

The MISTI is an amazing tool and is very useful for repeat stamping. What I should have done after stamping the So Saffron, was remove the piece of watercolor paper and replace it with another to stamp the second M. Then do the second masking, stamp, replace the watercolor paper and stamp again. This would have ensured that I had the division line between the So Saffron and the Calypso Coral in the exact same place on both M's.

But I didn't do that! :(

Instead, I took off the M letter stamp and put it in the spot where the second M would go and attempted to mask and stamp to get the colors in the right places.

NOT!

In the end, I measured carefully and was successful at stamping another M correctly and then I was able to die cut all the letters using the Large Letters Framelits. But it would have been so much easier just to replace the watercolor paper with another piece! Regardless, I got what I wanted in the end.

After die cutting the letters, I punched two daisies from Watercolor Paper using the Daisy Punch and then colored them using sponge daubers. I shaped them slightly with a bone folder and adhered them together using liquid adhesive. A Gold Faceted Gem was added to the centre but I decided it needed to be more yellow so I touched it up with a yellow Sharpie.

I cut the DSP and matted it onto Tranquil Tide. The letters were adhered using liquid adhesive and then the daisy with Dimensionals.

The entire matte was adhered to the Calypso Coral card front using Foam Adhesive Strips.

On a Whisper White matte, I used my MISTI to stamp the flowers from the Word Words stamp set onto a corner of the matte using So Saffron. This was repeated and then I selectively added Calypso Coral to some flowers on the stamp using a sponge dauber and stamped it again, twice. This procedure was repeated with the opposite corner of the matte. A sponge dauber was then used to ink all four edges of the matte with So Saffron before adhering the matte inside the card.

Linda Vich Creates: Summer Daisy. Masking technique used to create two-toned letters on this Delightful Daisy summer card!

Linda Vich Creates: Summer Daisy. Masking technique used to create two-toned letters on this Delightful Daisy summer card!

Linda Vich Creates: Summer Daisy. Masking technique used to create two-toned letters on this Delightful Daisy summer card!

Linda Vich Creates: Summer Daisy. Masking technique used to create two-toned letters on this Delightful Daisy summer card!


I love the combo of Tranquil Tide with the Calypso Coral and I really like this piece of the Delightful Daisy DSP and I hope to find a use for it again soon!


Thursday, June 8, 2017

Explosion Box For Baby

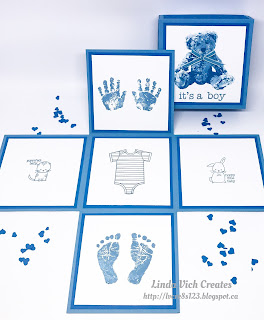
Linda Vich Creates: Explosion Box For Baby. A variety of baby stamp sets, both retired and new, were used to create this lovely project for a new baby boy!
One of my managers at work is expecting a baby any day now. I decided to try my hand at an explosion box to give to her.

To create the box, I chose a 12 x 12" piece of Marina Mist card stock and scored each side at the 4" mark. I then cut up the score lines to cut off the "boxes" at each corner, leaving a shape like a plus sign. This would be used to form the base of the box.

For the lid of the box, I cut a piece of Marina Mist at 7 1/8 x 7 1/8" and scored each side at 1.5". I cut tabs on two sides of the piece and then used liquid adhesive to adhere them to form the lid.

I cut mattes from Pacific Point and Whisper White for each panel, inside and out, and both sides of the lid of the box. The Pacific Point mattes were adhered to the box using liquid adhesive and then I used various baby themed stamp sets, some new, some retired, to stamp the Whisper White panels using Marina Mist. The stamp sets I used were Baby Prints, Made With Love, Something For Baby, Baby Bear, and Moon Baby. These were then adhered on top of the Pacific Point mattes.

Linda Vich Creates: Explosion Box For Baby. A variety of baby stamp sets, both retired and new, were used to create this lovely project for a new baby boy!

Linda Vich Creates: Explosion Box For Baby. A variety of baby stamp sets, both retired and new, were used to create this lovely project for a new baby boy!

Linda Vich Creates: Explosion Box For Baby. A variety of baby stamp sets, both retired and new, were used to create this lovely project for a new baby boy!


For inside the box, I created a baby carriage, complete with baby! I referenced a video tutorial and downloaded a template from Steffi Von Stempelwiese. You should note that the video is in German and is actually for a basket that uses the same technique as the carriage but after downloading the template I was able to make sense of how the baby carriage was constructed.

I printed the template onto a 8.5 x 11" sheet of Pacific Point card stock and then scored and cut it out, using both my Stampin' Trimmer and scissors. I used the now retired Project Life Corner Rounder Punch to round each segment of the template that would be held together with a brad.

Once I had all the segments and the larger piece of the carriage from one side all piled up in order, I used my Paper Piercer to put a hole through all at once and then put in a now retired gold brad. I repeated this process with the other side to construct the carriage. (My one regret is not inking each piece before putting it together–it would have given it a better look.)

I used my 1" Circle Punch and retired 7/8" Scalloped Circle Punch to create the wheels of the carriage. For the handle, I cut a 1/2' strip of card stock, scored it and adhered it inside the carriage. I added a strip of Venetian Crochet Trim to the top of the carriage using Tear & Tape. A tiny bow was made from the retired 1/8" Marina Mist ribbon to adhere to the top of the carriage.

Linda Vich Creates: Explosion Box For Baby. A variety of baby stamp sets, both retired and new, were used to create this lovely project for a new baby boy!

Linda Vich Creates: Explosion Box For Baby. A variety of baby stamp sets, both retired and new, were used to create this lovely project for a new baby boy!


For the baby, I used the retired Baby Bumblebee stamp to stamp twice, once on watercolor paper and once on Whisper White. I used Marina Mist for one and Basic Black for the other. I then used a combination of Watercolor Pencils and Stampin' Write Markers together with an Aqua Painter to paint the baby's face on the watercolor paper. This was then cut out and glued onto the Marina Mist stamped piece, minus the wings and antennae.

To cover the baby, a piece of Marina Mist card stock was embossed with the Cable Knit Embossing Folder. The "blanket" was adhered over top of the baby using double Dimensionals to make the blanket look rounded.

Linda Vich Creates: Explosion Box For Baby. A variety of baby stamp sets, both retired and new, were used to create this lovely project for a new baby boy!

Linda Vich Creates: Explosion Box For Baby. A variety of baby stamp sets, both retired and new, were used to create this lovely project for a new baby boy!


I used the retired Confetti Hearts Border Punch to punch out Pacific Point strips to adhere around the lid of the box. The resulting confetti hearts were added inside the completed box.

Linda Vich Creates: Explosion Box For Baby. A variety of baby stamp sets, both retired and new, were used to create this lovely project for a new baby boy!

Linda Vich Creates: Explosion Box For Baby. A variety of baby stamp sets, both retired and new, were used to create this lovely project for a new baby boy!

Linda Vich Creates: Explosion Box For Baby. A variety of baby stamp sets, both retired and new, were used to create this lovely project for a new baby boy!


For my first explosion box, I think it turned out pretty well! One disappointment is that when I stamped the outside mattes, I didn't allow for the lid so you can't see the entire image until the lid is off the box :(  Oh, well! The next one I make will be better!

I think my manager will like it just fine, just the way it is!


Wednesday, June 7, 2017

Watercolor Blocks Thank You Cards

Linda Vich Creates: Watercolor Blocks Thank You Cards. Watercolor hues reminiscent of tropical beaches are the focal point of these quick and easy thank you note cards that use the Thankful Thoughts stamp set.
A quick and easy card for you today! I used the now retired Crumb Cake Note Card & Envelopes and teamed them up with a fun little watercolor technique.

To begin with, I used the #4 stitched square from the Stitched Shapes Framelits to die cut Gold Foil. I then used the #9 scalloped square from the Layering Squares in either Bermuda Bay or Pacific Point to matte the foil.

Next, I cut squares of Watercolor Paper to fit onto the gold mattes.

Using my Clear D Block, I scribbled onto it using my Stampin' Write Markers. I used Bermuda Bay, Lemon Lime Twist and Pacific Point. After spritzing it with water, I pressed the block onto the watercolor paper. The result was different each time!

After drying each of these well with my heat tool, I used my Embossing Buddy and then stamped the sentiment from the Thankful Thoughts stamp set in Versamark and then heat embossed with Gold Stampin' Emboss Powder.

All three mattes were stacked and adhered together with liquid adhesive and then adhered to the card front using Fast Fuse. No Dimensionals were used because there is not any extra room with the matching envelopes!

Quick and easy with a lovely result!

Linda Vich Creates: Watercolor Blocks Thank You Cards. Watercolor hues reminiscent of tropical beaches are the focal point of these quick and easy thank you note cards that use the Thankful Thoughts stamp set.


Linda Vich Creates: Watercolor Blocks Thank You Cards. Watercolor hues reminiscent of tropical beaches are the focal point of these quick and easy thank you note cards that use the Thankful Thoughts stamp set.

Linda Vich Creates: Watercolor Blocks Thank You Cards. Watercolor hues reminiscent of tropical beaches are the focal point of these quick and easy thank you note cards that use the Thankful Thoughts stamp set.

I hope you try this technique for yourself! If you'd like to use the same color combo, be sure to grab the graphic below.


Tuesday, June 6, 2017

2017 Catalog Launch Prep Part 3: First Prize

Linda Vich Creates: 2017 Catalog Launch Prep Part 3: First Prize. Delightful Daisy DSP teams up with the Daisy Punch for this lovely card set and portfolio.
Today brings us to the third and final part of my Catalog Launch Prep series. If you missed the two earlier parts, you can reach them here: 2017 Catalog Launch Prep Part 2: Second Prize and 2017 Catalog Launch Prep Part 1: Third Prize. You can also read about the actual 2017 Catalog Launch Party.

Today I feature the card set that was the First Prize at my Catalog Launch.

I started by creating the cards for the card set. I chose a 4.75 x 6" card base and cut it from Thick Whisper White. I cut a matte from Daffodil Delight and embossed it using the Hexagons Dynamic Embossing Folder and adhered it to the card front using Dimensionals.

I next cut a panel of the Delightful Daisy DSP and
matted it with some Night of Navy. I used half of a Delicate White Doily and adhered it under the Daisy panel which was adhered to the left side of the card front.

Using Night of Navy, the sentiment was stamped on a strip of Thick Whisper White and then it was punched with the Banner Triple Punch. It was adhered to the Daisy Panel with Fast Fuse and to the embossed matte using a Dimensional.

The Daisy Punch was used to punch two Night of Navy Daisies which were curled slightly using a bone folder and then adhered together using liquid adhesive. The 1/2" Circle Punch was used to punch a Daffolil Delight Circle which was adhered to the centre with a Clear Faceted Gem, colored with a sharpie, adhered over top of it. The daisy was adhered to the card front using a Dimensional.

The Envelope Punch Board was used with Daffodil Delight card stock was used to create matching envelopes for the cards.

Linda Vich Creates: 2017 Catalog Launch Prep Part 3: First Prize. Delightful Daisy DSP teams up with the Daisy Punch for this lovely card set and portfolio.


For the card portfolio, I used a 12 x 12" sheet of Daffodil Delight card stock trimmed to 11 x 9.5". I scored the long side at 2.5" from the bottom and at 5.5" on the short side and used a bone folder to really burnish the folds. Inside, I cut on the centre score line for the 2.5" piece and then cut slivers from each side to reduce the bulk when folding the portfolio.

For the front, I matted two pieces of the Delightful Daisy DSP with Night of Navy. Before adhering the mattes to the front and back covers of the portfolio, I used Tear & Tape to adhere a length of Daffodil Delight 1/4" Double Stitched Ribbon across the middle of the back and front. I then adhered the mattes using liquid adhesive.

Three additional daisies were punched, curled, and assembled as for the cards and then adhered to the front cover of the portfolio. The cards and envelopes were added inside and the portfolio tied up with the ribbon.

Linda Vich Creates: 2017 Catalog Launch Prep Part 3: First Prize. Delightful Daisy DSP teams up with the Daisy Punch for this lovely card set and portfolio.

Linda Vich Creates: 2017 Catalog Launch Prep Part 3: First Prize. Delightful Daisy DSP teams up with the Daisy Punch for this lovely card set and portfolio.

I really had a lot of fun preparing these prizes for my Catalog Launch and it was even more fun to share them with the ladies who won them!

I hope you've enjoyed reading about my preparations for the 2017 Catalog Launch. If you have visited, drop me a line below to let me know you stopped by–I'd love to hear from you!