Monday, October 31, 2016

Halloween Scenes Popcorn Treat Box

Linda Vich Creates: Halloween Scenes Popcorn Treat Box. Elegant Eggplant Popcorn Box embellished with spooky Halloween scenes.
Didn't think I'd actually get to make a treat box for Raine this year but I was able to do it today–just in time for Halloween!

This Halloween treat box was CASEd from a project made by one of my stamping class ladies, Carolyn. I also found a video tutorial by Connie Stewart very helpful for working with the Popcorn Box Thinlits.

I started by creating the popcorn box itself using Elegant Eggplant. I then used Connie's tip to use the Popcorn Box Thinlit to cut a piece which got used as a template for adding mattes to the sides of the box. I cut four mattes from Whisper White.

On each panel, I sponged on Crushed Curry, Pumpkin Pie, and Elegant Eggplant. I then used the 1 1/4" Circle Punch to punch four circles from Whisper White and sponged them with Crushed Curry and a little bit of Pumpkin Pie.

Using the Halloween Scenes Edgelits I die cut two witches and four trees from Basic Black and two fences from Silver Foil. I used Basic Black to stamp the tombstones 2X on Smoky Slate and the pumpkins 2X on Pumpkin Pie. These were die cut also using the Edgelits.

Before glueing anything to the panels, I played around with the best arrangements for all four of the panels. I then used liquid adhesive to attach all the items, stamping bats on two of the moons. Items that overhung the sides of the panels were trimmed off with the exception of the trees.

The tag sentiment was stamped with Basic Black on Pumpkin Pie card stock using the Halloween Scares stamp set. The tag was then die cut with a die from the Popcorn Box Thinlits. I used the 1/8" Circle Punch to punch a hole and then sponged the edges with Elegant Eggplant. The tag was threaded with a length of the Halloween Night Baker's Twine and also a tassel. More twine was strung around the top of the box and the tag attached to it. The candy was added and a non-Stampin' Up clothespin closed the treat bag.

Linda Vich Creates: Halloween Scenes Popcorn Treat Box. Elegant Eggplant Popcorn Box embellished with spooky Halloween scenes.

Linda Vich Creates: Halloween Scenes Popcorn Treat Box. Elegant Eggplant Popcorn Box embellished with spooky Halloween scenes.

Linda Vich Creates: Halloween Scenes Popcorn Treat Box. Elegant Eggplant Popcorn Box embellished with spooky Halloween scenes.

I'm pleased with how it turned out and Raine liked it!


Here she is in her Captain America costume ready to go trick-or-treating! Too bad it had to rain this year but "Raine" faced it like a trooper!


Sunday, October 30, 2016

Clean and Simple Thank You

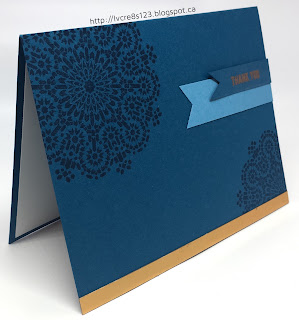
Linda Vich Creates: Clean and Simple Thank You. An elegant mandala-stamped card trimmed with Copper Foil.
The card I have to share with you today is a very clean and simple card made using one of the In Colors and Copper Foil.

I cut a standard card base from Dapper Denim and then stamped the mandala, from the Moroccan Nights stamp set, in Dapper Denim. I offset each of the two stamps. Using my MISTI allowed me to stamp each mandala twice. I also stamped an offset mandala on a Whisper White matte for inside the card; this time I stamped with Marina Mist.

I cut two strips of paper, one Dapper Denim, one Marina Mist, and flagged the ends manually and by using the Triple Banner Punch. Using Versamark, I stamped the sentiment, from the Thoughtful Banners stamp set, on the Dapper Denim strip and then heat embossed it using Copper Embossing Powder. The strips were attached to the card front using Fast Fuse.

I used liquid adhesive to adhere a thin strip of Copper Foil to the bottom of the card front and then adhered the stamped matte to the inside to complete the card.

Linda Vich Creates: Clean and Simple Thank You. An elegant mandala-stamped card trimmed with Copper Foil.

Linda Vich Creates: Clean and Simple Thank You. An elegant mandala-stamped card trimmed with Copper Foil.


I think that sometimes simplicity can be very sophisticated. What do you think?


Saturday, October 29, 2016

Exciting Stampin' Up! News and Stamp Class Projects


Have you heard the news??

As of November 1, you will be able to purchase stitched dies from Stampin' Up! A collection of 12 stitched dies, four each of ovals, squares, and circles will be appearing in the new annual catalog in June but you can purchase them early!

View the video below for a look at these lovely dies!


To celebrate the release of these dies, Stampin' Up is offering a 25% discount on select stamp sets which coordinate with these dies! These stamp sets will only be on sale during the month of November.

Click photo for full size listing of stamps on sale.

Contact me to place your order for both the stitched dies and matching stamp sets of your choice!

On Thursday, I met with my second stamp group and we had a ball chatting about crafting and making two lovely projects.

A standard card base was cut from Real Red card stock. Two mattes were cut from Whisper White. One matte was embossed using the Softly Falling Embossing Folder. The edges were inked with Pool Party using a sponge and then it was adhered to the card front.

The igloo was cut from Thick Whisper White using the Layering Ovals. A backing was cut from Pool Party. The white piece was embossed using the Brick Wall Embossing Folder and then the two pieces of the igloo were glued together with liquid adhesive.

The outside of the igloo was inked with Pool Party as well as the lines between the bricks. Liquid glue was applied to the edges, around the doorway, and random spots on the igloo itself and then Dazzling Diamonds Glitter was applied.

The Eskimo from the Cookie-Cutter Christmas stamp set was stamped on watercolor paper using Stazon ink. After setting the ink with a heat tool, the Eskimo was colored by using Stampin' Write Markers with a Blender Pen.

The igloo and Eskimo were adhered to the card front using Dimensionals. The sentiment, from the Santa's Sleigh stamp set, was stamped with Basic Black on a strip of Pool Party. One end was flagged with scissors and then the sentiment was adhered to the card front using Snail Adhesive.

The matte for the inside was stamped in Pool Party with a brick stamp from the Ghoulish Grunge stamp set. The edges of the matte were inked with Pool Party and then the matte was adhered inside to complete the card.

Linda Vich Creates: Exciting Stampin' Up! News and Stamp Class Projects.This card features an Eskimo cut with the Cookie Cutter Builder Punch and an igloo created with the Layering Ovals.

Linda Vich Creates: Exciting Stampin' Up! News and Stamp Class Projects.This card features an Eskimo cut with the Cookie Cutter Builder Punch and an igloo created with the Layering Ovals.

Linda Vich Creates: Exciting Stampin' Up! News and Stamp Class Projects.This card features an Eskimo cut with the Cookie Cutter Builder Punch and an igloo created with the Layering Ovals.


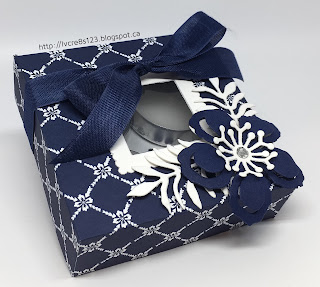
Our second project was a little box that holds four tea light candles. The project was CASEd from Square Fish Designs and there is a template there that shows the scoring lines for the project.

A piece of the Floral Boutique DSP was cut 9.5 x 5.25" and scored and cut according to the template mentioned above. The Layering Squares were used to cut a hole in the lid portion of the box and a piece of Window Sheet was adhered inside the lid using Snail Adhesive.

A frame for the outside was cut with the Layering Squares from Thick Whisper White. It was adhered outside the window using liquid adhesive. Tip: Apply liquid adhesive to the frame and lay it, glue side up on the desktop. Hold the unassembled box with the wrong side facing you. Look through the window in the lid to line up the frame and press to adhere.

The box was completed using liquid adhesive and the candles placed inside. The Botanical Builder Framelits were used to cut the flower, stamens, and leaves. These were attached to the box lid using liquid glue and Dimensionals. A rhinestone was added to the centre of the flower.

A piece of the now retired Night of Navy Seam Binding was tied in a bow around the box to complete it.

Linda Vich Creates: Exciting Stampin' Up! News and Stamp Class Projects. This box for four tea light candles is stunning when made from Floral Boutique DSP and embellished with flowers die cut with the Botanical Builder Framelits.

Linda Vich Creates: Exciting Stampin' Up! News and Stamp Class Projects. This box for four tea light candles is stunning when made from Floral Boutique DSP and embellished with flowers die cut with the Botanical Builder Framelits.

Linda Vich Creates: Exciting Stampin' Up! News and Stamp Class Projects. This box for four tea light candles is stunning when made from Floral Boutique DSP and embellished with flowers die cut with the Botanical Builder Framelits.

Fun was had by all and I look forward to our next class in November!


Sunday, October 23, 2016

Pretty Pine Bough

Linda Vich Creates: Pretty Pine Bough. Black and gold unite in this festive holiday card filled with stamped, embossed and die cut pine boughs.Gold is in the house!

The card I started the other day–but couldn't complete because I actually ran out of both Gold Foil and Gold Glimmer paper and had to order more–could now be completed!

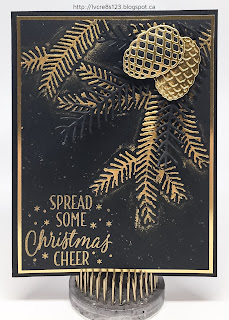
I started by embossing a Basic Black matte with the Pine Bough Embossing Folder. I got to use my Viva Decor Inka Gold Old Gold! I used my finger to apply the metal gloss paint to the embossed pine bough. Though I tried initially to avoid smearing the paint on the matte itself, in the end I decided that I didn't mind the additional smears! After applying, I buffed the paint with a paper towel.

Next I stamped the sentiment from the Tin of Tags stamp set in Versamark and heat embossed it with Gold Stampin' Emboss Powder. To add even more gold to this matte, I "flicked" my Gold Wink of Stella pen to add several gold sparkles.

This matte was adhered to a Gold Foil matte with Fast Fuse and then adhered to a standard Basic Black card front using Dimensionals.

The Pretty Pines Thinlits were used to die cut pine pieces from Basic Black and pine cones from both Gold Foil and Basic Black. The pine pieces were adhered to the embossed matte using Glue Dots and the pine cones were adhered over top of them using Dimensionals.

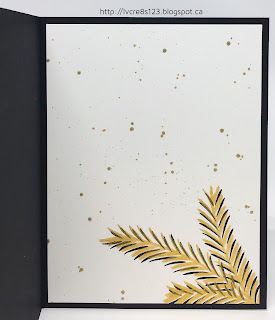
A Whisper White matte was cut for the inside of the card and two of the pine stamps from the Christmas Pines stamp set were used to stamp on the bottom of the matte using both Basic Black and Tsukineko Delicata Golden Glitz ink. Since Stampin' Up no longer carries gold or silver inks, the Delicata inks are the ones I love to use when I need metallic ink! Both the gold and silver are very rich and metallic! I flicked my Gold Wink of Stella over this matte as well before adhering it with Fast Fuse to complete the card.

Linda Vich Creates: Pretty Pine Bough. Black and gold unite in this festive holiday card filled with stamped, embossed and die cut pine boughs.

Linda Vich Creates: Pretty Pine Bough. Black and gold unite in this festive holiday card filled with stamped, embossed and die cut pine boughs.

Linda Vich Creates: Pretty Pine Bough. Black and gold unite in this festive holiday card filled with stamped, embossed and die cut pine boughs.


I love the drama of the black and gold in this card!


Saturday, October 22, 2016

Star of Light

Linda Vich Creates: Star of Light. A simple yet elegant card that uses the a copper die cut from the Starlight Thinlits against a sparkle embossed Melon Mambo background.
Today I have a simple yet effective card to share with you.

This card did not go completely to plan. I had intended to use the embossed impressions technique that Jennifer McGuire shared the other day but that will take a bit more practice! I absolutely love her technique so I will definitely be practicing until I get it to work for me! With the exception of the embossing technique, the card design is the same.

I started by cutting a standard card base from Thick Whisper White card stock. I also cut a matte from Melon Mambo. I used the Sparkle Embossing Folder to emboss it and then lightly sponged it with Melon Mambo ink to bring out the embossing.

One of the Starlight Thinlits was used to die cut a star from Copper Foil. I also cut two thin strips of Copper which were adhered to the edges of the Melon Mambo matte using Fast Fuse Adhesive. This matte was then adhered to the card front using Dimensionals. The copper star was adhered to the matte using rolled up Glue Dots.

The sentiment, from the Star of Light stamp set, was stamped on Thick Whisper White using Versamark and then heat embossed using Copper Embossing Powder. It was die cut using a die from the Project LIfe Cards & Labels Framelits and then adhered to the matte using Dimensionals.

Inside the card I stamped the matching star in Versamark and heat embossed it using the now retired Iridescent Emboss Powder. It was impossible to get a good picture of this but it added just a subtle yet elegant touch to complete this card.

Linda Vich Creates: Star of Light. A simple yet elegant card that uses the a copper die cut from the Starlight Thinlits against a sparkle embossed Melon Mambo background.

This card is indeed very simple and could easily be completed in a card class. I could have stepped it up by adding rhinestones to the copper star or sprinkling sequins around but for this card I decided that less was more.


Thursday, October 20, 2016

Merry Medley in Rustic Tones

Linda Vich Creates: Merry Medley in Rustic Tones. Dramatic Christmas card created by pairing the Merry Medley stamp in black with Kraft card stock, accompanied by a poinsettia and pine sprigs.
The card I have for you today is not the card that I started to make. The card I had envisioned was coming together perfectly and would have been completed quickly but I discovered that I had no Gold Foil paper! I didn't even have any Gold Glimmer paper!
How does this happen??? So . . .  that card is on hold until my gold arrives! In its place, I am offering this rustic holiday card.

After first determining that I would need a 4.75 x 6" card for my design, I cut a card base from Basic Black. I then cut a matte from Kraft card stock and using my MISTI, I stamped the Merry Medley background stamp using Basic Black Archival ink three times to get a very black image.

A one inch strip of Basic Black was cut and crimped with my paper crimper. This was adhered to the stamped matte using liquid adhesive and the excess was trimmed with scissors. Linen thread was wrapped around the strip and then the matte was adhered to the card front using Dimensionals.

I punched 8 small petals from Kraft and then 4 of the double centre petals from Basic Black. I used a sponge dauber with Soft Suede to ink the edges of the Kraft petals and then used my scoring stylus to score down the centre of each petal, and then shaped them slightly with my fingers.

A one inch circle was punched from Kraft and then used the glue gun to glue the Kraft petals to it. I then added the four double black petals to the flower. The Pretty Pines Thinlits were used to die cut three pine sprigs from Basic Black.

After determining the ideal placement, I decided to add a dash of sparkle to the card. I used Wink of Stella to detail the black petals and the pine sprigs and then adhered the sprigs in place with Glue Dots and the flower with Dimensionals. I also used Wink of Stella to color the word Christmas on the stamped matte. For the centre of the flower, I used a retired Antique Brad and heat embossed it with Copper Embossing Powder. After cutting off the prongs with metal cutters, I adhered the brad to the flower centre using Crystal Effects.

For inside the card, I cut a matte from the now retired Naturals Ivory card stock. I used the pine stamps from the Christmas Pines stamp set to stamp in the bottom left corner using Sahara Sand, Crumb Cake and Soft Suede. The sentiment was stamped with Crumb Cake.

Linda Vich Creates: Merry Medley in Rustic Tones. Dramatic Christmas card created by pairing the Merry Medley stamp in black with Kraft card stock, accompanied by a poinsettia and pine sprigs.

Linda Vich Creates: Merry Medley in Rustic Tones. Dramatic Christmas card created by pairing the Merry Medley stamp in black with Kraft card stock, accompanied by a poinsettia and pine sprigs.

I really like how this card turned out and that it is a Christmas card in non-traditional colors. There is something about Kraft and black that really packs a punch!


Sunday, October 16, 2016

Stamp Class #2 Projects

Linda Vich Creates: Stamp Class #2 Projects. Heat embossed background serves as a pretty backdrop for the Jar of Cheer candle embellishment in this cheery Christmas card.
When I was a kid, time seemed to pass soooooo slowly. It took forever just to get to the weekend. Christmas and summer vacation were eons away. And growing up, in general, seemed like it would never happen. Now, one week runs into the next, and the months gallup into years!

Though it seems like only a few days ago, I met with my second stamp group at the end of September. All but three were new to stamping but they did fabulously with the two projects I created for them.

The first card started with a standard card base cut from Thick Whisper White card stock. A matte of Real Red received a stamped background of Versamark using one of the stamps from the Timeless Textures stamp set. It was Heat embossed using Clear Stampin' Emboss Powder.

A length of the metallic gold twine from the Baker's Twine Trio Pack was wrapped around the matte and secured with tape. The matte was then adhered to the card front using Dimensionals.

On a square of Thick Whisper White, the candle from the Jar of Cheer stamp set was stamped using Basic Black Archival ink. The heat tool was used to set the ink before coloring with Stampin' Write Markers. The candle and flame also received some Gold Wink of Stella.

The candle and a piece of gold foil were die cut using the Layering Circles Framelits and then adhered together using liquid adhesive. The finished embellishment was then adhered over the twine using Dimensionals.

To complete the card, a sentiment from the Tin of Tags stamp set was stamped in Real Red on the inside of the card.

Linda Vich Creates: Stamp Class #2 Projects. Heat embossed background serves as a pretty backdrop for the Jar of Cheer candle embellishment in this cheery Christmas card.


Linda Vich Creates: Stamp Class #2 Projects. Heat embossed background serves as a pretty backdrop for the Jar of Cheer candle embellishment in this cheery Christmas card.


The second card was CASEd from here. The standard card base was cut from Crushed Curry and two mattes cut from Very Vanilla and Rich Razzleberry.

The Rich Razzleberry matte was spritzed lightly with water and then embossed using the Cable Knit Embossing Folder. It was adhered to the Very Vanilla matte with liquid adhesive and then to the card front.

Crumb Cake was used to stamp a leaf from Vintage Leaves on watercolor paper and then after die cutting, color was sponged onto the leaf using Crushed Curry, Pumpkin Pie, Rich Razzleberry and Old Olive. Two pieces of Linen Thread were tied around the leaf stem and then the leaf was adhered to the card front using Dimensionals.

The Triple Banner Punch was used to flag one end of a strip of Very Vanilla and then Rich Razzleberry was used to stamp the sentiment from Basket of Wishes Stamp set. The strip was adhered using Dimensionals.

Linda Vich Creates: Stamp Class #2 Projects. Rich Razzleberry Cable Knit background is paired with a colorful autumn leaf in this thinking of you card.

Linda Vich Creates: Stamp Class #2 Projects. Rich Razzleberry Cable Knit background is paired with a colorful autumn leaf in this thinking of you card.

The ladies had a lot of fun and the time flew by!


Friday, October 14, 2016

Thoughtful Branches Sunflower

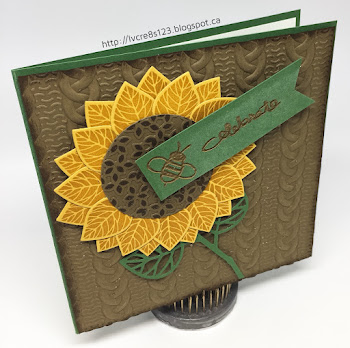
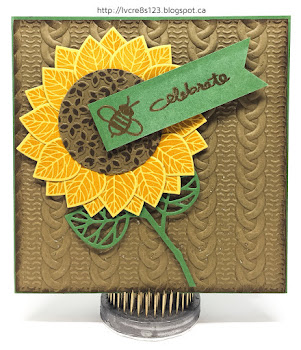
Linda Vich Creates: Thoughtful Branches Sunflower. A cheerful sunflower created with the Thoughtful Branches stamp set rests upon a cable knit matte in this cheerful birthday card.
Today's card share is a birthday card for a friend of mine who really likes sunflowers.

I cut a card base from Garden Green card stock for a 5.5 x 5.5" card. I cut a Soft Suede matte and embossed it with the Cable Knit Embossing Folder. After inking the edges with Soft Suede, I adhered it to the card front with Fast Fuse Adhesive.

Next, I stamped the leaves from the Thoughtful Branches stamp set—22 times—using Delightful Dijon. I had meant to stamp on Delightful Dijon card stock but pulled out some Hello Honey by mistake!

I die cut the leaves with the coordinating dies. I also used the dies to die cut the stem and leaves from Garden Green.

I punched a circle from Soft Suede card stock using the 2" Circle Punch. Using Soft Suede, I stamped the leaf canopy from the Thoughtful Branches stamp set on Soft Suede card stock and then die cut it. I then punched a 2" circle from the die cut and then glued it to the punched circle using liquid adhesive.

Unless you click on the pictures for a closeup look, you won't be able to see the Gold Wink of Stella that was "flicked" over both the embossed matte and the sunflower centre to add a bit of sparkle.

I adhered the stem to the card front using Glue Dots. The circle was turned upside down and then I glued the petals around the circle in two concentric circles. I adhered the flower to the card front over the stem using Dimensionals.

The Banner Triple Punch was used to flag one end of a strip of Garden Green. The sentiment from the Endless Birthday Wishes stamp set and the bee from the Garden in Bloom stamp set were stamped in Versamark and then heat embossed with Gold Stampin' Emboss Powder. The sentiment was adhered to the centre of the sunflower using a Dimensional.

A Very Vanilla matte was cut for the inside of the card. Two leaves were stamped in Garden Green in the bottom right corner of the matte. A third leaf was stamped on a scrap of Very Vanilla and die cut. It was adhered over the two stamped leaves using Dimensionals. The matte was adhered inside the card using Fast Fuse.

Linda Vich Creates: Thoughtful Branches Sunflower. A cheerful sunflower created with the Thoughtful Branches stamp set rests upon a cable knit matte in this cheerful birthday card.

Linda Vich Creates: Thoughtful Branches Sunflower. A cheerful sunflower created with the Thoughtful Branches stamp set rests upon a cable knit matte in this cheerful birthday card.


Wednesday, October 12, 2016

Paisley and Copper Times Three

Linda Vich Creates: Paisley Thank You. Copper embossed paisley stamps serve as the backdrop to a copper acorn on this lovely thank you card.
It happened again last night.

Lying in bed, just about asleep, I got the idea for today's card. I roused myself enough to jot down the pertinent details in my Notes app and then went back to sleep.

I was really looking forward to completing the card today but my daughter texted me early this morning to ask if I could watch Raine because she wasn't feeling too good.

Needless to say, I didn't get much done on the card today though there were a few moments when Raine felt a little better and was watching Pet Patrol on tv that I got to sneak into my craft room to start my card.

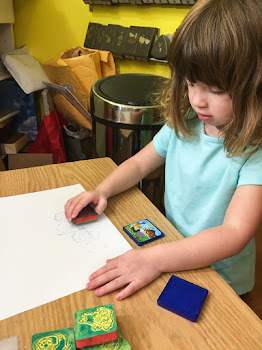
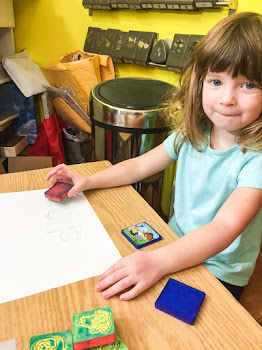
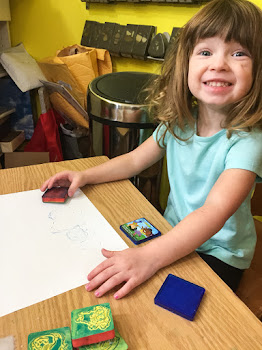
Raine appeared a little later and wanted to watch me stamp and emboss and then she decided to get out her stamping set and bring it to the craft room. I moved her table and chair in and she happily stamped beside me for about a half hour!
Linda Vich Creates: Paisley Thank You. Copper embossed paisley stamps serve as the backdrop to a copper acorn on this lovely thank you card.

Linda Vich Creates: Paisley Thank You. Copper embossed paisley stamps serve as the backdrop to a copper acorn on this lovely thank you card.

Linda Vich Creates: Paisley Thank You. Copper embossed paisley stamps serve as the backdrop to a copper acorn on this lovely thank you card.

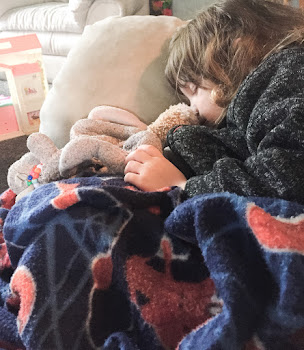
That was the high point of the day. Later, Raine started feeling miserable again and then about half an hour before Steffan came to pick her up, she fell asleep! Poor little thing! She wasn't too happy when she had to wake up and go home.
Linda Vich Creates: Paisley Thank You. Copper embossed paisley stamps serve as the backdrop to a copper acorn on this lovely thank you card.

After supper, I finished making my card using the following steps.

To begin with, I used my Judikins Color Dusters to brush areas of Pumpkin Pie and Tempting Turquoise onto a Very Vanilla matte. Next, I used my MISTI to line up the stamps from the Paisleys & Posies on top of the matte. After using my Embossing Buddy, I stamped in Versamark and then heat embossed it with Copper Embossing Powder.

Next, I used the Acorn Builder Punch to punch the parts of the acorn from Copper Foil and Pumpkin Pie. I used the now retired Decorative Dots Embossing Folder to emboss the copper piece and then used my Score Tool to emboss lines on the top piece of the acorn. I adhered the pieces together using liquid adhesive.

I glued the paisley matte to a copper one and then to a standard Tempting Turquoise card front. Using the now retired Finishing Touches Edgelits, I die cut a strip of Tempting Turquoise. I used two Dimensionals to adhere it to the front of the card front.

A nest of Copper Metallic Thread was made and adhered to the left side of the strip. The acorn was adhered with Dimensionals over it.

I cut a small strip of Tempting Turquoise and flagged one end using the Banner Triple Punch. The sentiment, from the now retired Another Thank You stamp set, was stamped in Versamark and then Heat embossed in copper. The strip was adhered at the top of the card front using a Fast Fuse.

A Very Vanilla matte was embossed with copper and adhered inside to complete the card.

Linda Vich Creates: Paisley Thank You. Copper embossed paisley stamps serve as the backdrop to a copper acorn on this lovely thank you card.

Linda Vich Creates: Paisley Thank You. Copper embossed paisley stamps serve as the backdrop to a copper acorn on this lovely thank you card.

I'm really pleased with the final result! I love the combination of turquoise, orange and copper and the paisley stamps just are so magical!


Tuesday, October 11, 2016

Something For Baby

Linda Vich Creates: Something For Baby. A baby onesie adorns a cable knit embossed card front, with matching bib, booties, and sentiment inside the card.
One of my daughter's friends was having a baby shower so she asked if I would make a card. Of course I said yes!

For this card, I used both old and new products. I started by cutting a standard card base from Sweet Sugarplum. I cut a matte from Thick Whisper White to exactly fit the top of the card and embossed it using the Cable Knit Embossing Folder.

Using stamps from the Something For Baby stamp set, I stamped a onesie, a bib, and two booties with Sweet Sugarplum on Thick Whisper White. I die cut these with the coordinating Baby's First Framelits. I also die cut a hanger from Silver Foil paper.

I tied a bow around the embossed matte using some glittery sheer ribbon that I had on hand. The matte was then adhered to the card front using Fast Fuse.

Glue Dots were used to adhere the onesie to the hanger and then adhered it to the card front using Dimensionals. I added three small pearls to the front of the onesie.

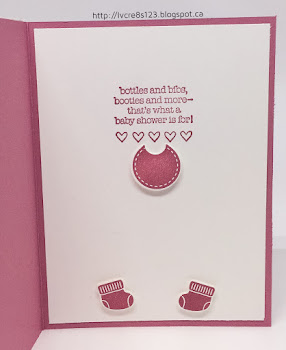
I cut a matte from Whisper White for the inside of the card. I stamped the sentiment from the now retired Baby Bundle stamp set and then adhered the matte using Fast Fuse. I used Dimensionals to adhere both the bib and the two booties inside the card. Though it is not shown in the photos, I stamped the baby carriage from the stamp set on the envelope.

Linda Vich Creates: Something For Baby. A baby onesie adorns a cable knit embossed card front, with matching bib, booties, and sentiment inside the card.

Linda Vich Creates: Something For Baby. A baby onesie adorns a cable knit embossed card front, with matching bib, booties, and sentiment inside the card.


I wasn't totally pleased with this card but Courtney's friend loved it!


Friday, October 7, 2016

Pretty Paisley Birthday

Linda Vich Creates: Pretty Paisley Birthday. Petals & Paisleys DSP is teamed with the Cable Knit Embossing Folder to produce this formal and ornate birthday card.
I don't know why I waited so long to purchase the Paisleys & Posies Stamp Set, coordinating Thinlits and DSP–they are GORGEOUS! And yes, I am shouting!

When I saw the sheet of Night of Navy DSP with the copper embossed paisley print, I knew that I wanted to pair it with the (you guessed it!) Cable Knit Embossing Folder.

I started by cutting a standard card base from Night of Navy card stock and then cut a piece of the DSP to 5.5 x 4.25" to fit perfectly on the card front.

I cut a strip of Night of Navy card stock and embossed it with the Cable Knit Embossing Folder and then wrapped several times with the Copper Metallic Thread, securing it at the back with Fast Fuse. I then adhered the embossed strip to the DSP and then that to the card front using Fast Fuse.

I stamped the sentiment from the Birthday Blooms stamp set on Night of Navy using Versamark and heat embossed with the Copper Embossing Powder. I die cut the sentiment using the Layering Squares as well as die cutting a piece of the Copper Foil using the matching scalloped square.

Both pieces were transformed into rectangles by using this trick from Patty Bennett. I adhered the die cuts together using liquid adhesive–I find that this adhesive works best for centering these die cuts because it gives you the wiggle room you need to get the right placement. I adhered the sentiment on top of the embossed strip using Dimensionals.

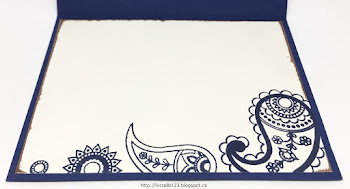
A matte of Very Vanilla was cut for inside the card. I used the Paisleys & Posies with Night of Navy ink to stamp along the bottom of the matte. I then used a Versamark marker to edge the matte and then heat emboss with the Copper Embossing Powder. The matte was adhered with Fast Fuse to complete the card.

Linda Vich Creates: Pretty Paisley Birthday. Petals & Paisleys DSP is teamed with the Cable Knit Embossing Folder to produce this formal and ornate birthday card.

Linda Vich Creates: Pretty Paisley Birthday. Petals & Paisleys DSP is teamed with the Cable Knit Embossing Folder to produce this formal and ornate birthday card.
Click photo to view details in larger size

Don't you just love this? Though the copper is hard to photograph–it tends to look like gold–I'm sure you will agree that this paper and stamp set is truly stylish and ornate and it looks well with the clearly defined cable knit embossing.


Thursday, October 6, 2016

A Halloween Treat, A Ghost, and Other Creepy Stuff

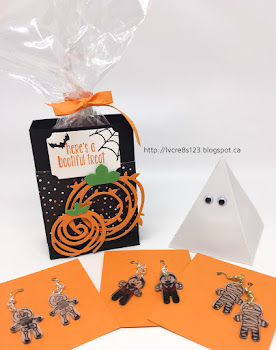
Linda Vich Creates: A Halloween Treat, A Ghost, and Other Creepy Stuff. A ghastly group of Halloween projects created with Swirly Scribbles Thinlits, Pyramid Pals Thinlits, Cookie Cutter Halloween and the Cookie Cutter Builder Punch.
Today I'm sharing with you a few of the 3D projects that I displayed for my new stamping group.

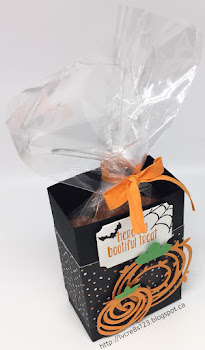
First up is a little Halloween Treat Box. This project was CASEd from Lisa's Christmas project. I used a piece of Basic Black card stock to make the box itself and then the belly band was cut from a sheet of the Halloween Night Specialty DSP.

To embellish the box with pumpkins, I cut two of the circles from Pumpkin Pie using the Swirly Scribbles Thinlits and used both the Petite Petals and Blossom Bunch Punches to punch leaves from Garden Green.

I used the Tags & Labels Framelits to cut a tag from Thick Whisper White and then used the stamps from the Spooky Fun stamp set with Basic Black and Pumpkin Pie.

One of our clear bags was used for candy and I tied it off with our now retired Pumpkin Pie 1/4" Cotton Ribbon.

Linda Vich Creates: A Halloween Treat, A Ghost, and Other Creepy Stuff. A Halloween treat box made with Halloween Night Specialty DSP and the Swirly Scribbles Thinlits.

Linda Vich Creates: A Halloween Treat, A Ghost, and Other Creepy Stuff. A Halloween treat box made with Halloween Night Specialty DSP and the Swirly Scribbles Thinlits.


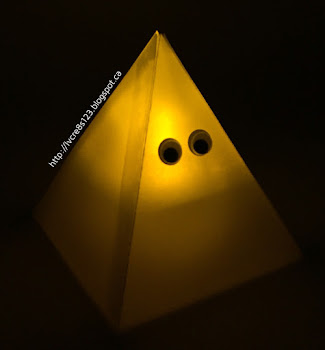
For my ghost, I used the Pyramid Pals Thinlits to cut vellum for the ghost's body. All but the back of the ghost was adhered with Fast Fuse. For the back I used glue dots to allow the ghost to be opened to insert and turn on the tea light. To complete the ghost, I simply added googly eyes.

Doesn't he look cute? I think a grouping of these would look lovely in a dark corner for Halloween!

Linda Vich Creates: A Halloween Treat, A Ghost, and Other Creepy Stuff. A ghost created by using vellum, a tea light and the pyramid pals thinlits.

Linda Vich Creates: A Halloween Treat, A Ghost, and Other Creepy Stuff. A ghost created by using vellum, a tea light and the pyramid pals thinlits.


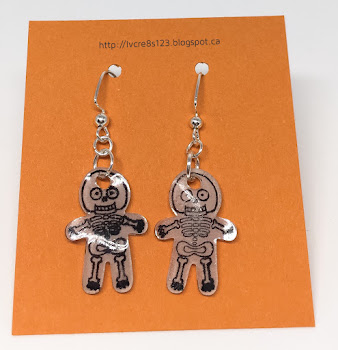
Lastly, I made three sets of Halloween earrings. These are really a lot of fun to make!

I used Jet Black Stazon ink and my MISTI to stamp onto Frosted Ruff N' Ready Shrinky Dinks plastic. After I was sure that they were dry, I used a sharpie marker to color red onto the Vampire while leaving the skeleton and mummy as they were stamped.

I used the 1/4" Circle Punch to put holes at the top of each and then used my piercing tool to hold each piece, through the hole, on a heat resistant surface. I heated each piece with my Heat Tool. While heating, the plastic billows and curves and then eventually shrinks and flattens into the final size, one-third the size of the original and nine times thicker!

To complete the earrings, I used 4 and 6 mm jump rings and earring wires.

Linda Vich Creates: A Halloween Treat, A Ghost, and Other Creepy Stuff. Halloween earrings made by using Cookie Cutter Halloween, Cookie Cutter Builder Punch, and Shrinky Dinks plastic.

Linda Vich Creates: A Halloween Treat, A Ghost, and Other Creepy Stuff. Halloween earrings made by using Cookie Cutter Halloween, Cookie Cutter Builder Punch, and Shrinky Dinks plastic.

Linda Vich Creates: A Halloween Treat, A Ghost, and Other Creepy Stuff. Halloween earrings made by using Cookie Cutter Halloween, Cookie Cutter Builder Punch, and Shrinky Dinks plastic.


I look forward to making more earrings in the future by using other stamps and dies!


Wednesday, October 5, 2016

Cable Knit Thank You

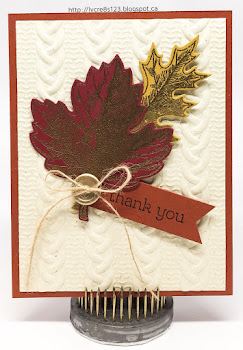
Linda Vich Creates: Cable Knit Thank You. Gold embossed Vintage Leaves adorn a cable knit backround on this thank you card.
Though Autumn is not my favorite season–I much prefer Spring–I do love leaves! The Vintage Leaves stamp set is one of my most treasured because I think it is very realistic and it can be used in so many ways and the coordinating Framelits are nice too!

For my thank you card today, I started with a standard card base cut from Cajun Craze. I cut a matte from the now retired Naturals Ivory card stock and embossed it with the Cable Knit Embossing Folder. I find myself reaching for this folder over and over again!

Though the color and texture of the Naturals Ivory was what I wanted, the paper did not react well to being spritzed with water and then being embossed. The dried paper was very warped and I resorted to placing a sheet over it and ironing it to get any sort of flat matte from it! It was finally adhered to the card front using Fast Fuse.

Next, I stamped both the maple and oak leaves, on Cherry Cobbler and Delightful Dijon respectively, with Versamark and heat embossed using Gold Stampin' Emboss Powder. Each leaf was then die cut using the coordinating Leaflets Framelits.

The leaves were adhered to the card front using Dimensionals and then one of the now retired Gold Basic Metal Buttons was threaded with Linen Thread and adhered to the leaf stems.

The sentiment, from the now retired Happy Watercolor stamp set, was stamped with Basic Black on on a strip of Cajun Craze and then the Triple Banner Punch used to flag the end. It was adhered just under the leaves.

A matte of the Naturals Ivory card stock was stamped with both the oak and maple leaves using Cherry Cobbler and Delightful Dijon and then adhered inside the card.

Linda Vich Creates: Cable Knit Thank You. Gold embossed Vintage Leaves adorn a cable knit backround on this thank you card.

Linda Vich Creates: Cable Knit Thank You. Gold embossed Vintage Leaves adorn a cable knit backround on this thank you card.

I love all the texture achieved by combining both the embossing folder and the embossed leaves!