Thursday, January 12, 2017

2017 New Year's Cards

Linda Vich Creates: 2017 New Year's Cards. Fireworks in gold and silver embossing burst behind gold glimmer numerals on this festive New Year's card.
This year, since I ran out of time to do my own Christmas cards, I decided to try something different . . . I created and sent New Year's cards!

As soon as I saw the It's A Celebration stamp set, I knew that I wanted to use it for fireworks and I envisioned this card. Before actually creating the card, I saw several similar cards on Pinterest so it seems that many of us had the same idea!

I started by cutting a standard card base from Basic Black. I also cut two mattes: one Whisper White and another Basic Black.

Because I knew I would be cutting the numerals for 2017 from Gold Glimmer paper, I wanted to echo that "glimmer" by using a matte of the same. However, I didn't want to use up a whole lot of Gold Glimmer paper in the process.

Instead, I cheated.

I used Versamark to ink the edges of the Whisper White matte and then heat embossed using Gold Tinsel Embossing Powder by Recollections.

This technique of embossing just the edges of a matte can be used to mimic either glimmer or foil paper as well. I find that sometimes the Gold Embossing Powder doesn't match with the Gold Foil paper so this is a way to achieve a consistency between embossed sentiments with a matte of the same color. (This is similar to the old style "dickie" of the sixties where a collar with some attached fabric was worn to mimic a turtleneck being worn under a shirt!)

On the Basic Black matte, I used Versamark and the fireworks stamps, heat embossing some with Gold and some with Silver Stampin' Emboss Powder. This matte was adhered to the Gold Embossed Whisper White matte which was adhered to the card base.

After die cutting the numerals from Gold Glimmer using the Large Numbers Framelits Dies, I used Adhesive Strips to adhere the numerals to the card front.

A simple Whisper White matte adhered inside the card was stamped with Happy New Year.

Linda Vich Creates: 2017 New Year's Cards. Fireworks in gold and silver embossing burst behind gold glimmer numerals on this festive New Year's card.

I hope you enjoyed this card and you are enjoying 2017–it's going to be a GREAT year!


Sale-A-Bration: A Big Opportunity For You!

Sale-a-Bration is going strong and you will want to take advantage of all the great benefits! Here's how you can take part:

Shop

For every $60 CAD you spend (before tax and shipping), you get a FREE Sale-a-Bration product! Your purchases may come from either the Annual or the Occasions Catalog or a combination of the two! Ready to place an order? SHOP 24/7 in My Online Store.

Host

If you hostess a party of $330 CAD in sales, you'll earn $35 CAD more in Stampin' Rewards! If you choose to do so, you can apply your Stampin' Rewards toward a Starter Kit and become a demonstrator yourself! Contact Me TODAY to book your own party!

Linda Vich Creates: Sale-A-Bration: A Big Opportunity For You!

Join

If you've ever thought of joining Stampin' Up!, Sale-a-Bration is the BEST time for you to do so! You can join for just $135 CAD and you get to choose TWO additional stamp sets for your Starter Kit–any stamp set, any price! On top of this great deal, your kit ships for free! This great opportunity is yours to have whether you choose to become a demonstrator just for the 25% or more discount or whether you want to pursue Stampin' Up! as a business! Contact Me TODAY for assistance or JOIN HERE.

Linda Vich Creates: Sale-A-Bration: A Big Opportunity For You!

Linda Vich Creates: Sale-A-Bration: A Big Opportunity For You!


To get an idea about the wonderful products available in the Occasions catalog, enjoy the following video from Stampin' Up!

Friday, January 6, 2017

One In A Million Tee Shirt Birthday

Linda Vich Creates: One In A Million Tee Shirt Birthday. Vibrant birthday card created using Custom Tee Bundle and the new Hexagons Dynamic Embossing Folder.
Well, our house is quiet again now that Courtney, Steffan, Raine, and the three cats have moved back to their own house! It was so nice to have them here yet sometimes difficult for both them and us as we all have our own routines and they don't always mesh well!

Because I wouldn't be seeing him on Monday, I wanted to send a card with Steffan for his 25th birthday.

Steffan is definitely a person who marches to his own drummer and his trademark is the black t-shirts that he wears. I knew that as soon as I saw the Custom Tee Bundle that I would use it on cards for him!

I started by using Versamark to stamp the t-shirt and its sentiment on Basic Black. I heat embossed using Gold Stampin' Emboss Powder and then die cut with the matching framelits.

After cutting a standard card base from Basic Black, I cut a matte from Real Red. To create the effect on the matte, I used a now retired Brayer to ink up the top of the new Hexagons Dynamic Embossing Folder with Basic Black Archival ink and then inserted the matte and ran it through the Big Shot. Not only did I get that fabulous 3D embossing but the "chicken wire" effect added to the gritty, urban look that I wanted.

I then proceeded to wrap a combo of Basic Black Baker's Twine with the now retired Gold Baker's Twine from the Baker's Twine Trio Pack from the Holiday Catalog around the matte, securing at the back with tape. Please note that I did try both the Black and the Gold twines on their own but only the combo produced this dynamic effect!

I used Dimensionals to adhere the matte to the card front as well as to pop up the t-shirt on the front of the card. I did adhere a white matte to the inside of the card but kept the sentiment to a simple Happy 25th Birthday created by using both the Number of Years and the Project Life Day to Day stamp sets.

Here's one of my favorite photos of Steffan from Christmas–a photo of Steffan is a rarity. He was really enjoying himself on Christmas Eve!


I am sure that Steffan will enjoy this card and I am pleased with the final result!

Linda Vich Creates: One In A Million Tee Shirt Birthday. Vibrant birthday card created using Custom Tee Bundle and the new Hexagons Dynamic Embossing Folder.


Saturday, December 31, 2016

Elegant Dragonfly Thank You

Linda Vich Creates: Elegant Dragonfly Thank You. Elegant thank you card created in white and gold, topped with a stunning gold dragonfly die cut.
I just couldn't help myself.

In sending thank you cards to my stamp club members, I just had to choose the Detailed Dragonfly Thinlits to use on my cards! By combining it with a stunning embossing folder, Stitched Shapes Framelits, gold embossing and gold foil, I was able to create an elegant card very quickly.

I cut a standard card base from Thick Whisper White and also cut a 4.25 x 5.5" matte from Whisper White which I embossed using the new Falling Petals Embossing Folder. The embossed matte was adhered to the card front using Fast Fuse.

Next, I die cut a square using the Stitched Shapes Framelits. Using Versamark, I stamped the sentiment, from the now retired Another Thank You stamp set, and heat embossed it using Gold Embossing Powder. I used Dimensionals to adhere it to the card front.

Finally, I die cut the lovely dragonfly from Gold Foil and used an adhesive strip to adhere it to the front of the card.

Linda Vich Creates: Elegant Dragonfly Thank You. Elegant thank you card created in white and gold, topped with a stunning gold dragonfly die cut.

Linda Vich Creates: Elegant Dragonfly Thank You. Elegant thank you card created in white and gold, topped with a stunning gold dragonfly die cut.

If I were you, I would put this set at the top of your wish list for the new 2017 Occasions Catalog. I know mine is going to get a LOT of use!


Friday, December 30, 2016

My 12 Favorite Projects From 2016

As we reach the end of the year, it is both a time for reflection and goal setting. I'd like to take this opportunity to look back at the projects I've created this year. Be sure to click on each image to be taken to the pertinent blog post for all the details.

January

My favorite for January is actually a tie for two images! I absolutely fell in love with the Sky Is The Limit stamp set and knew that I would use it often–it was perfect for masculine cards!


In creating a Valentine for a man, it is sometimes difficult to create a card not full of flowers and frilly hearts! For this card, I felt that the combination of Kraft card stock and black worked well for a masculine Valentine. You can see that I managed to squeeze in a few flowers but they are "masculine" flowers! I also think that the the various textural elements work well for a masculine card.


February

My favorite for February is one that earned me the Top Picks award for the Stampin' Royalty challenge #316.


March

Anyone that knows me well knows that I am partial to unusual combinations, whether that be food, colors, textures, etc. For the Global Design Project #025, I was required to use a color combo that I wouldn't have picked for myself. In working with it, I chose to use the Brick Wall embossing folder as an actual wall as a backdrop for a window that showcased a very simple stamp set–Vivid Vases. I was very pleased with my completed card!


April

My favorite for April also uses the Brick Wall embossing folder but the card it is used on is totally different. This particular card enabled me to take part in an International Blog Hop organized by Kylie Bertucci! I also enjoyed trying a new technique–painting with alcohol in my Aqua Pen and reinkers.


May

My favorite for this month was the project I designed for the International Blog Hop that I mentioned  previously. I utilized my all time favorite color, Blackberry Bliss, and added a lot of textural and glitzy elements to put this gate fold card over the top!


June

My favorite for this month actually comes from a set of cards I created as a prize for my Catalog Launch Party! The technique that I used was new to me but it was oh such fun! The technique involves using an embossing folder with a large surface, in this case butterflies, and then stamping very lightly several times over the entire embossed image using a a flourish stamp. The stamping is repeated until the ink is totally used up on the stamp and then it is re-inked and stamped again. This technique provides a lot of dimension.


July

July's favorite card also uses the Brick Wall embossing folder and makes uses of several textural elements to create a truly dimensional card.


August

My favorite for this month combines both colors and textures and uses a bundle, Thoughtful Branches, that I was very disappointed was available for only a short time.


September

September's favorite also uses the Thoughtful Branches Bundle as well as a a dots stamp from the Swirly Birds stamp set. It is a fun technique that produces a lot of texture and color.


October

My favorite for October uses a combination of Kraft card stock and black in a non-traditional sort of Christmas card. I think this card would work well for a masculine card but I know that I would love to receive a card like this one as well!


November

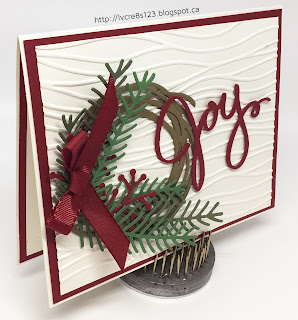
My November favorite is a card I taught at one of my stamp groups. It uses a lot of textural elements–embossing, die cuts, ribbon–to produce a pleasing Christmas card!


December

Though my cards for December were few and far between, I do have a favorite. The card was my first use of a new stamp set from the Occasions Catalog, Beautiful You, and also my first play with the new Watercolor Pencils. In addition, I also got to use the Stitched Shapes Framelits which I absolutely love!


I hope that you've enjoyed my review of my favorite stamping projects throughout 2016! I said at the beginning of this post that the end of the year was a time for both reflection and goal setting. The review of my favorite projects takes care of reflection.

I am hoping that you, my blog readers, will help me with goal setting. I would like to know what sorts of techniques and projects you would like to see and read about in the 2017. This will help me to formulate my goals for the coming year! I would appreciate you leavng me a comment below.

I wish each and every one of you a Happy New Year and all the best for 2017!

Thursday, December 29, 2016

Dragonfly Dreams Thank You

Linda Vich Creates: Dragonfly Dreams Thank You. A vibrantly blended background with emboss resist dragonflies sets the stage for a magnificent shimmery die cut black dragonfly on this thank you card.It was easy to figure out that the Dragonfly Dreams Bundle was going to be one of my "go to" sets from the 2017 Occasions Catalog! Not only is the stamp set and its sentiments beautiful but the thinlits are superb! I chose this set recently when creating a thank you card for a friend.

I started by cutting a 4.75 x 6" Basic Black card base and a Watercolor paper matte to go on top of it. Using Versamark, I stamped several dragonflies, offset, on the watercolor paper and then heat embossed them using Clear Embossing Powder.

For my next step I blended Bermuda Bay, Pacific Point and Rich Razzleberry onto the watercolor paper using Stamping Sponges. I used a paper towel to buff up the dragonflies to remove any lingering ink from them.

I die cut a dragonfly from Basic Black and then used Versamark and Clear Embossing Powder to make it really shiny. I then wanted to add some shimmer so I used the now retired Iridescent Embossing Powder.

The watercolor matte was adhered to the card front using Fast Fuse and then I popped up the dragonfly by using an adhesive strip.

The sentient was heat embossed in white on a strip of Basic Black and then the Triple Banner Punch was used to flag the end. It was adhered to the card front.

A matte was cut from Whisper White and a dragonfly was stamped in the bottom right corner using Pacific Point. The matte was adhered inside the card to complete it.

Linda Vich Creates: Dragonfly Dreams Thank You. A vibrantly blended background with emboss resist dragonflies sets the stage for a magnificent shimmery die cut black dragonfly on this thank you card.

Linda Vich Creates: Dragonfly Dreams Thank You. A vibrantly blended background with emboss resist dragonflies sets the stage for a magnificent shimmery die cut black dragonfly on this thank you card.
Close up details of the shimmer on the dragonfly.

Linda Vich Creates: Dragonfly Dreams Thank You. A vibrantly blended background with emboss resist dragonflies sets the stage for a magnificent shimmery die cut black dragonfly on this thank you card.

I'm pleased with how this card turned out and I look forward to using this set with my classes!


Tuesday, December 20, 2016

Christmas Decor and Gift Card Holder

Linda Vich Creates: Christmas Decor and Gift Card Holder. Christmas decor item CASEd from Connie Collins.
For the last class of the year for my Country Villas Stamp Group, we worked on a decor project cased from Constantly Stamping. Though I had intended to create the project using alternate colors, as a traditional red & green Christmas lover, I decided to follow Connie's color choices. I mean, why reinvent the wheel?

To begin, the Pyramid Pals Thinlits were used to cut two of each color, of both Old Olive and Always Artichoke.

Next, the Festive Flower Punch was used to punch petals from Cherry Cobbler and leaves from Old Olive and Always Artichoke. Then, using a leaf from Vintage Leaves, the leaf veins were stamped on each petal and leaf, using coordinating ink. The 1 1/4" Circle Punch was also used to
punch one circle from Cherry Cobbler.

A glue gun was used to adhere each petal to the 11/4" circle and then further petals were added, working toward the centre. The leaves were added behind the flower petals.

The stamens were cut from Glimmer Paper using the Botanical Builder Framelits and then adhered with the glue gun. Additional "greenery" was die cut from Gold Foil and Gold Glimmer using the Pretty Pines Thinlits. These were also adhered to the flower using the glue gun.

For the Pyramid Pal pieces, the tabs were cut off and then they were adhered together as per usual, using Fast Fuse.

Using the MISTI, they were each stamped with the large medallion from the Frosted Medallions stamp set using the matching ink. Once the ink had dried, each piece was scored from point to point and from corner to corner using the Simply Scored. A bone folder was used to burnish each fold well and each piece then formed a 3D, four-pointed star.

The two stars were placed one on top of the other, offset, and a pencil was used to mark the point where the top star sat on the bottom star. The glue gun was then used to place glue behind the pencil lines and the glue was allowed to cool. More glue was added to give additional height and the top star was adhered to the bottom. In the same way, the finished poinsettia was adhered to the top of the completed eight-pointed star.

To complete the fancy star-poinsettia, a rhinestone was added to the centre of the flower and a length of the Cherry Cobbler from the Silky Taffeta Combo Pack was knotted and glued into the back of one of the star points.

Linda Vich Creates: Christmas Decor and Gift Card Holder. Christmas decor item CASEd from Connie Collins.


Linda Vich Creates: Christmas Decor and Gift Card Holder. Christmas decor item CASEd from Connie Collins.

Linda Vich Creates: Christmas Decor and Gift Card Holder. Christmas decor item CASEd from Connie Collins.

I love how this turned out! The colors are so rich and festive. I hung mine on my tree while one member of our group decided to showcase hers in a shadow box frame.

Linda Vich Creates: Christmas Decor and Gift Card Holder.


Our second project was simple by comparison but still produced a pleasing and useful Gift Card Holder.

We used the Envelope Punch Board to create a small envelope using a piece of Candy Cane Lane DSP. A sentiment from the Tin of Tags stamp set was stamped on a piece of Whisper White using Real Red and the MISTI. A second stamping with Versamark allowed the sentiment to be heat embossed using the Real Red Glitter Embossing Powder. The paper was then adhered inside the envelope.

A strip of Cherry Cobbler was cut and wrapped around the envelope to create a belly band. The little house adhered to the belly band was fussy cut from another piece of the Candy Cane Lane DSP. The now retired 2-Way Glue Pen was used on the snow parts and then Dazzling Diamonds was added for a sparkly finish. To another touch of shimmer, a Clear Wink of Stella pen was used to trace over all the white and candy parts on the house.

To complete the gift card holder, a tag was die cut from Crumb Cake using the Tags & Labels Framelits and then stamped with a stamp from the Hang Your Stocking stamp set. It was hung from the belly band using a length of twine from the Candy Cane Lane Baker's Twine.

Linda Vich Creates: Christmas Decor and Gift Card Holder. Christmas gift card holder using Candy Cane Lane DSP.

Linda Vich Creates: Christmas Decor and Gift Card Holder. Christmas gift card holder using Candy Cane Lane DSP.

I hope you've enjoyed these little Christmas projects!