Monday, March 13, 2017

So Succulent Gift Set With Video Tutorial

Linda Vich Creates: So Succulent Gift Set With Video Tutorial. Pot of trendy, colorful succulents with coordinating gift card that uses Dragonfly Dreams.
Friday night, my stamping ladies did a little gardening, though a green thumb was not required!

Succulents and dragonflies were the focus of my class as we created a darling pot of succulents with a matching gift card.

The Succulent Framelits are so much fun to use to create a vast array of colorful succulents. All six framelits required for the largest succulent can be fit onto a 4.25 x 5.5" piece of card stock and run through the big shot at the same time so this means that you save paper AND time!

In designing the succulents for this pot, I did a Google search to get some ideas for how to color the plants. Little did I know that succulents come in all the colors of the rainbow! Such fun!

I did a little experimenting with different colors of card stock and ink before deciding on my final choices. I save small strips of card stock just for the purpose of testing my ideas for colors. It is amazing what you can discover by sponging various ink colors onto different colors of card stock. For example, by sponging Wisteria Wonder with Pool Party, I was able to create a kind of Periwinkle Blue color.

In the end, I designed three types and sizes of succulents because I knew it was important to mix sizes and colors to produce a balanced design.

You can view the following video explaining how the succulents were created and assembled. This particular video shows a slightly different method to those portrayed in the photographs in this blog post. The succulents created in my class were fuller looking and more realistic as detailed in the notes below.


In addition, the second video shows the assembly of the pot and uses two types of moss to add further texture to the finished project.


Large succulent:
Wisteria Wonder card stock was cut with all six framelits; Pool Party ink was sponged on the petals of each piece and then Melon Mambo was sponged on the tips; double Dimensionals were used to adhere the two largest bottom layers as well as the next layer; liquid glue was used to adhere the remaining pieces.

Medium succulents:
Mint Macaron card stock was cut twice with five of the framelits to produce two separate succulents; Pool Party ink was sponged on the petals of each piece and then Old Olive was sponged on the ends of each petal; double Dimensionals were used on the two largest layers and liquid glue for the remaining pieces.

Small succulents:
Sweet Sugarplum card stock was cut three times with the three smallest framelits to produce three separate succulents; Old Olive was sponged lightly over the petals and then the tips were sponged with Melon Mambo; the layers were adhered using liquid glue.

After sponging the pieces for each of the succulents, a large-ball stylus from either the Heartfelt Creations Deluxe Flower Shaping Kit or one from the McGill Paper Blossom Tool Kit was used to shape each piece. The piece was placed in the palm of the hand and the stylus was circled over the middle until the piece "cupped."

To add further dimension to each piece, a bone folder was used to curl each petal downward. Double Dimensionals were also used to create separation between the largest layers and to produce a fuller looking succulent.

Once all the succulents were assembled, it was time to prepare the pot.

A sheet of newspaper from a community paper was crumpled tightly into a ball and then carefully undone. It was re-crumpled but this time ensuring a smooth, top section to the ball. A glue gun was used to apply glue to the bottom and sides of the metal pot and the newspaper ball was pushed inside to adhere it. Some tutorials for succulent pots found on Pinterest use half a styrofoam ball to form this part of the pot but that adds to the cost. I much prefer using the easily attained newspaper!

Pieces of moss, in both natural and green were then hot-glued to the top of the newspaper. Some tendrils of moss were allowed to fall outside of the pot for added interest. After gluing enough moss to cover the newspaper, the pot was turned upside down and tapped to remove any loose moss.

The front of the pot was determined and the arrangement of the succulents was chosen. Each succulent was glued in place using the glue gun. A glue eraser was used to rid the pot of any clinging glue gun trails.

A glue dot was adhered to the middle back of the pot rim; two more were adhered to each side of the pot's rim. A length of the 5/8" Burlap Ribbon was adhered to the glue dots and tied in a bow at the front of the pot.

Finally, a dragonfly was die cut from Gold Glimmer paper, shaped slightly, and adhered to one of the succulents in the pot with Glue Dots.

Linda Vich Creates: So Succulent Gift Set With Video Tutorial. Pot of trendy, colorful succulents created using the Succulent Framelits.

Linda Vich Creates: So Succulent Gift Set With Video Tutorial. Pot of trendy, colorful succulents created using the Succulent Framelits.

Linda Vich Creates: So Succulent Gift Set With Video Tutorial. Pot of trendy, colorful succulents created using the Succulent Framelits.


To create the accompanying card, a 4 x 4" card base was cut from Old Olive. Mattes of 3.75 x 3.75" were cut both from Mint Macaron and Whisper White.

On the Mint Macaron matte, the sentiment was stamped in Basic Black. The dragonfly, from the Dragonfly Dreams stamp set was stamped in Versamark and heat embossed with Gold Stampin' Emboss Powder.

The edges of the matte were sponged generously with Pool Party and then, less generously with Old Olive. The matte was adhered to the card front using Dimensionals.

A dragonfly was stamped offset on the Whisper White matte using Pool Party and then adhered inside the card.

Using the Envelope Punch Board, a matching envelope in Mint Macaron was created. The flap of the envelope was stamped with another dragonfly using Pool Party.

Linda Vich Creates: So Succulent Gift Set With Video Tutorial. Gift card that uses Dragonfly Dreams and coordinates with a pot of the trendy succulents.

Linda Vich Creates: So Succulent Gift Set With Video Tutorial. Gift card that uses Dragonfly Dreams and coordinates with a pot of the trendy succulents.

Linda Vich Creates: So Succulent Gift Set With Video Tutorial. Gift card that uses Dragonfly Dreams and coordinates with a pot of the trendy succulents.


I hope you have enjoyed reading about my projects and viewing the video tutorials! If you have yet to order the Succulent Framelits or the Dragonfly Bundle, you can purchase them in my online store! Just think what you can create with these products!


Thursday, March 2, 2017

You Light Up My Life Lighted Card

Linda Vich Creates: You Light Up My Life Lighted Card. A multicolored brick background showcases three copper embossed lanterns that light up when the sentiment is pressed.
Ever since I saw a card created using the new copper embossing powder, I have been wanting to make this card. Today I finally saw it through to completion!

I started by creating the background matte. This was inspired by a card created by Diane as seen on this Pinterest link. I used the Brick Wall Embossing Folder to emboss a piece of Watercolor paper and then sponged on inks–Tempting Turquoise, Emerald Envy, Cajun Craze and Night of Navy.

Using Versamark, I stamped two of the lanterns from the Moroccan Nights stamp set on Vellum and then heat embossed using Copper Stampin' Emboss Powder. I used scissors to fussy cut the lanterns.

I ran a length of the 5/8" Burlap Ribbon across the bottom of the card and taped it to the back. I used glue dots to keep the ribbon flat against the matte.

The sentiment from the Jar of Love stamp set was stamped with Basic Black on Emerald Envy card stock. A stitched oval was used to die cut the sentiment. A scalloped oval from the Layering Ovals Framelits was used to die cut Night of Navy and then Soft Suede was die cut with another stitched oval. These were sponged with Cajun Craze and layered using liquid adhesive and Dimensionals.

Next, I cut a Whisper White matte the same size as the brick matte. I positioned the lanterns on the matte and traced around them using a pencil, marking the spots where the light would show the vellum. Then, because I would be using the sentiment embellishment to press the "switch" to light the lanterns, I traced both the ribbon and the oval onto the white matte. I also used my Piercing Tool to poke through the white matte and through the brick matte so I would know where the light would be. Lastly, I scored 7/8" from the bottom of the matte and folded up to form the spot where the battery would sit.

Linda Vich Creates: You Light Up My Life Lighted Card. A multicolored brick background showcases three copper embossed lanterns that light up when the sentiment is pressed.
White matte showing traced lanterns, ribbon, and sentiment embellishment

I used a pencil crayon to draw two parallel paths, negative and positive, through the lantern tracings, with the end of the negative path above the fold and the positive end below the fold. I also marked positive and negative signs next to the ends so I could keep track which was which.

A Circuit Scribe Pen was used to trace over the paths I had drawn, filling in a solid circle at the end spot for each of the positive and negative paths. I then carefully peeled off one of the Chibitronic LED lights, being careful not to touch the sticky bottom. I adhered one LED within each lantern tracing. Each light was adhered across the positive and negative paths, with the point of the light on the negative path.

Linda Vich Creates: You Light Up My Life Lighted Card. A multicolored brick background showcases three copper embossed lanterns that light up when the sentiment is pressed.
Negative path traced with pen, positive path drawn with pencil crayon

Linda Vich Creates: You Light Up My Life Lighted Card. A multicolored brick background showcases three copper embossed lanterns that light up when the sentiment is pressed.
Completed paths with lights adhered, battery on negative spot

I placed the battery, text side up, on top of the negative spot and tested the circuit by pressing down the folded paper over the battery (completing the circuit by pressing the positive spot down onto the battery's positive side). It worked! If it hadn't, I would have carefully checked each path to make sure no gaps existed as well as checking that each LED was securely adhered.

Linda Vich Creates: You Light Up My Life Lighted Card. A multicolored brick background showcases three copper embossed lanterns that light up when the sentiment is pressed.
Battery enclosed with adhesive strips

Since the circuit was working, I then used pieces of Adhesive Strips to enclose the battery and keep it from moving around. I carefully folded the matte over the battery to adhere it. I then cut the excess folded card stock away.

The lanterns were adhered to the front of the brick matte using cut up Dimensionals and a drop of liquid adhesive for the chains of the lanterns. It was then, upon holding the card up to the light, I realized that the "hole" for each light did not look right behind the vellum so I further clipped out more of a hole behind each lantern's vellum piece.

I used more of the Adhesive Strips as well as some Dimensionals to adhere the brick matte over the white matte. The two mattes were then adhered to the front of an Emerald Envy card base.

Lastly, the sentiment embellishment was adhered over the burlap ribbon using Adhesive Strips.

Linda Vich Creates: You Light Up My Life Lighted Card. A multicolored brick background showcases three copper embossed lanterns that light up when the sentiment is pressed.

Linda Vich Creates: You Light Up My Life Lighted Card. A multicolored brick background showcases three copper embossed lanterns that light up when the sentiment is pressed.

Linda Vich Creates: You Light Up My Life Lighted Card. A multicolored brick background showcases three copper embossed lanterns that light up when the sentiment is pressed.


I hope you have enjoyed learning about how to make a light up card!


pt src="https://mystampinblog.com/Script/ShowcaseDetailsScript">

Monday, February 27, 2017

Rose Garden Window Box

Linda Vich Creates: Rose Garden Window Box. The Window Box and Rose Garden Thinlits team up with the Sale-A-Bration Glimmer Paper in this darling gift box.
Have you purchased the Window Box Thinlits yet?

I had so much fun playing with them today to dress up my little gift box! They can be decorated in so many different ways using the dies that come in the set or by adhering patterned paper and embellishments, and they may be used both horizontally or vertically! Use them as gift boxes and/or tea candle holders.

I have only touched on a few ways to decorate these boxes but there are a host of ideas available for them if you do a search on Pinterest.

I have used the Window Box Thinlits for my Waterlily Gift Box and I created a double-sized gift box in my Valentine Collection blog post.

After playing with the Sale-A-Bration FREEBIE–6 x 6" Glimmer Paper Assortment Pack–the other day, I was anxious to use the glimmery goodness again on Basic Black. I started by cutting out the two necessary pieces to make my box and then assembled the box using liquid adhesive.

I used the Rose Garden Thinlits to die cut the smaller rose from the Sweet Sugarplum as well as six smaller flowers and then die cut both the larger and smaller leaves from the Mint Macaron, trimming them with scissors.

Placing glue dots strategically around the top edge of the box sides, I tied a length of the now retired Sweet Sugarplum Glitter Ribbon around the box, finishing with a bow at the front of the box.

I used Connie Stewart's method for adhering detailed die cuts to adhere the die cuts to the top and sides of my box. This is the BEST method I have found yet for adhering these types of die cuts.

To complete my little gift box, I added rhinestones to the centre of the flowers and on the lid of the box.

Linda Vich Creates: Rose Garden Window Box. The Window Box and Rose Garden Thinlits team up with the Sale-A-Bration Glimmer Paper in this darling gift box.

Linda Vich Creates: Rose Garden Window Box. The Window Box and Rose Garden Thinlits team up with the Sale-A-Bration Glimmer Paper in this darling gift box.


Isn't it pretty? It's too bad that the glitter ribbon isn't still available as it matches the Glimmer paper perfectly!

If you would like to make your own little boxes, you can purchase your own Window Box Thinlits in my online store. By purchasing either the Clear-Mount Bundle or the Wood-Mount Bundle, you qualify for a Sale-A-Bration FREEBIE! (You could get some of that luscious glimmery paper that I used by choosing #143831 for your free item!)


Friday, February 24, 2017

Marblelized Thank You Cards

Linda Vich Creates: Shaving Cream Thank You Cards. Simple thank you cards that sport marblelized backgrounds topped with stitched sentiments with glimmer paper banners.
Today's cards use a technique that has been on my to do list for some time but which I just hadn't got around to trying. I had several cards to make so I thought that using shaving cream to produce a marblelized effect would be appropriate since several similar yet different backgrounds can be made at one time. An excellent tutorial can be found here.

The cards also use the 6 x 6" Glimmer Paper Assortment Pack, one of the new FREE Sale-A-Bration items that can be earned by placing a $60 order!

I started by cutting 4 x 5.25" mattes from Whisper White. I then sprayed shaving cream onto a foam plate (one that was larger than my matte) and smoothed the surface of the cream with a piece of cardboard saved from some packaging.

Next, I placed drops of reinker–Mint Macaron, Bermuda Bay, and Sweet Sugarplum–randomly on the shaving cream. I used a wooden dowel to drag through the drops both vertically and horizontally (and sometimes circularly). There is no right way of doing this–feel free to experiment!

I placed one of my mattes face down into the shaving cream and then removed it, checking to be sure I had color in all areas of the matte. If not, I re-dipped the matte.

I let the matte sit for a minute or two and then scraped off the shaving cream, leaving behind a marbled ink pattern. The matte was then set aside to dry while I repeated the process with other mattes.

Because the ink pattern tends to lose its crispness after producing a few mattes, I rinsed off the plate and began again. It was fun to try different "patterns" created with the wooden dowel. Sometimes I would only apply drops of Mint Macaron and Bermuda Bay, stir it with the dowel, and then add a few drops of the Sweet Sugarplum and stir it briefly with the dowel. It is important when working with colors that are complements on the color wheel, (red and green; blue and orange, purple and yellow) not to stir them together too much because the color will quickly turn to mud.

After my mattes were dry, I sponged the edges with Basic Gray ink and then adhered the mattes to standard card fronts cut from Smoky Slate.

The sentiment, from the now retired Happy Watercolor stamp set was stamped on either Sweet Sugarplum, Mint Macaron or Bermuda Bay card stock and then die cut using a square from the Stitched Shapes Framelits.

The Triple Banner Punch was used to flag the ends of Glimmer paper that matched the card stock used for the sentiment and these strips were adhered behind the sentiment. The sentiment piece was adhered to the card front using Dimensionals to complete each card.

Linda Vich Creates: Shaving Cream Thank You Cards. Simple thank you cards that sport marblelized backgrounds topped with stitched sentiments with glimmer paper banners.

Linda Vich Creates: Shaving Cream Thank You Cards. Simple thank you cards that sport marblelized backgrounds topped with stitched sentiments with glimmer paper banners.

I hope you will give this technique a try! Between colors and patterns, the possibilities are endless! What colors will you use and what patterns will you produce?


Thursday, February 23, 2017

Glimmery Goodness From Sale-A-Bration and a Video Tip


Have you received any of the new Sale-A-Bration goodies yet? As of February 21, Stampin' Up! added THREE new FREE items that can be earned by placing a $60 order! Believe me, you are going to want these items!

6 x 6 Glimmer Paper Assortment Pack #143831
This is my ultimate favorite–who wouldn't love the glimmer goodness in Bermuda Bay, Mint Macaron and Sweet Sugarplum? My project today uses all three of these papers.
Make A Medallion #143274
I wasn't that struck on this set when I first saw it but I have seen some marvellous examples and it is now on my "get" list! Here is one example:


Reverse Words,  #143316 (wood mount), #143319 (clear-mount)
These reverse words have a lot of possibilities. Check these samples below:


Be sure to place your $60 or more order to be able to receive one or more of these items for yourself!


Next up today, I have a short video tip for you. Have you ever struggled with getting your clear mount stamps ready for use? Do you have difficulty getting the labels on the stamps correctly? Watch my video below to see how I successfully prepare my clear mount stamps for use.


I hope that you found this video helpful! Be sure to give it a "thumbs up" and subscribe to my channel to catch future videos.

Finally, the card I have for you today makes use of the FREE 6 x 6 Glimmer Paper Assortment Pack that you can receive when you place a $60 or more order. This paper is lovely and I did hate to cut into it but in the end I was happy that I did!

To construct my card, I cut the following:
  • 6 x 4.75" card base from Thick Whisper White
  • 5.5 x 4.25" matte from Basic Black
  • 5.375 x 4.125" matte from Thick Whisper White
Because I would be die cutting into my Whisper White matte, I needed to get an idea of the overall arrangement for the items on my matte. To do this, I first die cut two large leaves and two small leaves from the Mint Macaron Glimmer paper using the Stylish Stems Framelits. I also stamped the larger flower from the Special Reason stamp set on Thick Whisper White using Pool Party. This was die cut using the the matching framelits.

I arranged the framelits and the die cuts on my matte until I had a pleasing arrangement and then snapped a photo with my phone. I was then able to die cut the two flowers from the matte itself. I then taped small pieces of the Glimmer papers behind the die cut openings in the matte. This piece was then adhered to the Basic Black matte.

Liquid adhesive was used to adhere the die cut leaves. On the stamped flower, I used a Bermuda Bay Stampin' Write marker to color in the flower's centre and then used a Clear Wink of Stella pen to give the whole flower some shimmer. The flower was popped up with Dimensionals.

The sentiment was stamped with Versamark on Basic Black, heat embossed with White Stampin' Emboss Powder, and die cut using an oval from the Stitched Shapes Framelits. A thread nest was adhered with glue dots and then the sentiment popped up over it using Dimensionals. A sprinkling of 
silver Metallic Enamel Shapes was added to complete the card.

Linda Vich Creates: Glimmery Goodness From Sale-A-Bration. Stylish Stems combines with the Sale-A-Bration freebie Glimmer Paper in this floral birthday card.

Linda Vich Creates: Glimmery Goodness From Sale-A-Bration. Stylish Stems combines with the Sale-A-Bration freebie Glimmer Paper in this floral birthday card.

Linda Vich Creates: Glimmery Goodness From Sale-A-Bration. Stylish Stems combines with the Sale-A-Bration freebie Glimmer Paper in this floral birthday card.

Isn't all that glimmery goodness just to die for? Thanks for visiting today!


Wednesday, February 15, 2017

Valentine Collection

Linda Vich Creates: Valentine Collection. Several valentine projects that use a host of die sets to create lovely boxes and a card.
Valentine's Day this year marked the day 30 years ago when my husband Bob proposed to me! Such a special day that was! We celebrated by going for supper at Jonesy's Restaurant in Bird's Hill. This was the first time we had eaten at this restaurant and it definitely won't be our last! It is a very small restaurant, and did not have a fancy decor, but the food was wonderful and I highly recommend the place.

Today I have for you a collection of items that I created for my family for Valentine's Day this year.

First up is a simple tea light holder for my daughter who likes candles. I added no extra embellishments to this box so that the light of the candle could shine through all the tiny die cut holes.

I simply used the largest of the Window Box Dies to cut out two pieces of card stock and then used a smaller die with a heart pattern to cut openings in the small sides of the box. A larger die was used to cut the holes in the top of the box. Liquid adhesive was used to assemble the box.

Linda Vich Creates: Valentine Collection. Several valentine projects that use a host of die sets to create lovely boxes and a card.

Linda Vich Creates: Valentine Collection. Several valentine projects that use a host of die sets to create lovely boxes and a card.


Next, I created an enlarged Window Box by using a tutorial from Kirsteen Gill. I wanted a larger box that could hold more treats and this worked perfectly!

To create the box, you need to do some fancy cutting with your Big Shot. In order to make the box larger, you need to shift the top cutting plate so that it doesn't extend all the way across the Window Box Thinlits die. It is not a hard technique but I did need to refer to the tutorial in order to make it work for me!

Once the pieces were cut out, the box was assembled like the original version and I used liquid adhesive to adhere the card stock. I cut panels for the box using the Sending Love DSP and also used the Love Notes Framelits to cut tiny envelopes, hearts, arrows, and the banner for the top.

Using the Sealed With Love stamp set, I stamped the tiny notes within the envelopes. I used the Bloomin' Love stamp set for the sentiment on the banner which I embellished with rhinestones. I also used one of the Lace Doilies on the lid of the box. These doilies are really nice because they are Whisper White on one side and Very Vanilla on the other!


Linda Vich Creates: Valentine Collection. Several valentine projects that use a host of die sets to create lovely boxes and a card.

Linda Vich Creates: Valentine Collection. Several valentine projects that use a host of die sets to create lovely boxes and a card.

Linda Vich Creates: Valentine Collection. Several valentine projects that use a host of die sets to create lovely boxes and a card.


To create the card for my husband, I first die cut the four letters from the Sale-A-Bration Freebie, Inside The Lines DSP, using the Large Letters Framelits. I also cut three versions using Thick Whisper White and one from Basic Black for all four letters. These letters stacked and adhered using liquid adhesive, with the Basic Black layer being slightly offset to produce a shadow.

A 4.75 x 6" card base was cut from Real Red and then a sheet of the Sending Love DSP was cut and adhered to the front.

Next, I used one the squares from the Stitched Shapes Framelits to cut a rectangle on which to place each letter.

In order to cut a rectangle using a square die, the top cutting plate on the Big Shot must be placed so that the one edge of the die is not cut. The die is then moved, the platform rotated, and the cutting plate replaced so that the other side can be cut. To ensure that each of my rectangles was the same size, I cut one rectangle and then used the resulting "frame" as a template to place over each piece of card stock to be cut. The template ensured that the die could only be moved to the same place each time ensuring the same size of rectangle. For more information on this technique, check out the video tutorial by Dawn Griffith.


Linda Vich Creates: Valentine Collection. Several valentine projects that use a host of die sets to create lovely boxes and a card.
This shows the template on top with the square die
moved to create the second cut for the rectangle.

Linda Vich Creates: Valentine Collection. Several valentine projects that use a host of die sets to create lovely boxes and a card.
The top cutting plate is positioned so that the bottom
edge of the die does not cut through the card stock

Each letter was adhered to its stitched rectangle using liquid adhesive. The rectangles were adhered to the card front using Dimensionals. Small hearts were punched from Red Glimmer paper and adhered to the letters using Glue Dots.

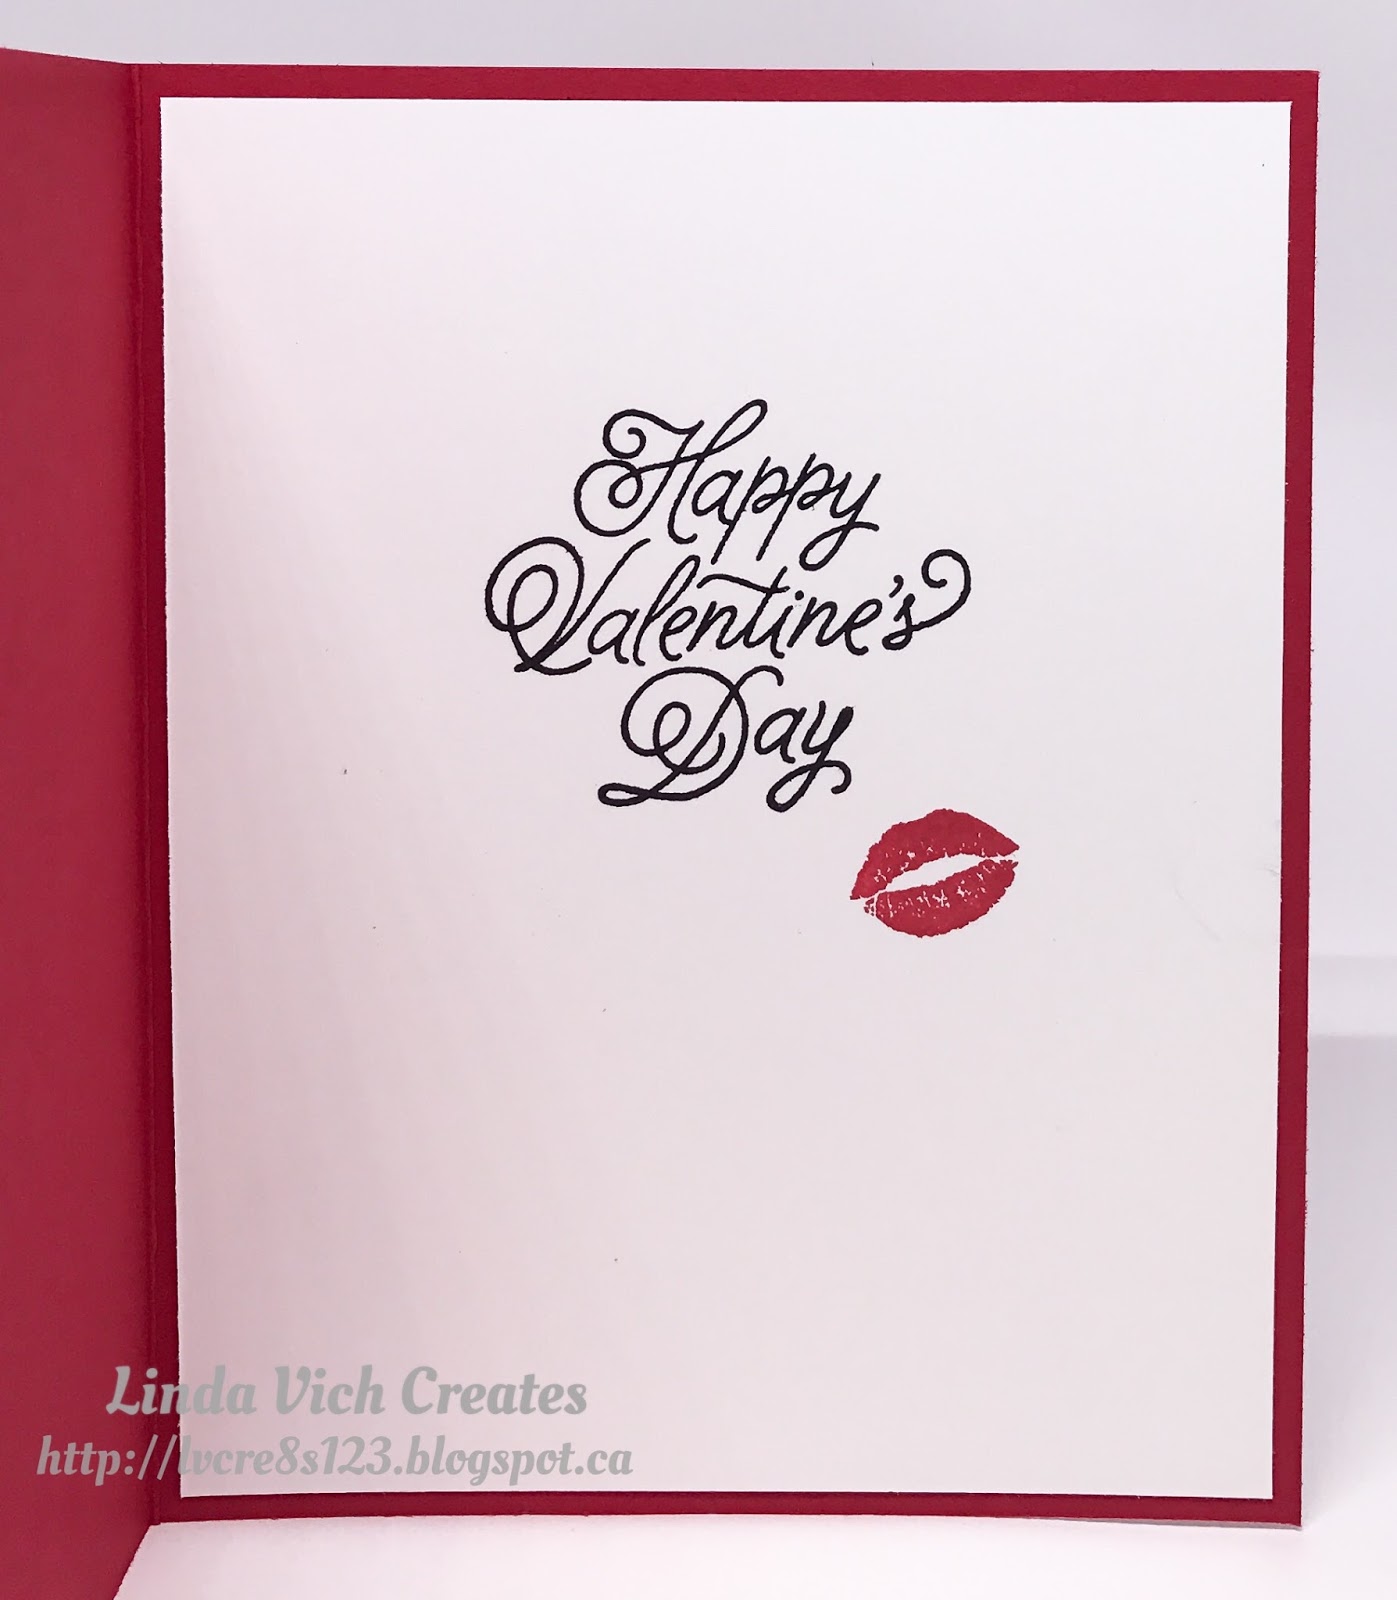
For inside the card, a white matte was stamped with a sentiment from the Sealed With Love stamp set using Basic Black and the lips were stamped with Real Red. The matte was adhered to complete the card.


Linda Vich Creates: Valentine Collection. Several valentine projects that use a host of die sets to create lovely boxes and a card.

Linda Vich Creates: Valentine Collection. Several valentine projects that use a host of die sets to create lovely boxes and a card.

Linda Vich Creates: Valentine Collection. Several valentine projects that use a host of die sets to create lovely boxes and a card.


Finally, I created a lidded box for my granddaughter using the Popcorn Box Thinlits. I referred to the tutorial by Intatwyne Designs.

I created my box using Real Red card stock and adhered panels cut from the Sending Love DSP. I decorated each panel by adhering layered hearts cut from Red and Dazzling Diamonds Glimmer paper using the Sweet & Sassy Framelits.

I stamped the sentiment from the Sealed With Love stamp set using Real Red and then Versamark inks and heat embossed it using the Real Red Glitter Embossing Powder. This was die cut using a square from the Stitched Shapes Framelits and adhered to the lid of the box.

A length of ribbon was adhered at the back of the box with a glue dot and then tied in a bow to complete the box.


Linda Vich Creates: Valentine Collection. Several valentine projects that use a host of die sets to create lovely boxes and a card.

Linda Vich Creates: Valentine Collection. Several valentine projects that use a host of die sets to create lovely boxes and a card.

Linda Vich Creates: Valentine Collection. Several valentine projects that use a host of die sets to create lovely boxes and a card.


This completes my Valentine projects for 2017. I hope you enjoyed a lovely Valentine's Day!


Wednesday, February 1, 2017

Waterlily Gift Box

Linda Vich Creates: Waterlily Gift Box. Succulent Framelits create a waterlily that tops a lovely gift box create with the Window Box Thinlits.
Instead of a card today, I have a gift box that was inspired by the photo of a waterlily that turned up in a Google search. I thought that the waterlily could be created by using the Succulent Framelits and the box could serve as the water and the lilypads could be represented by the die cut mattes added to the box.

After die cutting the two large sections for the box from Dapper Denim, I used Fast Fuse to assemble the box.

I got a tip on a Facebook group that one of the square Stitched Framelits perfectly fit as a matte for the Window Box so I die cut a matte from Cucumber Crush. A die from the Window Box Framelits was used to die cut little holes in the stitched matte.

On a scrap of Cucumber Crush, I tried sponging both Bermuda Bay and Emerald Envy to see which one would give me the look I was after; Bermuda Bay won! I sponged the matte and it looked great! I then die cut the remaining five mattes and sponged them as well.

Before adhering the mattes to the box, I decided to also sponge the edges of the box using Dapper Denim. The sponging gave the box some added depth. I then adhered the mattes using Glue Dots.

Next, I used the Succulent Framelits to cut two of the largest succulents, two of the middle size and one of the smallest size from Whisper White. I used Melon Mambo to sponge color on both sides of the die cuts and then used a bone folder to curl up the "petals" a bit. Liquid adhesive was used to adhere the die cuts to form the flower.

Clear Wink of Stella was used on the petals of the flower and then stamens were die cut from Crushed Curry using a die from the Botanical Builder Framelits. It was adhered and given a coat of Wink of Stella. A rhinestone was added to complete the flower.

When I put the flower on the top of the box, even though the blue of the box was designed to represent the water and I wanted it to show but, design-wise, I needed some greenery as well. I then die cut a hexagon using the largest Window Box die and further die cut it using the ornate hexagon die. I then trimmed the sides down as much as possible and adhered it to the top of the box before adhering the flower on top using Dimensionals.

Here is the Google photo that was my inspiration:

http://hubpages.com/living/Water-Lilies-The-Perfect-Addition-to-any-Garden

Here is my interpretation:

Linda Vich Creates: Waterlily Gift Box. Succulent Framelits create a waterlily that tops a lovely gift box create with the Window Box Thinlits.

I'm really pleased with how this little gift box turned out! It is so nice when a project you envision turns out so well!

If you would like to use my color scheme from this project, feel free to save it!


If you are ready to purchase the items to make this gift box, you can click on the items below to be taken directly to my store.