All you need for the Eclipse Technique is to choose a word, a card front that fits the word, and a stamp set or sets to use! A search on YouTube will turn up a number of tutorials for the technique but one that I like is by Gaynor Boyce.
Of course, you will also need to use the Large Letters Framelits. Though these are a very expensive set, you can get them for 50% off when you have a qualifying order. I have used my Framelits many times after purchasing them and the Eclipse Technique provides many opportunities to use them.
My first Eclipse card was designed for a birthday and I chose to use the lovely Painted Harvest stamp set. Because Simone's name was quite long, I designed my card to be 4 x 8.5" in size. After cutting my card base from Berry Burst, I cut two Basic Black and two Thick Whisper White mattes. I used liquid adhesive to adhere one Whisper White matte to a Basic Black matte and then adhered the second Basic Black matte to the card front.
To begin with, I laid out the letter's of Simone's name on a white matte to see where they would fall. This allowed me to plan out my stamping.
I started by stamping the sentiment, from the Tabs For Everything stamp set, with Basic Black. I then used Daffodil Delight, Tangerine Tango and Berry Burst to stamp the sunflowers. I also stamped one complete flower on a full-adhesive Post It Note and then fussy cut it. I used this as a mask on the flowers so that when stamping the leaves in Wild Wasabi, it would look like the leaves were behind the flowers.
With my stamping complete, I laid out the six letters and then drew a light pencil line to be sure that my alignment of the letters would be perfect. I used the Big Shot and my Magnetic Platform to die cut the letters. I also die cut a second set of the letters from another piece of Thick Whisper White.
Using liquid adhesive, I glued all the stamped letters to the second set of letters. In the case of the O, the two pieces of the stamped letter O was replaced into the die cut opening. The middle of the O was then adhered with liquid adhesive and then the outer part of the O was removed again. I then adhered the stamped matte to the Basic Black matte on the card front.
I applied Foam Adhesive Strips to all the letters and then placed each into its die cut opening on the card front.
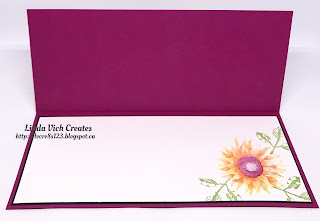
For the inside of the card, I simply stamped a single flower and some leaves in the bottom right corner of the remaining Whisper White matte and then adhered the matte inside the card.
I am so pleased with how this card turned out! The colors are bright and cheerful and the stamping looks so cool on the raised letters!
I hope that you have enjoyed my card and that you will try this technique for yourself!


1 comments:
This is a lovely card. I appreciated your tip about laying out the letters first to see where you would stamp. I have made four cards using this technique. One I wasn't pleased with because the letters didn't fall right. I too like Gaynor Bryce's tutorial the best. Did you make your own envelope?
Post a Comment