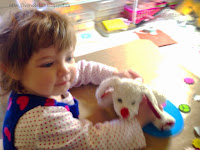
Had a glorious day babysitting my granddaughter today! She was good as gold and we finally got to have some time in the craft room together.
I thought that she would probably only stay at the task for about 15 minutes but it was closer to 45 minutes by the time she was finished!
She enjoyed being a "big girl" and sitting up on my high chairs to work on her eggs. Of course, she had to bring one of her stuffed animals up with her to add to the fun!
I snapped a few photos but they aren't great–so hard to get good pics with my phone when she's always on the move!
Anyway, I got to craft a bit later this evening. My card is a CASE of Colleen's creation on One Smile Lifts A Spirit.
Back then, I thought this background too bright and colorful to be used in any project but for whatever reason, I still hung onto it. When I saw Colleen's technique, I thought that it would be a way to use this piece successfully.
I chose to use a Whisper White card base and layered both a Basic Black and a Tempting Turquoise matte on it. I then cut my bokeh background in strips of 1 1/4", 3/4", and 3/8" and inked the edges with Tuxedo Black Memento ink. I used Dimensionals to adhere the strips to the card front, separating them by about an 1/8."
My MISTI came in handy when I stamped the sentiment from the Painted Petals stamp set. I used Jet Black Stazon ink and it took three inkings and stampings to successfully stamp this image; without the MISTI I would have been tearing my card apart to re-stamp it!
I used the Butterfly Thinlits to cut a butterfly from Basic Black and then used Versamark and Iridescent Emboss Powder to heat emboss it. I adhered it to the card using glue dots and then added some rhinestones down the middle.
A few sequins, some from my stash and some from Pretty Pink Posh, adhered with Crystal Effects, and my card was complete!
Have you ever created a card background that you thought was a little too overpowering? Perhaps you could use this technique to save it!
Built for Free Using: My Stampin Blog


2 comments:
Oh my goodness- that is gorgeous! I always learn so much from you- thank you!
And your granddaughter is so adorable- what a precious time crafting together!
Thank you, Michelle. That's high praise from you because your projects are always so polished!
Post a Comment