Friday, November 27, 2015

It's Beginning To Look a Lot Like Christmas!

Today, after preparing my projects for next week's stamp class, I was able to finish coloring the stamp I had started last Friday.

I absolutely love my Zig Clean Color Real Brush Markers! They are like no other markers I have ever used! It's almost effortless to blend colors with them, either on their own or by adding water with an aqua pen.

In preparation for coloring, I actually stamped a number of images on watercolor paper. I chose the little boy in the snowsuit from Christmas Cuties because there were a lot of large areas that I thought would work well for blending with water.

I couldn't have been happier with the way he turned out!

After fussy cutting him, I stroked around all the edges with a Basic Black Stampin' Write Marker to hide any white edges.

I cut a Thick Whisper White matte and embossed it with the Softly Falling embossing folder. To create a couple of snowbanks, I used the Sleigh Ride Edgelits Dies to cut some Dazzling Diamonds Glimmer paper. I snipped off the houses and trees with scissors.

Besides snowbanks, I wanted a tree for my little scene. I chose a stamp from the Peaceful Pines stamp set. Using Mossy Meadow, I stamped it on Garden Green card stock and then die cut it with the Perfect Pines Framelits.

I played with the placement of the snowbanks, tree, and the little boy until I was satisfied with my plan. Next, I glued one snowbank onto the embossed matte and then applied Dimensionals to the top of the other snowbank and Fast Fuse Adhesive to the bottom.

The tree die cut also received Dimensionals and was put in place behind the second snowbank. The little boy was popped up with Dimensionals and added to the scene giving depth to the scene.

The sentiment, also from Christmas Cuties, was stamped with Basic Black Archival ink and then punched with the Washi Label Punch. I used a sponge dauber to ink the edges with Real Red. It was adhered to the matte with Dimensionals.

I cut a matte from a striped Tempting Turquoise paper from the Brights DSP stack and inked the edges with Basic Black Archival ink. It was adhered to a Real Red card base using Fast Fuse Adhesive.

Finally, the embossed matte was adhered on top using Fast Fuse Adhesive.


What do you think? Drop me a comment below!


Built for Free Using: My Stampin Blog


Thursday, November 26, 2015

Woodland and Wonderland: Together And Doing Fine!

Today I want to share with you the second card that I started while crafting at Charlene's last Friday.

I am madly in love with both Wonderland and the Woodland folder! Ever since I first saw Pinterest posts on the two, I have been dying to experiment with them.

Whereas the Wonderland trees can be stamped in every color of the rainbow and look nice, the cards created with the Woodland embossing folder seem to be, for the most part, done with traditional birch colors of white and a little gray or taupe added for interest, but they are nonetheless fabulous!

When you marry these two products in the same card, how could it not be anything but stunning?

My card is a CASE of the card by Billie Moan:

Card by Billie Moan

I started by cutting a piece of the Thick Whisper White card stock (love how elegantly this embosses!) 4.25 x 5.75" in size. I absolutely love how the new embossing folders are 6" in size, giving you lots of possibilities to use them in larger cards!

Next, I took the Woodland embossing folder and laid it open on my craft mat. I took my Tip Top Taupe and swiped the stamp pad across the side marked Sizzix, down near the bottom of the folder. I then used Lost Lagoon to swipe the upper part of the folder.

I inked up Wonderland using Mossy Meadow and stamped it right on the folder, and repeated this process right across the folder, being sure to clean my stamp between inkings.Placing my card stock on the un-inked side of the folder, I carefully closed it and ran it through my Big Shot. Beautiful results!

I used a sponge dauber to ink the edges of the embossed panel with Tip Top Taupe and then used my Early Espresso Stampin' Write Marker to outline the marks on the trees. Wow! That technique alone gives a whole lot of punch to these trees and it really only takes a few minutes to accomplish, using the brush end of the marker.

The finished piece was adhered  to a Mossy Meadow matte using Fast Fuse Adhesive and then I wrapped a length of Blackberry Bliss ribbon around the bottom of the panel, securing it at the back with tape.

I stamped the sentiment from the soon to be retiring Festive Fireplace Stamp Set on Whisper White card stock using Blackberry Bliss ink. I die cut the sentiment using the Chalk Talk Framelits.

Mossy Meadow ink added definition to the edges of the tag and it was adhered on top of the ribbon using Dimensionals. Two rhinestones gave it a little extra sparkle. The finished matte was then mounted on a 6.5 x 5" Blackberry Bliss card base using Dimensionals.

For the inside, I stamped the tops of the Wonderland trees in Mossy Meadow along the bottom of a piece of the now retired Naturals White card stock. I finished by inking the edges of the matte using Mossy Meadow and adhered it using Fast Fuse Adhesive.


Have you tried either the Wonderland Stamp Set or the Woodland Embossing Folder yet? Don't miss out on purchasing these two great products! Order yours TODAY! For a full list of both retiring and sale products, click here.

To see my other uses of Wonderland and Woodland, click the links below:

Wonderland: My Go-To Stamp
Color Burst Christmas and Wonderful Wonderland
Glints Of Gold With Wonderland
Who's Hiding In The Woods?


Built for Free Using: My Stampin Blog

Wednesday, November 25, 2015

Glints of Gold With Wonderland

Last Friday, I had the pleasure of visiting my friend, Charlene, and working in her new craft room!

Wow! What a change from the bare basement in which she used to work to a sophisticated, secret hideaway tucked behind the wall-to-wall bookcase in her new rec room area!

Her new area is bright, functional, and welcoming! She has a large work table in the middle, designed to sit four, with storage on one end, as well as additional space to set up tables if she hosts a large group of stampers.

Counters with white cupboards above and drawers below are along one wall, giving her plenty of work and storage space for her Big Shot and Paper Trimmer and other tools.

The white contrasts beautifully with the Lucky Limeade wall color–it looks amazing! Though it is still a work in progress, her craft room is definitely a wonderful space in which to work! I would have posted pictures but her craft area and rec room are to be featured in an upcoming magazine issue so I do not want to spoil the surprise!

While at Charlene's, I was able to work on two different cards and start some coloring with my Zig Clean Color Real Brush Markers. Of course, as is often the case when you travel somewhere to craft, you can't totally complete a project because the sentiment stamps or the embellishments with which you came are not the ones you need! However, I made a good start and was able to finish my two cards when I returned home. I have one of those cards to show you today.

To my dismay, Wonderland is on the Retiring Products List from the Holiday Catalog :( I love working with this stamp and have seen many lovely renditions of the stamp. Be sure you order yours before it disappears!

I wanted to use the stamp with Night of Navy but I thought it would look very nice paired with Soft Suede. I cut my card base from Soft Suede to make a 5 x 7" card.

I had previously stamped on Vellum card stock using Versamark and heat embossed the trees using Gold Stampin' Emboss Powder.

The Oval Framelits Collection were used to cut an oval from a 4.25 x 5.5" matte of Night of Navy and then I placed the vellum behind it and taped it in place. Because I liked the look of the Night of Navy through the vellum, rather than the Soft Suede, I cut a second Night of Navy matte and adhered it behind the vellum.

Wrapping two lengths of the 3/8" White Glitter ribbon around the bottom of the matte, I then covered the seam between the two pieces using a length of the Gold Sequin Trim.

I chose one of the wooden Snowflake Elements and covered it with glue using the 2-Way Glue Pen. I sprinkled on a coating of Dazzling Diamonds Glitter and set it aside to dry.

The matte was adhered to the card base using Dimensionals and then I used the Fine Tip Glue Pen to attach a few loose gold sequins to the top of the matte.

Once the snowflake was dry, I used the Fine Tip Glue Pen again to adhere a large gold sequin to the centre of the flake and then placed a rhinestone in its centre for a little added sparkle.

I adhered some glue dots on top of the Gold Sequin Trim and then bundled some Gold Metallic Thread and secured it to the glue dots. I used more glue dots to attach the snowflake on top of the thread.

Close up detail of the embellishment cluster.

For the inside of the card, I used a matte of the now retired Naturals White card stock. Using Night of Navy, I stamped the trees to the bottom right of the card and also added the sentiment from the same set. The matte was adhered to the card using Fast Fuse Adhesive.

To finish the card, I used the Fine Tip Glue Pen to add tiny drops of glue to the trees and then added some Dazzling Diamonds Glitter to give them a subtle hint of sparkle!


I definitely like the richness of pairing Night of Navy with the Soft Suede! Have you tried this combo before? Drop me a note below!

You may like to read my other posts where I feature the soon to be retiring stamp set, Wonderland.


Built for Free Using: My Stampin Blog


Tuesday, November 24, 2015

Celebrate The Season With Acorns

As often happens with me, a card idea came to me just before I closed my eyes the other night. I immediately jotted it down into my Evernote app so I would not lose track of it.

The next day, I was able to create my card and I was able to utilize the leftover acorns I had created while previously making my Acorn Thank You cards.

I cut a card base from Basic Black card stock to give me a card measuring 8.5 x 4.5". I really like this card size! You can view another card I made in this size in my blog post, Love For The Lotus.

To add a bit of texture, I cut a matte from corrugated white paper and used a leaf from the soon to be retiring stamp set, Lighthearted Leaves, with Basic Black Archival ink to stamp all over the matte. I was very pleased with the result–I wanted a very airy look to the stamped panel and I think I achieved it because the Lighthearted Leaves were perfect for this effect!

I inked three sides of the matte using Real Red ink and then adhered it to the card base using Fast Fuse Adhesive.

Next, I used the Banners Framelits Dies to cut three banners from Real Red card stock and I inked all but the top edges on those, using the Basic Black Archival ink. These were also attached with Fast Fuse adhesive.

The acorns I had previously punched from Dazzling Diamonds Glimmer Paper and the soon to be retiring, Black Glimmer Paper. The top of the acorn was adhered using the Fine Tip Glue Pen. The acorns were adhered to each banner using Dimensionals.

Using my MISTI I stamped the sentiment from the soon to be retiring Happy Scenes stamp set, using Real Red on a 3/4" strip of Whisper White card stock. I then used the Triple Banner Punch to flag each end. I used the punch again on a 1" strip of Basic Black.

The sentiment pieces were adhered using Dimensionals and then adhered to the card front, also with Dimensionals.

For the inside of the card, I used a matte of the now retired Naturals White card stock. Using the same stamp from the Lighthearted Leaves, I stamped along the bottom of the matte using Real Red and then inked each edge as well.


I think that my card looks quite festive as well as being quite clean and crisp! You've just got to love red, white, and black!

I am so sad that the Lighthearted Leaves will be retiring! It is such a pretty set and can be used in so many different ways. If you like it as much as me, be sure to order it from me before it disappears! While you are at the store, be sure to grab some of the Black Glimmer Paper as well!

Built for Free Using: My Stampin Blog

Monday, November 23, 2015

Acorn Thank You

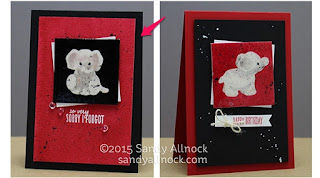
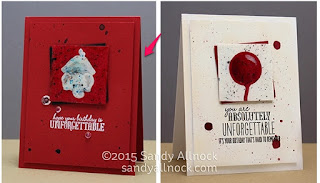
I absolutely love reading posts and watching Periscope broadcasts by Sandy Allnock! That girl has some serious art talent! Not only can she put a card together but her skill at coloring, drawing, and painting is second to none!

Sandy recently posted a couple of cards that she had CASEd and now I am posting a couple of cards that I CASEd from hers!

I am casing two of her four images:

Cards by Sandy Allnock.

Card by Sandy Allnock.

I started by punching my two different acorns from Dazzling Diamonds, Real Red, and Black Glimmer papers. Before gluing the tops on using the Fine Tip Glue Pen, I used a Real Red and a Basic Black Stampin' Write Marker to edge around each acorn to hide the white core of the Glimmer paper.

I then cut square mattes of 2.5" from Real Red, Basic Black and Whisper White card stock. I formed a stack with black and white and one with red and black. These were adhered together using Dimensionals.

Two card bases were cut, one from Basic Black and one from Real Red. Both cards used Real Red mattes which were adhered to the card bases using Dimensionals.

After adhering the mattes I realized that I hadn't yet created the paint fleck effect on the mattes so I went ahead and did it anyway, though I managed to get some paint on the card bases!

To create the fleck effect, I used Brusho powdered watercolor paint. I tapped out a little black paint and mixed it with water. After loading a brush with the paint, I tapped another brush against it to create the spatter.

Using MISTI, I stamped the sentiment from the Endless Thanks stamp set using Versamark and then heat embossed it using white embossing powder.

I adhered the square mattes to each card front and then the acorn on top of the mattes; both were adhered using Dimensionals.


I did not add mattes to the inside of these cards. Instead, I wrote in them using a white gel pen.

I really like both cards but I think the card with the Basic Black card base stands out more due to the high contrast between the two colors. However, I do love the red on red and the black and white acorn looks stunning on top! It uses the soon to be retiring Black Glimmer Paper.

Which card do you like best? Drop me a comment below!

Built for Free Using: My Stampin Blog

Retiring Products and Online Extravaganza!

Retiring_OLO_1116_US

It is almost time to say goodbye to some of my favorite products! So many of the wonderful products in the Holiday Catalog will be gone before you know it because this is a "while items last" scenario.

Just some examples that you will miss you if you don't act quickly:

Happy Scenes Stamp Set
Lighthearted Leaves Stamp Set
Black Glimmer Paper
Sleigh Ride Edgelits Dies
Square Pillow Box Thinlits Dies
Woodland Textured Impressions Embossing Folder
Festive Fireplace Bundle
Jingle All The Way Bundle

Check out the Retiring Products List to see the many items that will be disappearing and
TODAY!


As well as Retiring Products, be prepared to SAVE BIG during the Online Extravaganza Sale!

So many products to choose from the Sale List!

Need punches? Several punches are on the list.
SAVE 50% and 30%!

Been lusting after either the Envelope or Gift Box Punch Boards?
SAVE 30%!

Grab the Magnetic Platform and
SAVE 40%!


These sale items are only available until November 30 or while stock lasts.

Orders for both Retiring Products and Sale Items, as well as regular items,
can be combined in the same order.

Tuesday, November 17, 2015

90th Birthday Bash

On Saturday, we had a 90th Birthday Party for my mother, Joyce. Besides our immediate family, also attending the party was my mother's cousin, also named Joyce, who was also born on the same day!

Though at times my mother was quite confused, she seemed to enjoy herself and the party. I was in charge of food for the event, though my brother had been in touch with people regarding what we could use at my mother's nursing home.

When we got there, of course, things weren't exactly as we had anticipated and I ended up running around like a chicken with her head cut off! Suffice it to say, the food was later than we had planned it to be! Grrrr! Luckily, my brother snapped lots of pictures because I didn't have the chance to do so. I'll be getting some of those from him in time.

The card I designed for my mother was cased from the card in this video by Becca Feeken. Because we had decided to use the colors of purple, silver, and white for the theme of my mother's party, I altered the colors in the card accordingly.

I used Elegant Eggplant to create a gate fold card base, 5 x 6" in size. I cut the decorative panels from Silver Foil and embossed them using the Leafy Vine Embossing Folder from Taylored Expressions. Almost any type of embossing folder produces amazing results when you use foil paper but this turned out especially nice! The panels were adhered to the "gates" using Fuse Fast Adhesive.

Using the Banners Framelits dies, I cut the largest banner from Whisper White Thick card stock and a smaller one from Vellum card stock. On the vellum banner, using Versamark, I stamped the sentiment using both the Project Life Day to Day and the Four You stamp sets. I heat embossed using Silver Stampin' Emboss Powder. I also used a Versamark pen around the edge of the banner and heat embossed that with silver.

I used the Bow Builder Punch to punch out the bow pieces and also heat embossed the edges using the Silver Stampin' Emboss Powder. For the tails and the centre of the bow, I used Silver Foil paper.

A trick I used for the centre piece for the bow was to punch out a foil piece using the Word Window punch and trim it down a bit. I have always found the centre of the bow piece just a little small to work with but the Word Window punch worked great for a centre piece!

I adhered the vellum banner to the white one using glue dots which I then hid by mounting the bow on top. The banners were adhered to one side of the gate fold using Dimensionals. I placed Dimensionals on the opposite side as well so that the popped up banner would look equal but I did not remove the paper piece from the Dimensionals.

I cut a matte of Whisper White for the inside of the card and use the "swoosh" stamp from Everything Eleanor to stamp the edges in both Perfect Plum and Elegant Eggplant. I used sponge daubers to ink the edges in the corresponding inks.


Built for Free Using: My Stampin Blog


For my mother's cousin, Joyce, I created a card using one of my favorite patterned papers from the now retired, Fresh Prints Designer stack.

I cut two balloons using the Balloon Framelits Dies, one from Coastal Cabana and one from Real Red to match the designer paper. After establishing the placement I wanted, I used the framelits again to cut an opening in the designer paper for a "shaker" balloon.

Using my Fuse Tool and a page protector, I created a balloon filled with sequins that coordinated with the designer paper. I taped the shaker piece to the back of the designer paper and then adhered the panel to a piece of Baked Brown Sugar card stock. This was first inked with Bermuda Bay ink and then mounted on a Real Red matte that had been inked with a fine line of Basic Black Archival ink. This was then mounted onto a Coastal Cabana card base using Dimensionals.

Using a Two-Way Glue Pen, I ran a fine line around each balloon die cut and then added Dazzling Diamonds glitter. I then tied a piece of thick Coastal Cabana twine to each die cut and used a glue dot to attach a third piece to the "shaker" balloon.

I used "Celebrate" from the Expressions Natural Elements and used a paint dauber to paint it Real Red. I covered it with Versamark, half at a time, and heat embossed it with Clear Stampin' Emboss Powder to make it shiny. The strings from the balloon were tied to the "C" and the sentiment was adhered to the card front using the Fine Tip Glue Pen.

On a Whisper White matte I stamped the balloon from the Celebrate Today stamp set using Coastal Cabana and my MISTI. MISTI definitely came in handy because I had to re-stamp a few times to get the balloon to be completely stamped. I stamped the string in Smoky Slate.

I then stamped in Versamark, using the project Life Day to Day set, and heat embossed in silver. I inked the edges of the matte with Real Red and adhered the matte inside the card.


Built for Free Using: My Stampin Blog


Two totally different birthday cards but I loved creating each of them. Hope you have enjoyed reading about my process!