In preparing for my card class, I created some little treat boxes using the Pyramid Pals Thinlits CASEd from Linda Parker. If you haven't used these yet, you will want to give them a try! They are so very easy to put together and they make lovely boxes for tiny treats such as a Ferrero Rocher.
I die cut twelve boxes in jewel tones and used my MISTI to simplify the job of stamping one of the trees from the Totally Trees stamp set on each of the four panels of the pyramid boxes. I heat embossed six of them with Silver Embossing Powder and six with Gold.
The 1/8" Circle Punch was used to punch was used to punch two holes in both the front and back panels. I inserted either gold or silver cording through the back holes and into the front ones.
Tear & Tape was used to adhere the panels, leaving the front panel open. I inserted the Ferrero Rocher and then tied the box closed.
The cards we made were so much fun to make!
The first card was CASEd from Chiaki Haverstick. A Real Red standard card base was cut and a Whisper White matte was embossed with the Softly Falling Embossing Folder and then adhered to the card front.
The Gingerbread Boy, from the Cookie-Cutter Christmas stamp set, was stamped on Thick Whisper White using Tip Top Taupe. It was punched with the coordinating punch and then heat embossed with a non-Stampin' Up Clear Embossing Powder from WOW. This particular powder was used because the proper "baked" color could not be achieved in any other way. If the Clear Embossing Powder from Stampin' Up had been used, the boy would have had a glossy appearance–definitely not cookie-like! Instead, this embossing powder had a matte finish that gave the boy just the right look!
The Layering Circle Framelits were used to die cut both Real Red card stock and a striped piece of the Candy Cane Lane DSP. Strips of first Early Espresso, then a different piece of the Candy Cane Lane DSP was layered on the card front. The circles were adhered together and then layered with the Gingerbread Boy adhered on top with Dimensionals.
The sentiment from the Merriest Wishes stamp set was stamped on the bottom right of the card front to complete the card.
The second card was CASEd from Inking Idaho. A standard card base was cut from Very Vanilla and two mattes, one from Real Red, one from Sahara Sand.
The sentiment, from the Christmas Pines stamp set, was stamped on the bottom right of the Sahara Sand matte using Emerald Envy. The Sahara Sand and Real Red mattes were adhered together and then adhered to the Very Vanilla card front.
The Brick Wall Embossing Folder was inked up with Sahara Sand using the now retired brayer. A strip of Very Vanilla card stock was laid inside the folder and then run through the Big Shot. This gave the bricks a lovely dirty looking grout. The bricks were further "dirtied" up using a sponge and ink. Another small piece of Very Vanilla was "dirtied up" and adhered to the top of the larger brick piece with Dimensionals. This piece of "fireplace" was then adhered at the left of the card front.
Real Red was used to stamp the stocking and the berries on Thick Whisper White and then die cut. The top for the stocking and the holly was also die cut. These pieces were adhered to the stocking and then adhered to the fireplace using Dimensionals.
The merry sentiment was die cut from Red Glimmer Paper using the Christmas Greetings Thinlits. To adhere the sentiment, a new technique was used. A sponge, attached to a binder clip, was used to "pounce" glue onto the back of the sentiment which was laying on a silicone matte; a pair of tweezers was already in place ready to place the sentiment on the card front.
Two pine sprigs were die cut from Emerald Envy using the Pretty Pines Thinlits and adherd to the top of the fireplace. The Blossom Builder Punch was used to punch to blossoms from Real Red. These were adhered together, offset, and glued on top of the pine sprigs. To complete the card, Gold Glitz Dazzling Details was added to the centre of the Poinsettia.
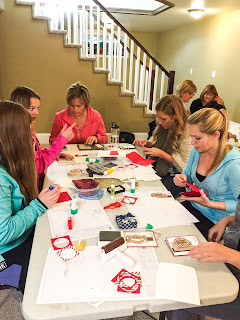
A lot of fun was had by all today!
 |
| Our lovely hostess Amy! |


Wow! An action packed blog post today, Linda - First of all, thank you for the BEAUTIFUL birthday card! I was completely surprised, and so happy to hear from you again. It's interesting that you mailed something thicker than 1/4" from Canada and it was $2.95, and yet, if I mail something that thick to Canada it is $9.50! Can you imagine? It makes me sad not to send dimensional cards to you or my other non-American friends. So I'm trying to make flatter cards now.
ReplyDeleteLove your goodie treat "boxes" - so cute, and a perfect size for favors at the table, with a name on top as a seating chart! Cute! And your cards are adorable - beautiful color choices that make me smell the gingerbread! Looks like the party as a good time for everyone, especially Amy!
Hoping you are doing well, Linda - Oh! I'd like to remind you not to forget to sign up on my blog for my blog candy! It is for my regular bloggy visitors such as yourself. hugs, de
Glad you liked your card Donna! Thanks for your comments!
Delete